Celery is a versatile, nutrient-packed vegetable widely used in American kitchens for soups, salads, juices, and garnishes. Imagine walking into your kitchen and grabbing fresh, crisp celery stalks that you grew yourself — no trips to the grocery store and no pesticides.
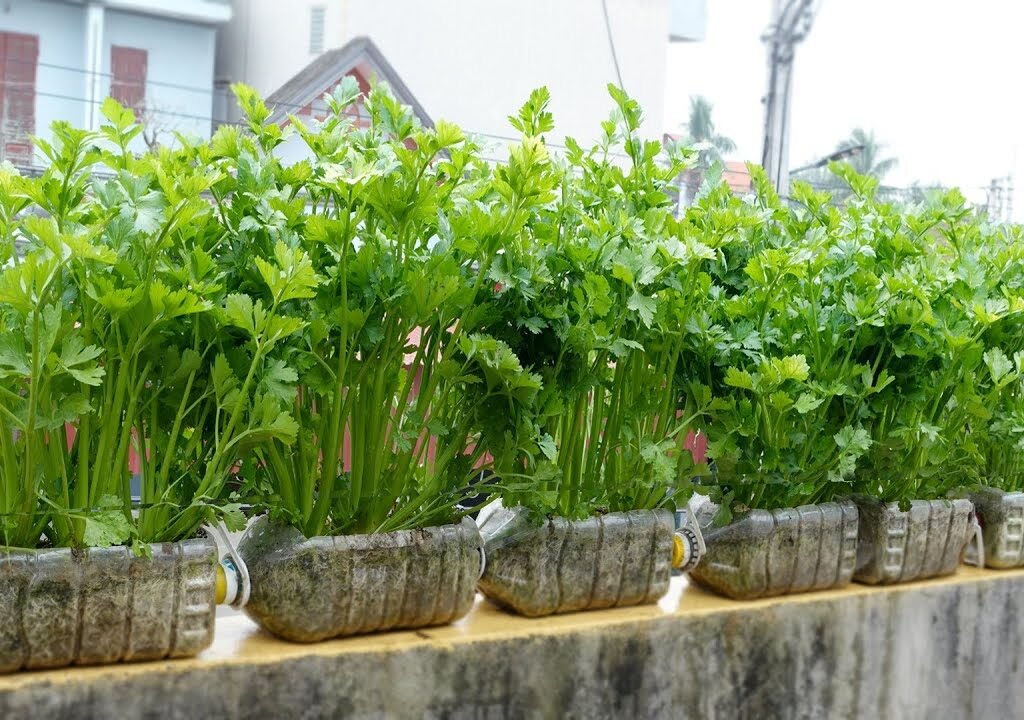
The good news? Growing celery at home doesn’t require a large garden. With just a few small plastic bottles, some soil, and basic care, you can cultivate lush, healthy celery plants in a fraction of the space. This method is perfect for urban gardeners, balcony growers, and beginners who want fresh vegetables year-round.
In this guide, we’ll cover everything from choosing celery seeds to planting, caring, and harvesting — all optimized for small-space, container-based gardening.
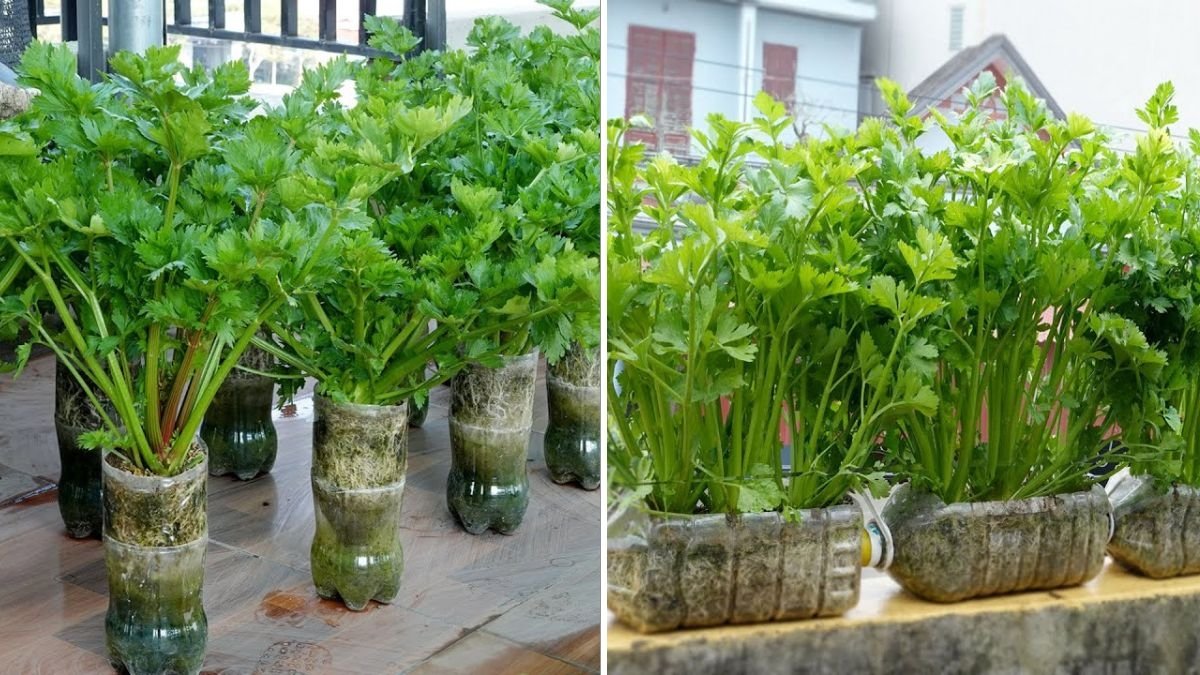
1. Why Grow Celery in Plastic Bottles?
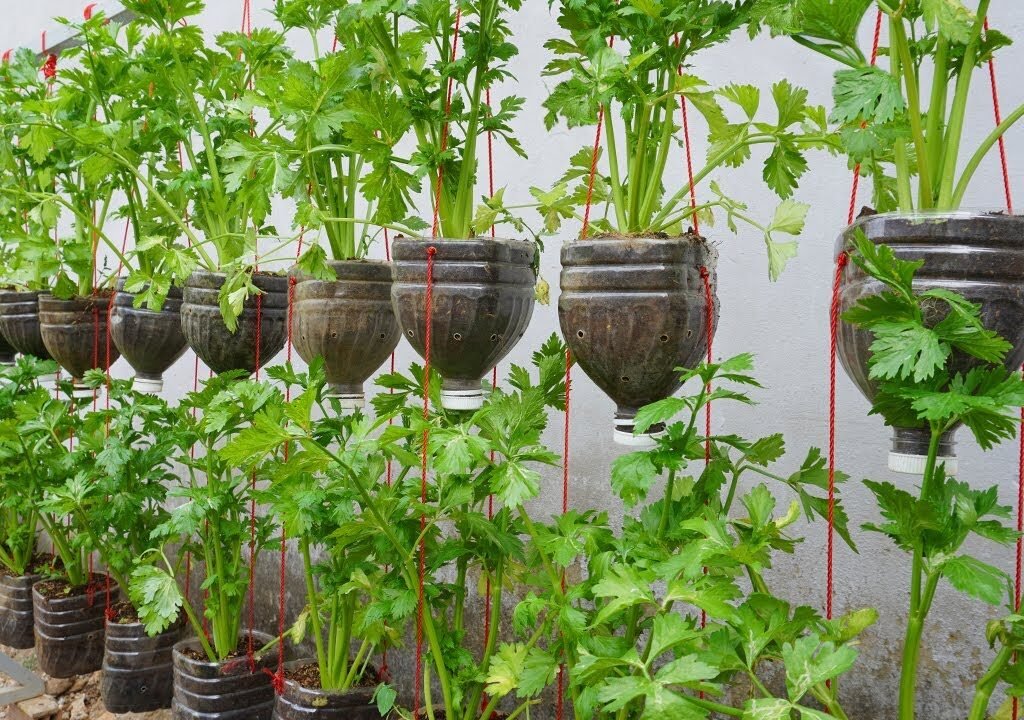
Plastic bottle gardening is an innovative, space-saving solution for growing vegetables at home. Celery, with its shallow roots and high water needs, is especially suitable for this approach.
Benefits of Growing Celery in Plastic Bottles:
- Space-efficient: Ideal for apartments, balconies, and small patios.
- Cost-effective: Reuses plastic bottles, reducing waste.
- Low-maintenance: Easy to manage and water-efficient.
- Healthy yields: Control over soil quality ensures lush, flavorful celery.
- Beginner-friendly: Simple setup with minimal gardening experience required.
Plastic bottles also allow for monitoring water levels and soil moisture, helping celery thrive in a controlled environment.
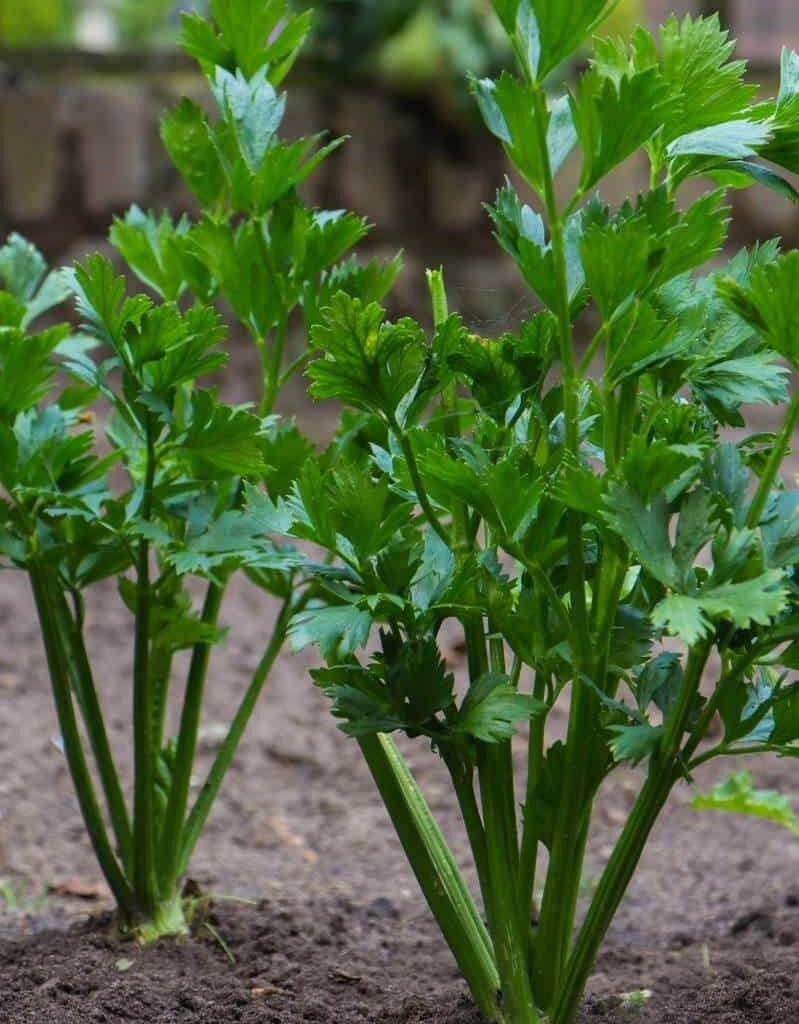
2. Selecting the Right Celery Variety
Not all celery types are equally suited for bottle gardening. Choosing compact, fast-growing varieties ensures better results in small containers.

Best Celery Varieties for Plastic Bottles:
- Golden Self-Blanching: Crisp, tender, and mild flavor; perfect for container growth.
- Tango: Fast-growing and heat-tolerant.
- Green Utah: Traditional variety, flavorful and sturdy.
- Baby Celery: Smaller plants, ideal for balcony or indoor containers.
Pro Tip: If your goal is continuous harvest, choose varieties that mature quickly and tolerate container growth.
3. Materials You’ll Need
You don’t need a garden bed to grow celery. Here’s what you’ll need for bottle-based gardening:
Materials List:
- Small plastic bottles (1–2 liters)
- Sharp scissors or knife for cutting
- Potting soil or lightweight container soil mix
- Organic compost or vermicompost
- Celery seeds or cuttings
- Watering can or spray bottle
- Optional: Tray to catch excess water
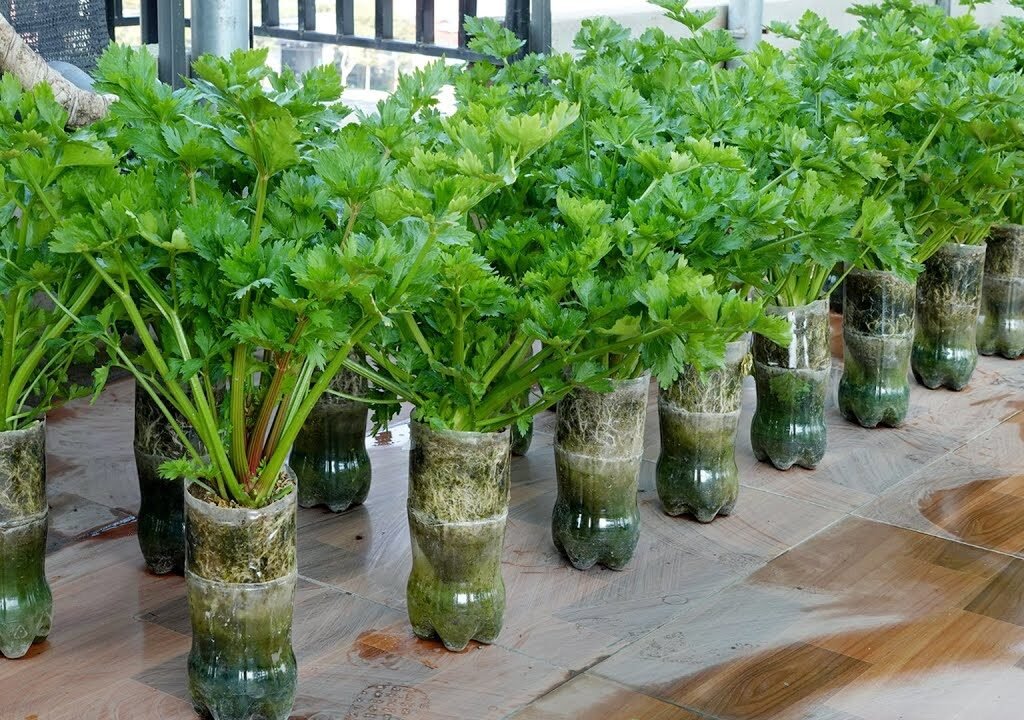
Tip: Use transparent bottles to monitor root growth and water levels easily.
4. Preparing Plastic Bottles
Proper preparation is key to healthy celery growth and water efficiency.
Step-by-Step Preparation:
- Cut the bottle in half; keep the top inverted to act as the planting container.
- Poke 2–4 small drainage holes in the bottle cap.
- Fill the top half with soil mixed with compost.
- Insert the inverted top half into the bottom half to act as a self-watering reservoir.
- Place bottles in a sunny or partially sunny location, ensuring at least 4–6 hours of light daily.
Pro Tip: The self-watering system reduces the need for constant attention, perfect for busy gardeners.
5. Preparing the Soil Mix
Celery thrives in nutrient-rich, well-draining soil.
Ideal Soil Mix:
- 50% potting soil
- 30% organic compost
- 20% perlite or sand for drainage
Soil pH: 6.0–7.0 (neutral to slightly acidic)
Pro Tip: Add a slow-release fertilizer or bone meal to boost growth during early stages.
6. Planting Celery
Celery can be grown from seeds, seedlings, or cuttings, depending on availability.
Step 1: Seed or Cutting Preparation
- Seeds: Soak in water for 12–24 hours for faster germination.
- Cuttings: Use healthy celery bases from kitchen scraps.
Step 2: Plant in Bottle
- Sow 2–3 seeds or place one cutting per bottle.
- Cover lightly with soil and water gently.
- Germination occurs in 7–14 days for seeds; cuttings may root within a week.
Step 3: Thinning Seedlings
- Once seedlings grow 2–3 leaves, thin to one strong plant per bottle.
Tip: Keep soil consistently moist to prevent celery from becoming tough or bitter.
7. Sunlight and Temperature Requirements
Celery prefers moderate sunlight and cool temperatures.
Optimal Conditions:
- Sunlight: 4–6 hours of indirect or morning sun daily
- Temperature: 60–75°F (15–24°C)
- Placement: Balcony, windowsill, or shaded patio areas
Pro Tip: Avoid scorching afternoon sun; celery prefers cooler, stable conditions.

8. Watering and Moisture Management
Celery has high water requirements, making a self-watering bottle ideal.
Watering Guidelines:
- Fill the reservoir as needed to keep soil consistently moist.
- Water gently at the base to avoid disturbing roots.
- Use mulch or organic matter on top of soil to retain moisture.
Pro Tip: The clear bottle helps monitor water levels and root health.
9. Fertilizing Celery
Container-grown celery needs regular feeding to produce lush, healthy stalks.
Fertilizer Schedule:
- At planting: Mix compost or slow-release fertilizer into soil.
- Every 2 weeks: Apply liquid fertilizer high in nitrogen for leafy growth.
- Optional: Top-dress with compost during growth to maintain soil fertility.
Pro Tip: Organic options like worm tea, fish emulsion, or diluted compost tea encourage faster, greener growth.
10. Supporting Celery Stalks
Celery grows upright and may need light support to prevent bending, especially in small bottles.
How to Support:
- Use small stakes or chopsticks inserted into the bottle.
- Tie stalks gently with soft string if necessary.
- Ensure good spacing between bottles for airflow.
Pro Tip: Proper support ensures long, crisp stalks without crowding.
11. Common Problems and How to Solve Them
Even in bottles, celery can face pests and growth issues.
| Problem | Cause | Solution |
|---|---|---|
| Yellow leaves | Nutrient deficiency or overwatering | Adjust fertilizer; check water levels |
| Aphids or spider mites | Poor air circulation or infestation | Spray neem oil or insecticidal soap |
| Stunted growth | Lack of sunlight or crowded roots | Move bottles to sunnier area; thin seedlings |
| Tough stalks | Inconsistent watering | Maintain regular moisture |
Tip: Inspect plants regularly and remove unhealthy leaves promptly.
12. Harvesting Celery
Celery is ready to harvest in 60–90 days, depending on variety.
How to Harvest:
- Cut outer stalks first, allowing inner stalks to continue growing.
- Use scissors or a sharp knife to avoid damaging the plant.
- Harvest leaves for soups or salads while stalks continue to mature.
Pro Tip: Regular harvesting encourages continuous growth and prevents plants from becoming woody.
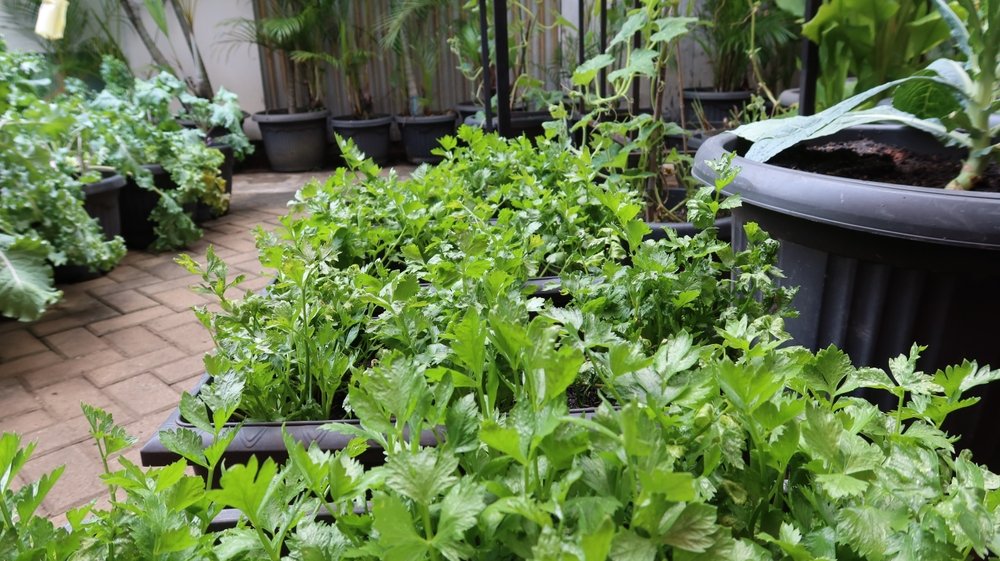
13. Maximizing Yield in Small Plastic Bottles
- Use one plant per bottle for root expansion.
- Rotate bottles for even sunlight exposure.
- Mulch and feed regularly for lush, healthy growth.
- Consider planting staggered batches to enjoy celery throughout the season.
14. Fun Fact: Celery Is a Hydrating Superfood
Celery contains 95% water, making it hydrating and low in calories. Homegrown celery ensures chemical-free, nutrient-rich stalks perfect for salads, juices, soups, and stir-fries.
15. Conclusion: Effortless, Lush Celery Gardening
Growing celery in small plastic bottles is a beginner-friendly, innovative gardening method. It’s space-efficient, eco-friendly, and low-maintenance, making it ideal for urban gardeners or anyone wanting fresh vegetables at home.
With just a few bottles, some soil, seeds or cuttings, and sunlight, you can enjoy lush, crisp celery all season long. This method not only reduces water usage but also gives you healthy, organic vegetables without a large garden.
Start your bottle celery garden today and experience the satisfaction of harvesting fresh, homegrown stalks — easy, sustainable, and delicious!
Leave A Comment