How to Balance Soil pH Naturally

How to Balance Soil pH Naturally

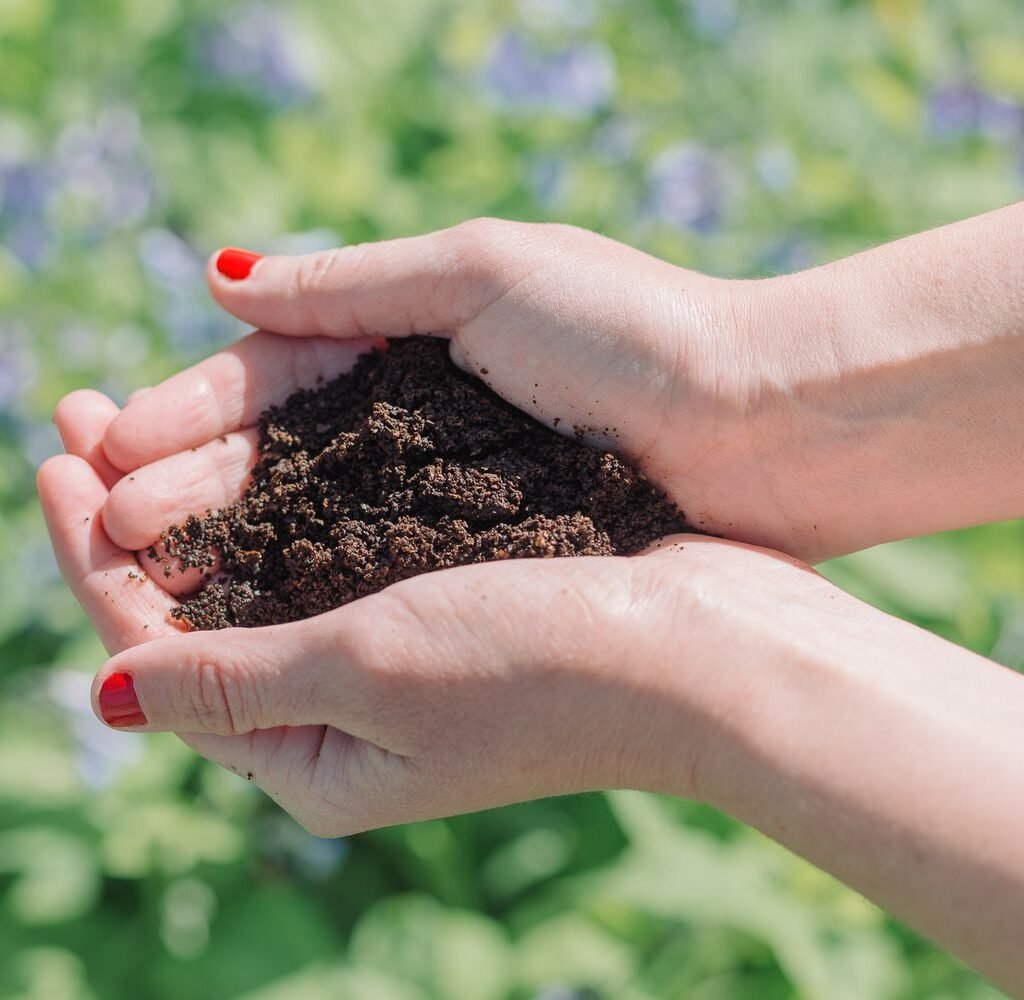
Soil pH plays a crucial role in gardening and plant health. It affects nutrient availability, microbial activity, and overall plant growth. If your soil is too acidic or too alkaline, even well-fertilized plants may struggle to thrive. While chemical treatments exist, balancing soil pH naturally is a safer, sustainable, and long-lasting approach for healthy gardens.

This comprehensive guide will show you how to balance soil pH naturally, including testing methods, amendments, soil management practices, and tips to maintain the ideal environment for plants.


Step 1: Understand Soil pH

Soil pH measures the acidity or alkalinity of soil on a scale from 0 to 14:

  • Acidic Soil: pH below 7
  • Neutral Soil: pH around 7
  • Alkaline Soil: pH above 7

Most plants thrive in slightly acidic to neutral soil (pH 6–7). Specific plants, such as blueberries, azaleas, and rhododendrons, prefer more acidic soil, while others, like lavender and beets, tolerate slightly alkaline soil.

Tip: Understanding the optimal pH for your plants helps you target adjustments effectively.


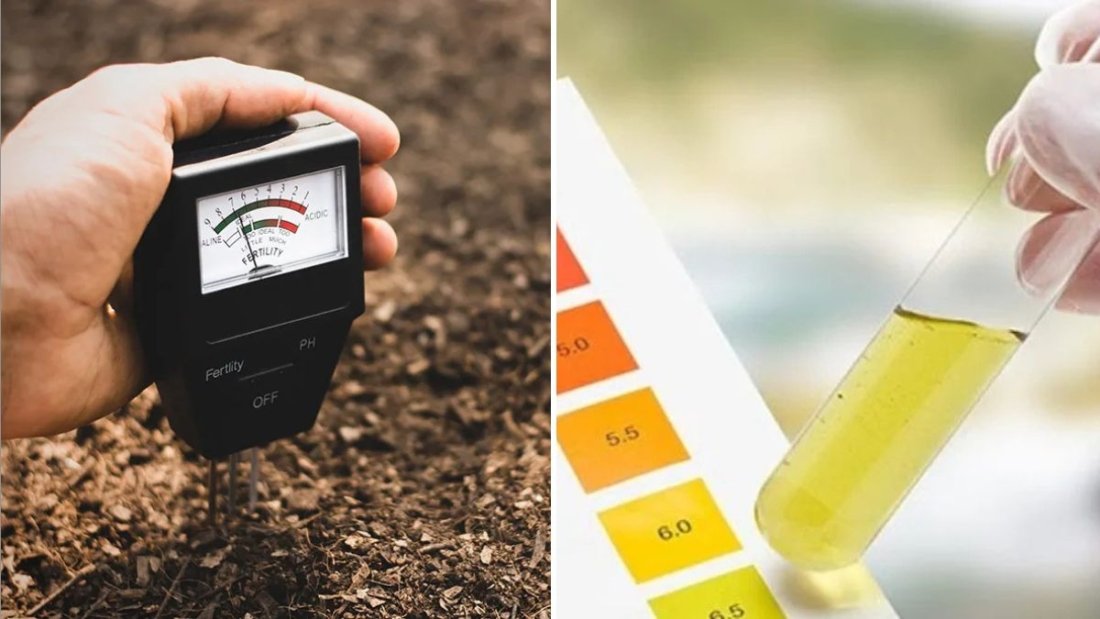
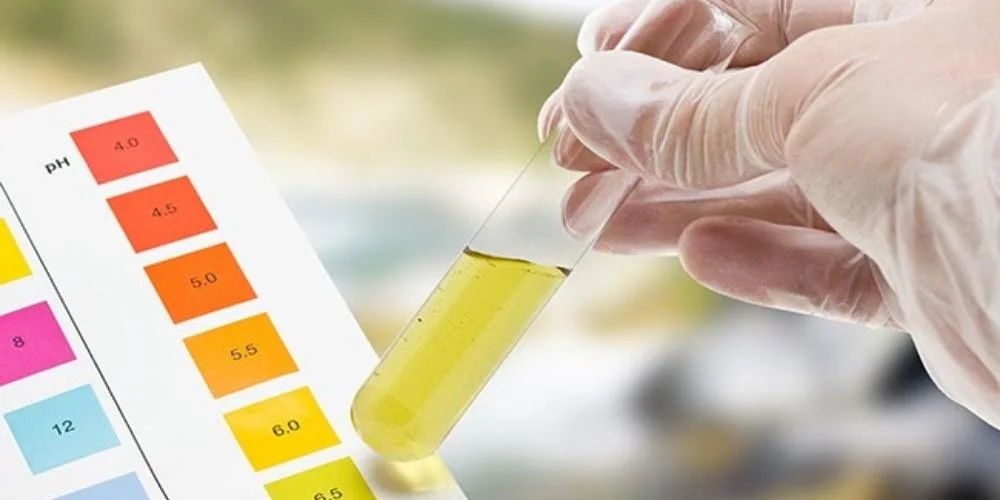
Step 2: Test Your Soil pH

Before making changes, determine your soil’s current pH:

  • Home Test Kits: Easy-to-use kits provide a general idea of soil pH.
  • pH Meter: Provides a digital reading for more precise results.
  • Professional Testing: Soil labs offer detailed nutrient and pH analysis.

Tip: Test soil in several locations and at different depths to get an accurate picture of overall conditions.


Step 3: Adjust Acidic Soil Naturally

If your soil is too acidic (pH below 6), you can raise the pH using natural amendments:

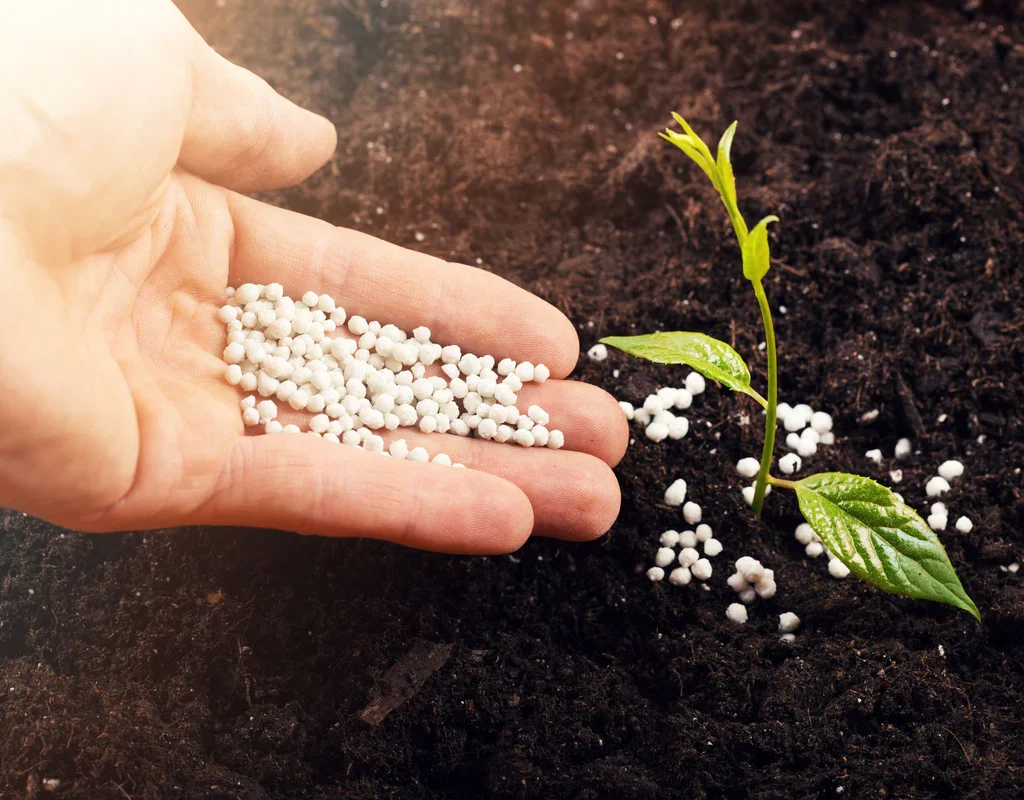
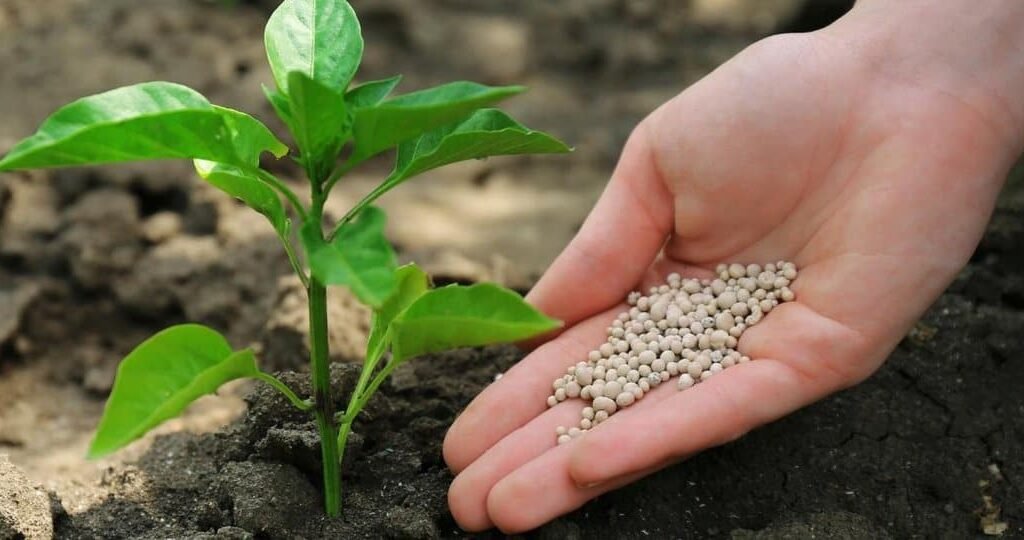
1. Agricultural Lime (Calcium Carbonate)

  • Most common natural option.
  • Slowly neutralizes acidity over time.
  • Apply according to soil test recommendations.

2. Wood Ash

  • Raises pH and adds potassium, calcium, and trace minerals.
  • Use sparingly, as excessive ash can cause over-alkalinity.
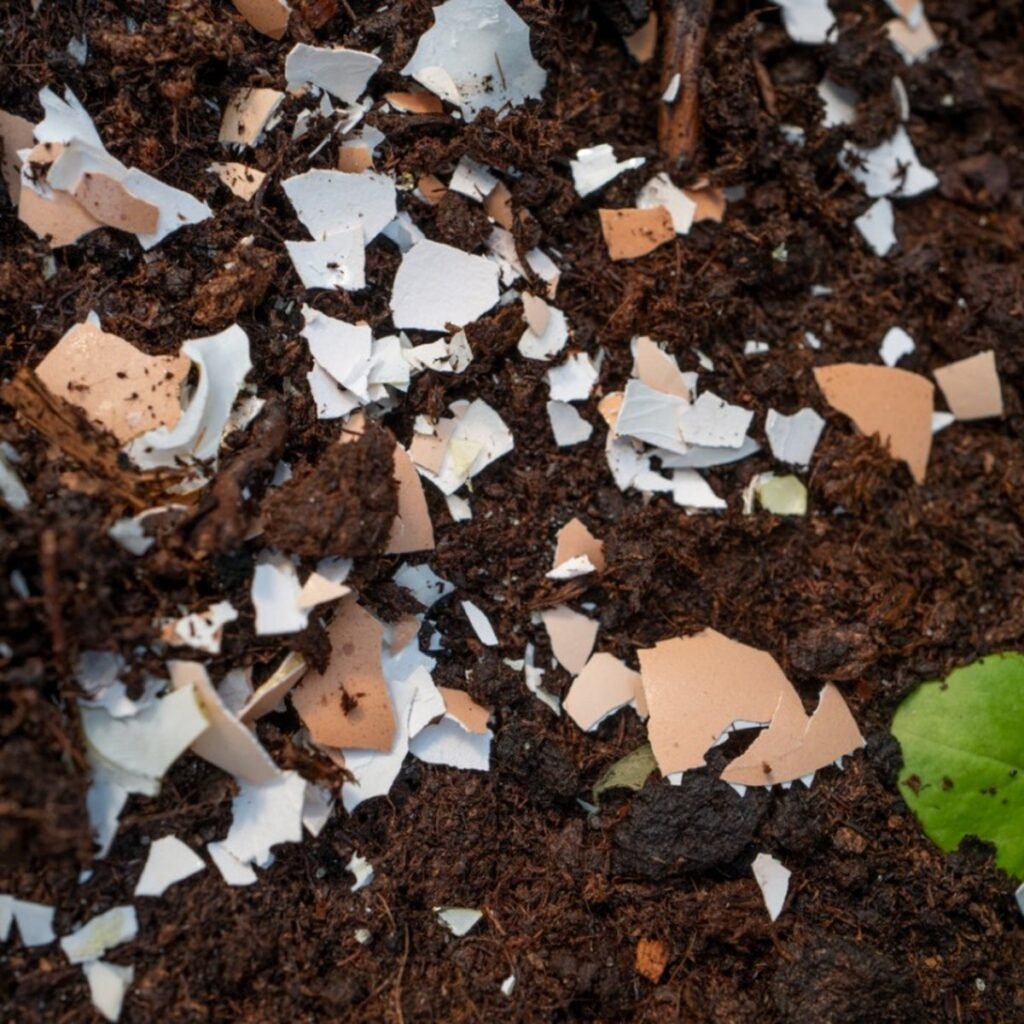
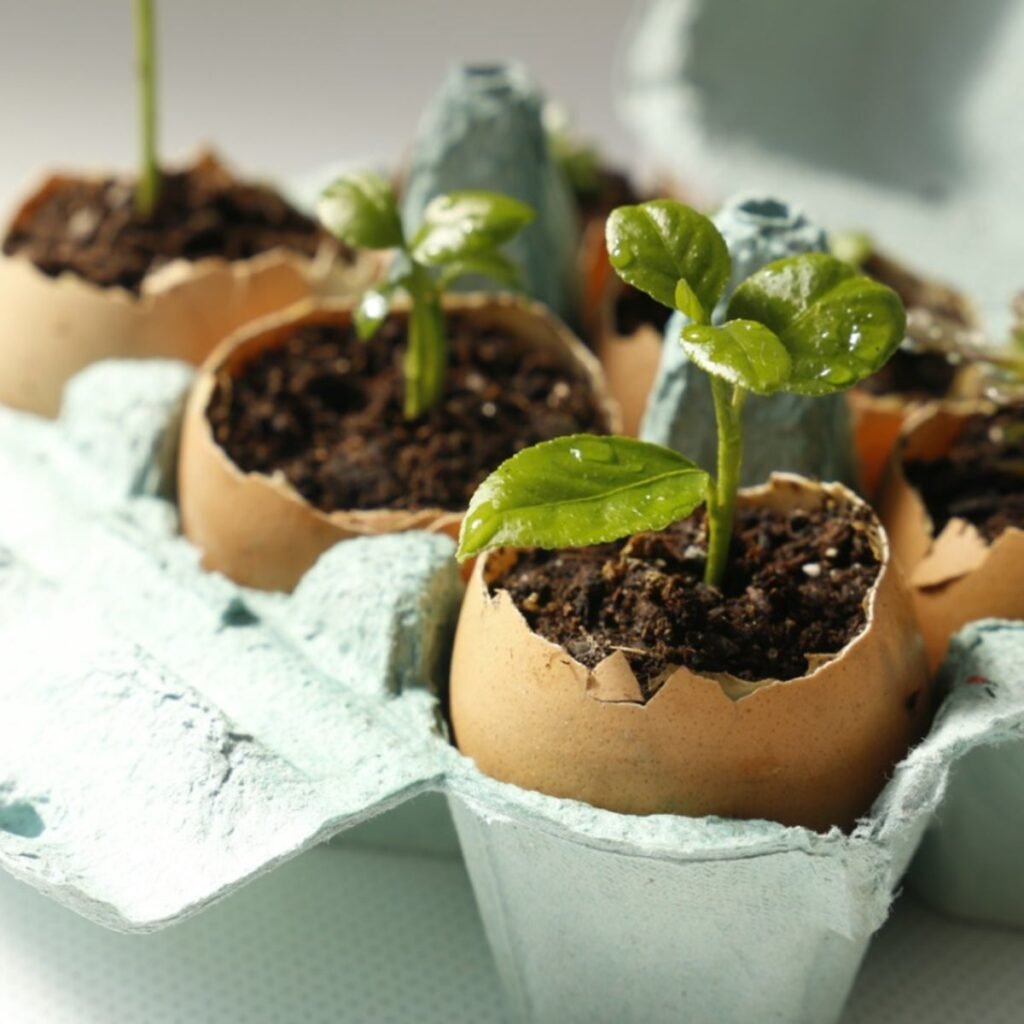
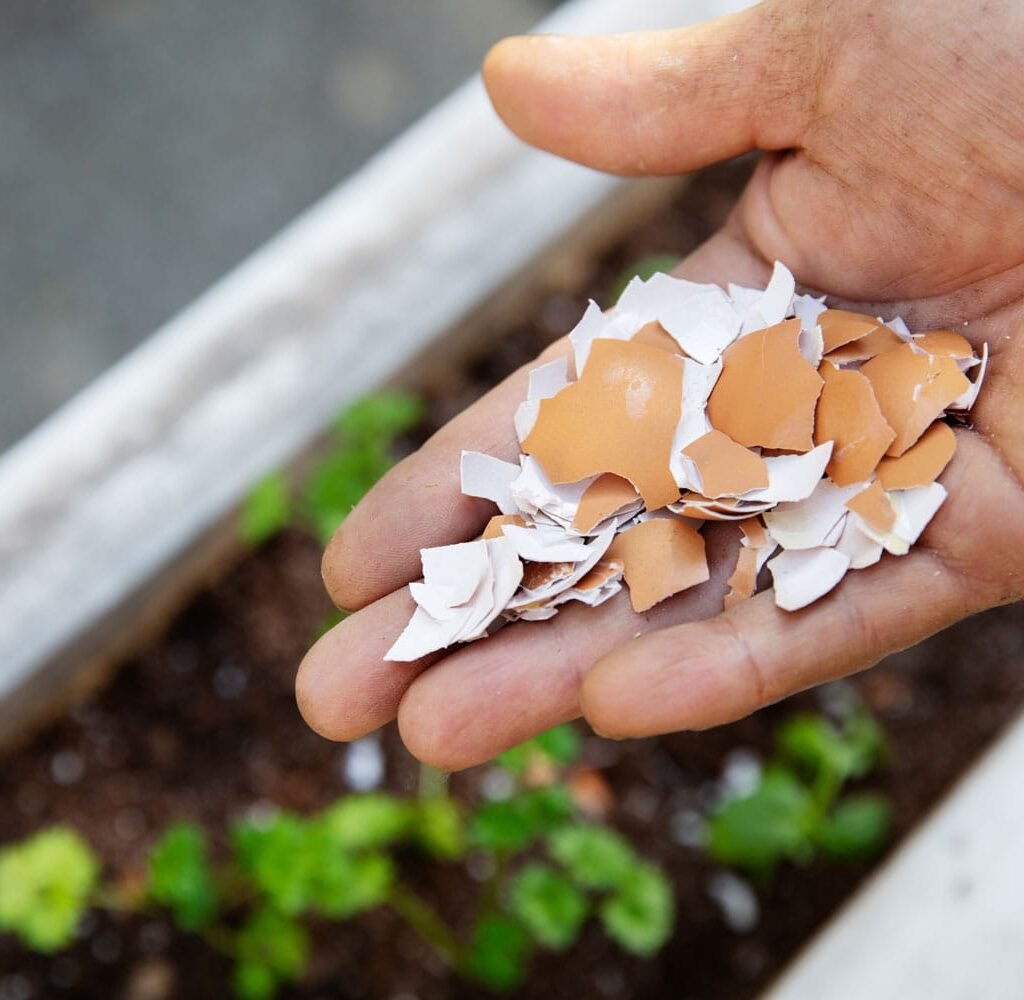
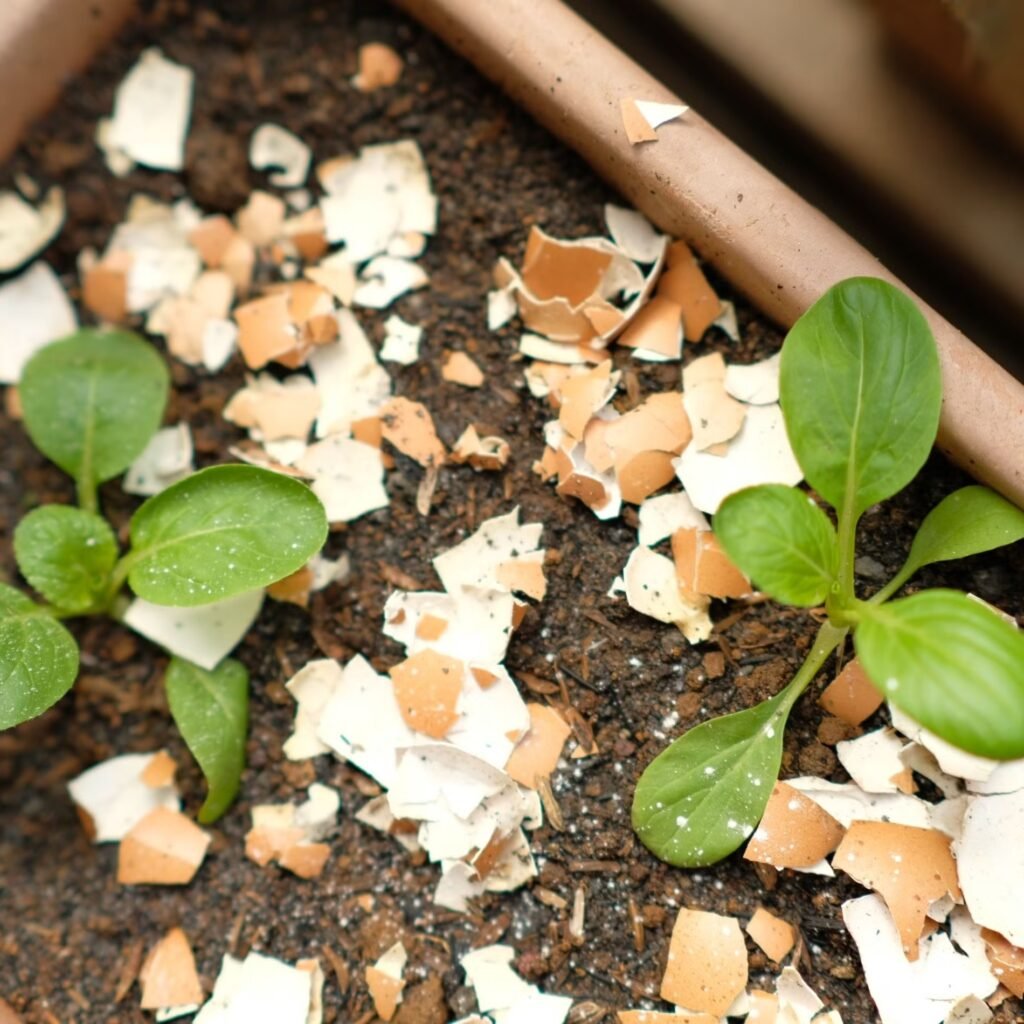
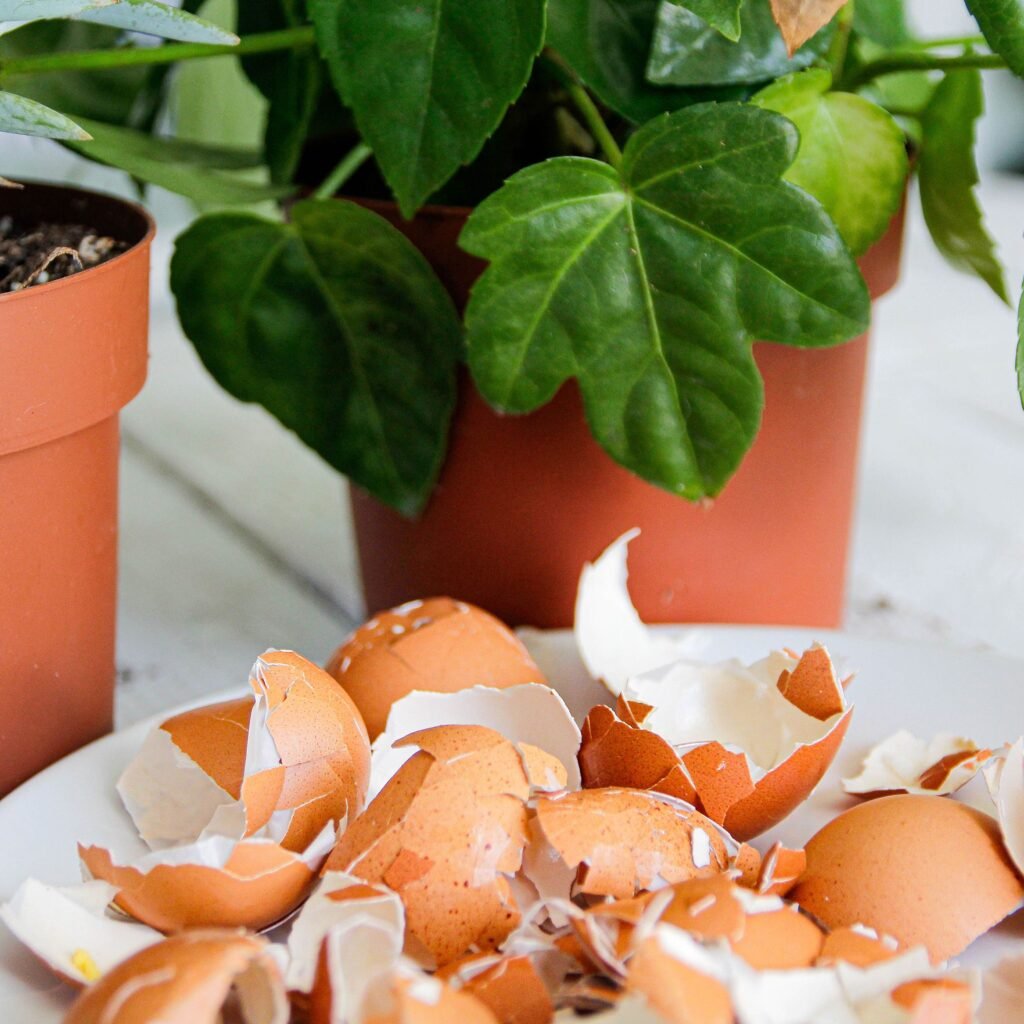
3. Eggshells

  • Crushed or powdered eggshells provide calcium to neutralize acidity.
  • Slowly decomposes, offering long-term benefits.
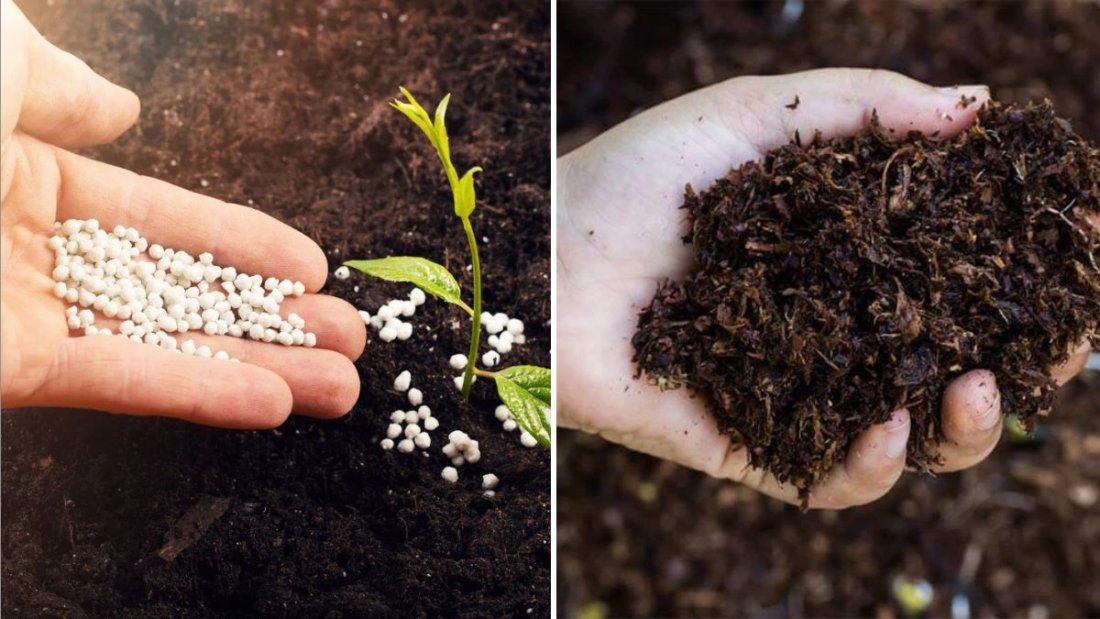
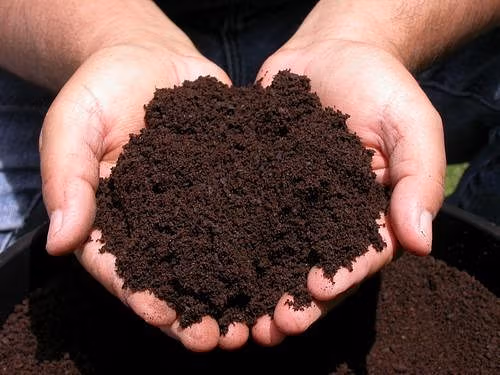
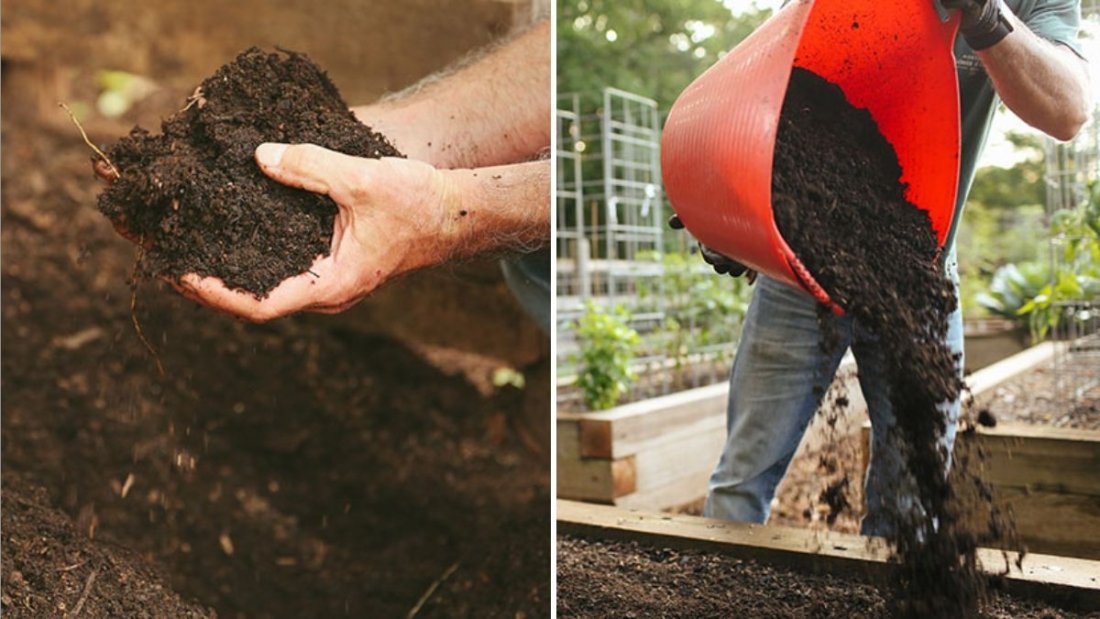
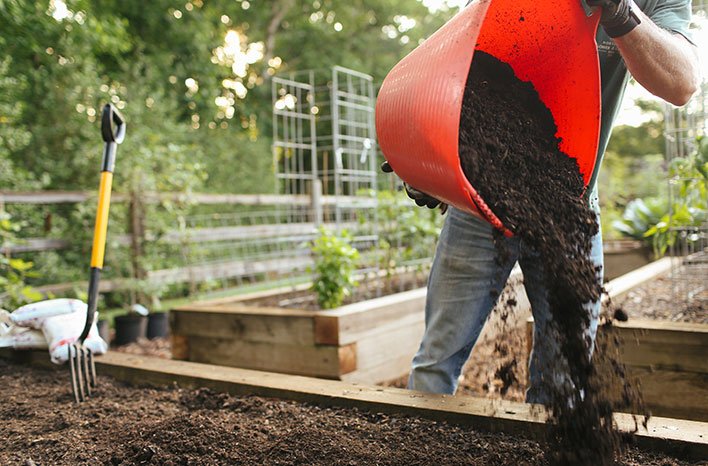
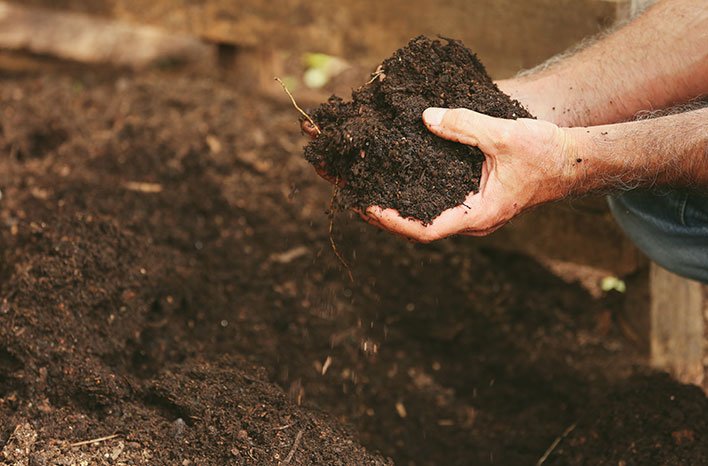
4. Garden Compost

  • Well-composted organic matter can help buffer acidity.
  • Adds nutrients and improves soil structure.

Tip: Mix these amendments into the top 6–12 inches of soil for best results. Always retest pH after a few weeks to gauge effectiveness.


Step 4: Adjust Alkaline Soil Naturally

If your soil is too alkaline (pH above 7.5), lower the pH using natural methods:

1. Elemental Sulfur

  • Slowly converts to sulfuric acid in soil, reducing pH.
  • Apply according to soil type and plant needs.

2. Peat Moss

  • Acidic and organic, lowers pH while improving moisture retention.
  • Mix into soil or use as a mulch.

3. Pine Needles

  • Use as mulch around acid-loving plants.
  • Gradually lowers pH as they decompose.

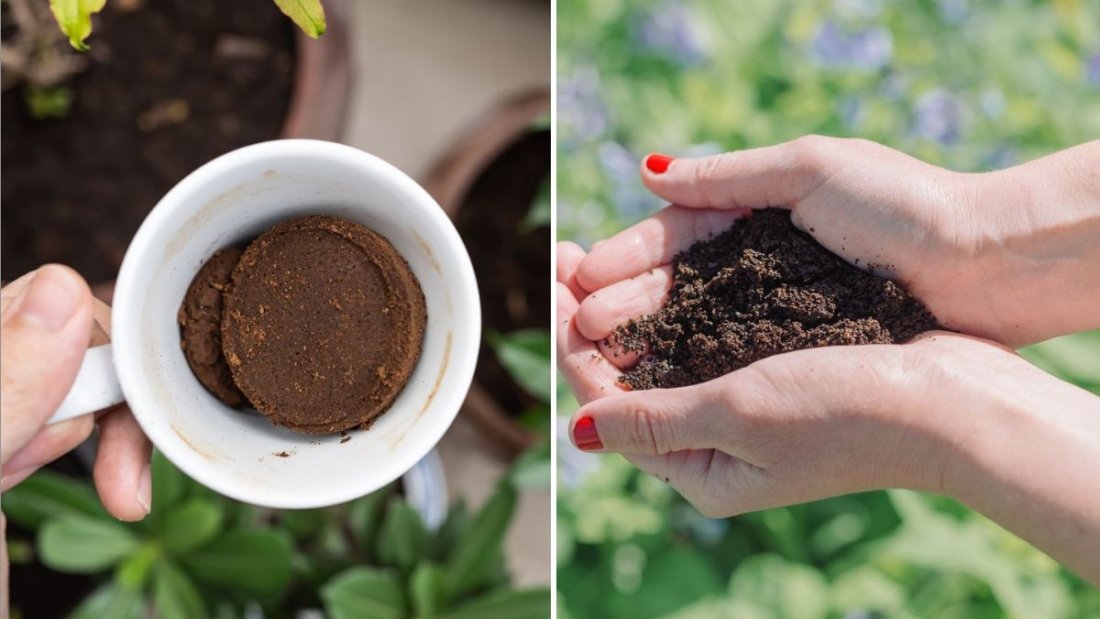
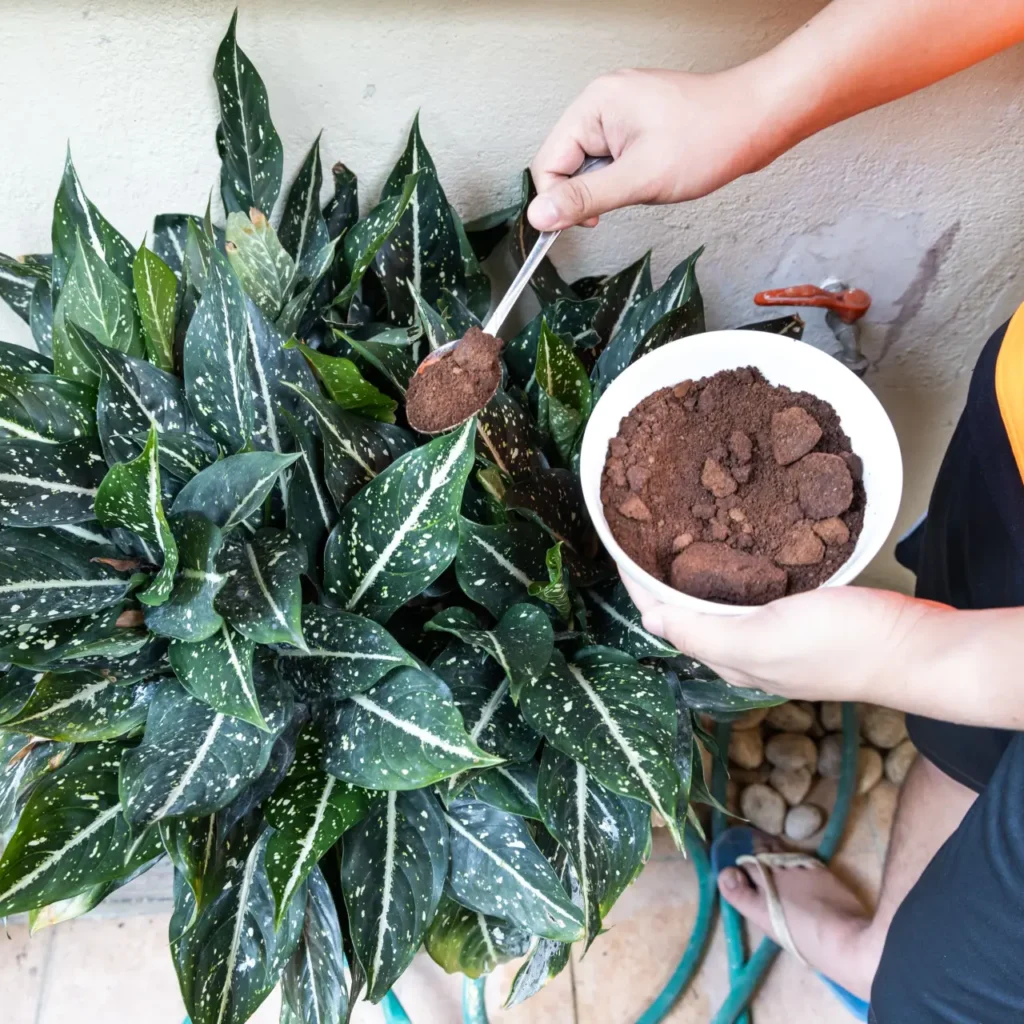
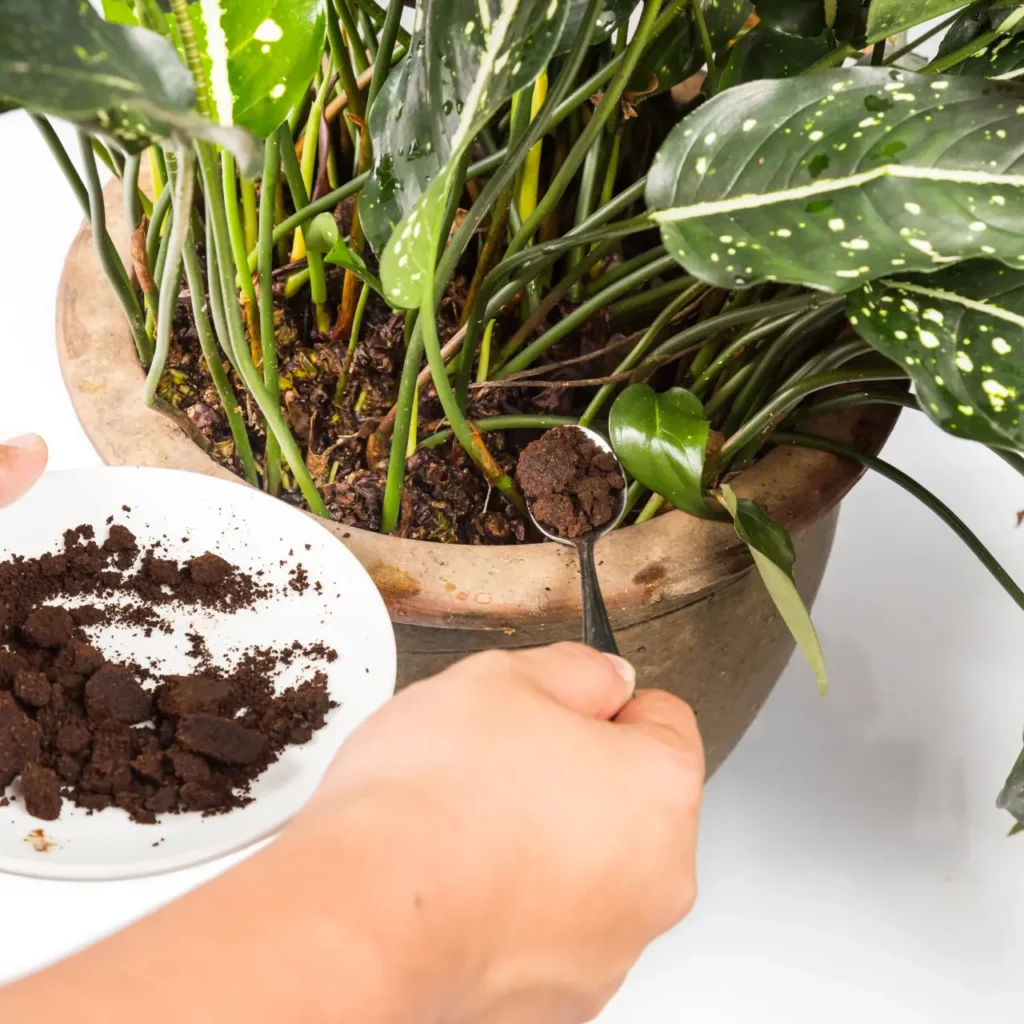
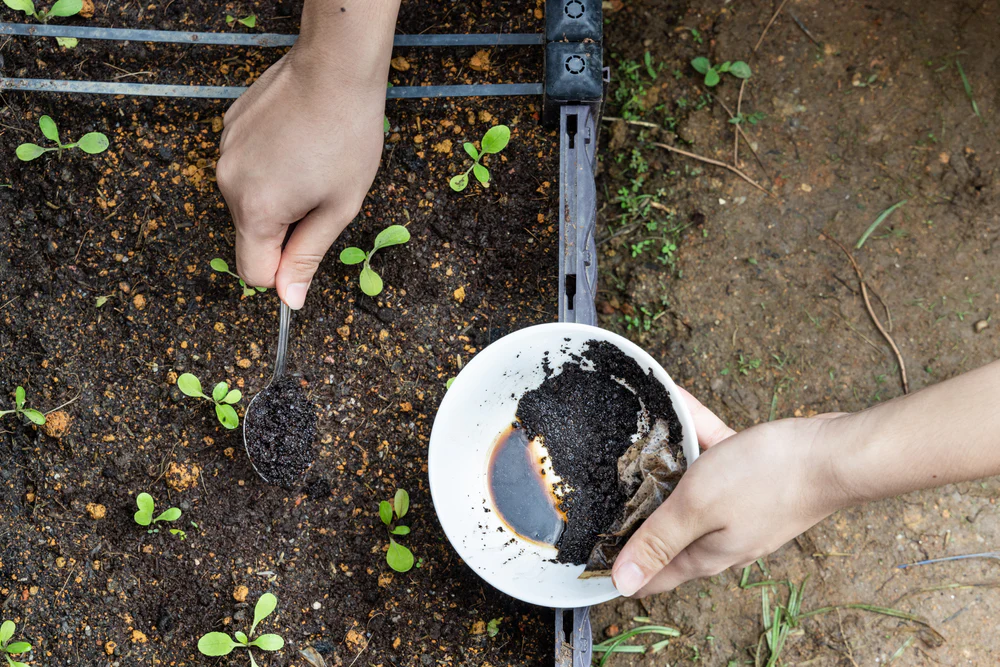
4. Compost with Acidic Material

  • Include coffee grounds, citrus peels, or vinegar in compost to create a slightly acidic blend.

Tip: Changes in alkaline soil can take longer, so patience is key. Test periodically and reapply natural amendments as needed.


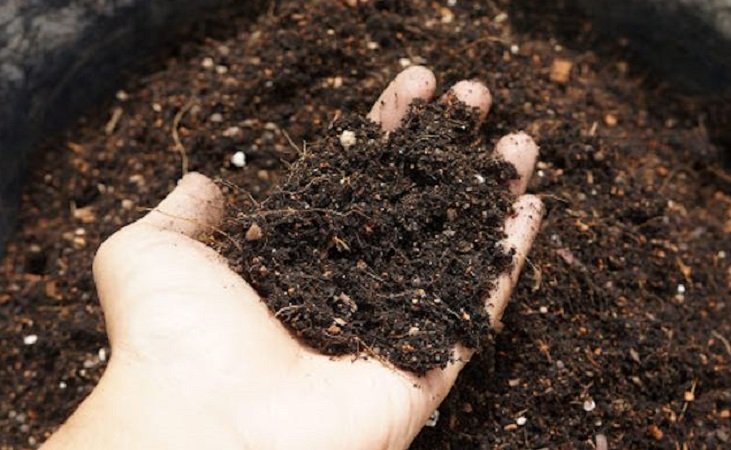
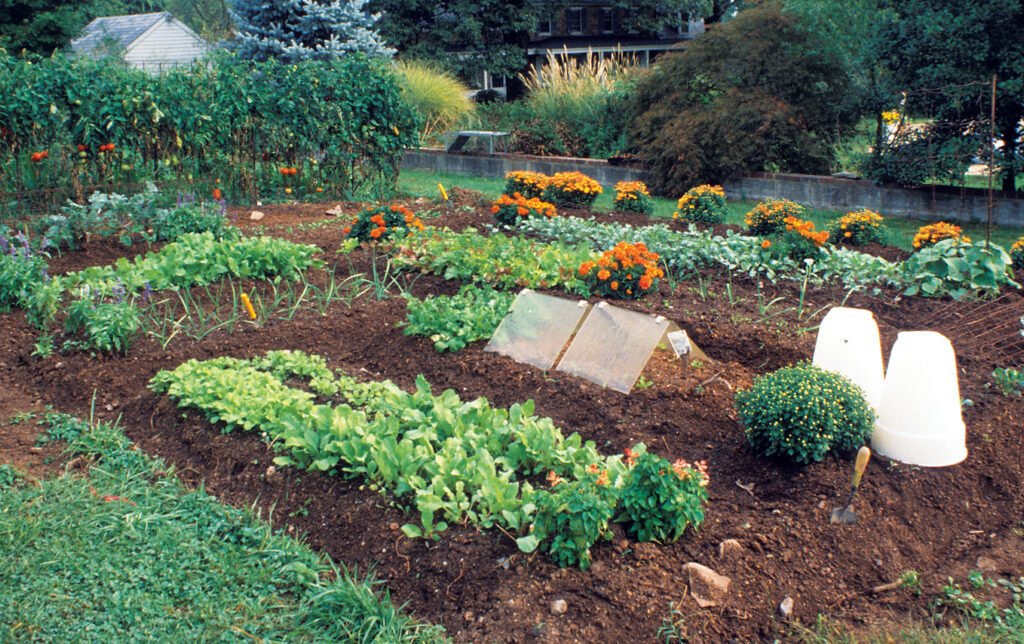
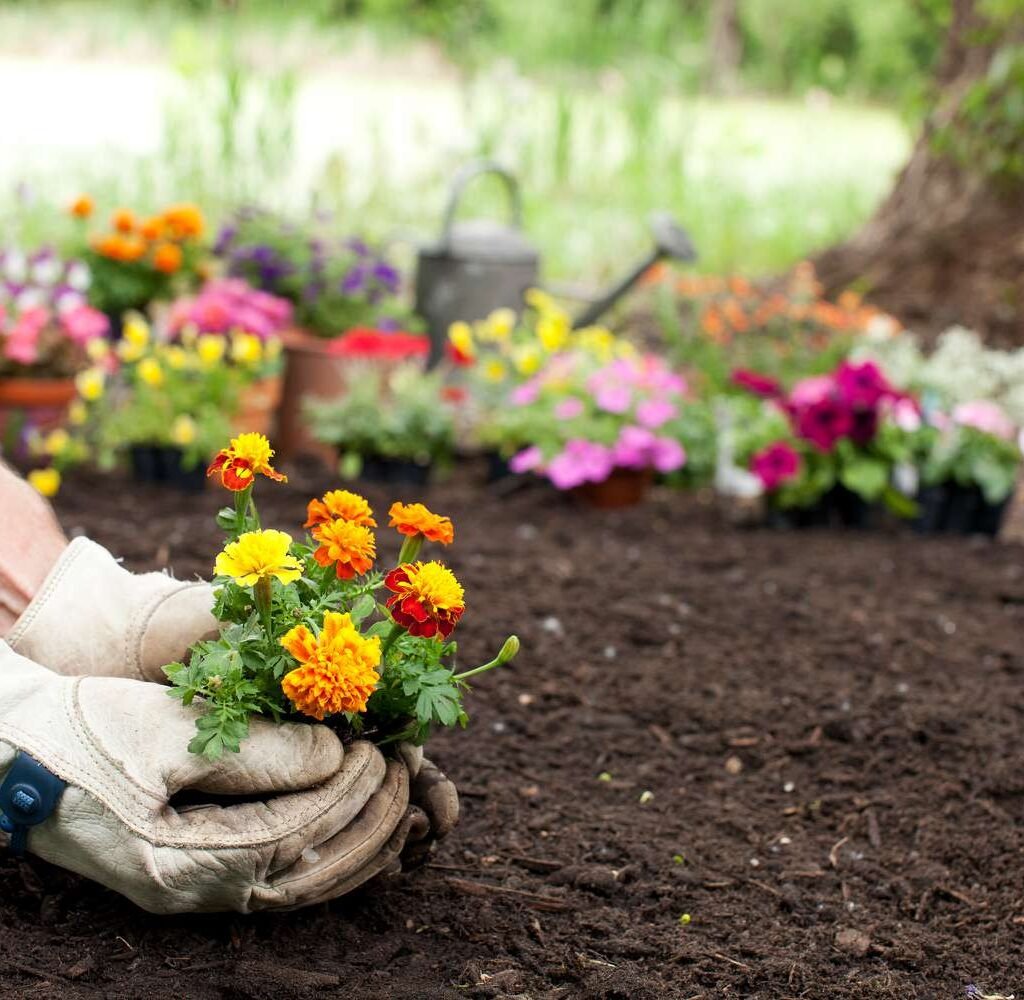
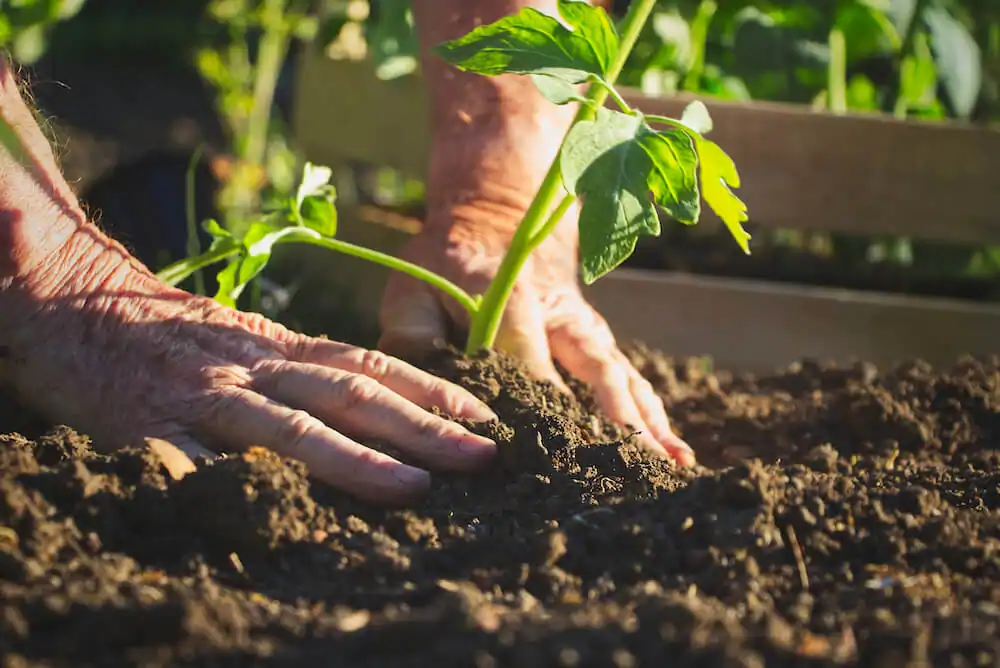
Step 5: Incorporate Organic Matter

Adding organic matter is one of the most effective ways to balance soil pH naturally:

  • Benefits: Improves nutrient retention, aeration, and water-holding capacity.
  • Sources: Compost, decomposed leaves, grass clippings, and organic mulch.
  • How to Use: Mix thoroughly into soil or layer as mulch around plants.

Tip: Organic matter not only balances pH but supports beneficial soil microbes essential for nutrient absorption.


Step 6: Use Crop Rotation and Cover Crops

Crop rotation and cover crops can help maintain pH naturally:

  • Legumes: Fix nitrogen and improve soil fertility without altering pH drastically.
  • Cover Crops: Rye, clover, and buckwheat enhance organic matter and buffer soil conditions.
  • Rotation: Avoid planting the same crop repeatedly, which can deplete certain nutrients and affect pH.

Tip: Cover crops also prevent erosion and maintain soil structure, aiding long-term pH stability.


Step 7: Mulching and Moisture Management

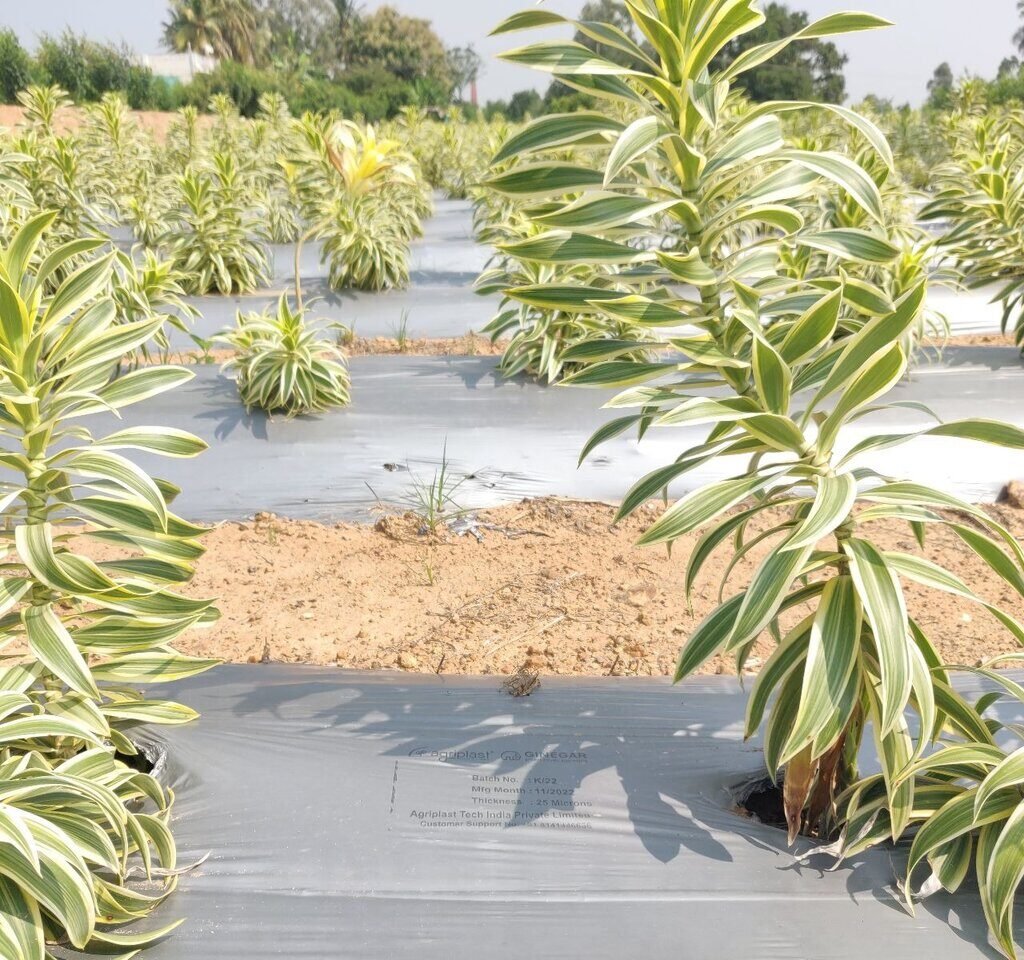
Mulching and proper watering influence soil pH indirectly:

  • Mulch decomposes slowly, releasing organic acids or bases depending on the material.
  • Pine needles or oak leaves help acidify soil naturally.
  • Watering with slightly acidic water (e.g., rainwater) can prevent alkaline buildup.

Tip: Mulching with the right material can complement other natural pH adjustments.


Step 8: Avoid Practices That Alter pH Negatively

Certain gardening practices can unintentionally affect soil pH:

  • Excessive chemical fertilizers, especially nitrogen-based, can acidify soil.
  • Over-liming or using too much wood ash can make soil too alkaline.
  • Poor drainage can increase acidity in some soils due to anaerobic conditions.

Tip: Use natural amendments moderately and monitor soil regularly.


Step 9: Monitor Soil Microbial Health

Beneficial microbes play a key role in nutrient cycling and pH stabilization:

  • Compost and organic matter feed microbes.
  • Avoid overuse of pesticides and chemical fertilizers that harm soil life.
  • A healthy microbial ecosystem helps buffer pH and improves overall soil fertility.

Tip: Worms, bacteria, and fungi thrive in balanced soil and contribute to long-term pH stability.


Step 10: Test and Adjust Periodically

Soil pH is dynamic, and natural methods take time:

  • Retest soil every 3–6 months.
  • Observe plant health for nutrient deficiencies (yellowing leaves may indicate pH-related nutrient unavailability).
  • Adjust amendments gradually based on test results.

Tip: Small, consistent changes are more effective and safer than large, abrupt adjustments.


Step 11: Benefits of Naturally Balanced Soil

  1. Improved Nutrient Availability: Plants absorb nutrients efficiently.
  2. Healthy Microbial Life: Encourages beneficial bacteria and fungi.
  3. Enhanced Growth: Stronger plants, better flowers, and higher yields.
  4. Sustainable Gardening: Reduces chemical use and environmental impact.
  5. Long-Term Soil Health: Supports a resilient, productive garden for years.

Tip: Naturally balanced soil benefits both plants and the surrounding ecosystem.


Step 12: Practical Tips for Maintaining Balanced Soil

  • Keep detailed records of soil tests, amendments, and plant responses.
  • Rotate natural amendments to prevent overaccumulation of any one element.
  • Combine multiple natural methods (compost, mulch, crop rotation) for best results.
  • Use plants suited to your soil’s natural pH when possible.

Tip: A holistic approach ensures sustainable soil health and reduces the need for corrective measures in the future.


Final Thoughts

Balancing soil pH naturally is essential for thriving plants and sustainable gardening. By understanding soil conditions, testing regularly, using natural amendments, incorporating organic matter, and supporting microbial life, you can maintain ideal pH levels without harmful chemicals.

Natural methods not only improve nutrient availability but also enhance soil structure, moisture retention, and plant resilience. Over time, a consistent, holistic approach to soil management will create a healthy, productive, and eco-friendly garden that thrives season after season.

Remember, patience is key—natural adjustments take time but provide long-lasting benefits for your plants, soil, and the environment.

How to Use Eggshells for Healthier Plants

How to Use Eggshells for Healthier Plants

When it comes to gardening, many home gardeners overlook the simplest and most effective natural resources right in their kitchen. One such resource is eggshells. Typically discarded after breakfast, eggshells are actually a powerhouse for plant health. Rich in calcium and trace minerals, they can improve soil fertility, strengthen plant cell walls, and even help deter pests.

This guide will show you how to use eggshells for healthier plants, including preparation methods, soil applications, pest control, composting, and tips to maximize their benefits.


Step 1: Understand the Benefits of Eggshells

Eggshells provide numerous advantages for your garden:

  1. Calcium Source: Essential for strong cell walls, which prevent blossom-end rot in tomatoes, peppers, and eggplants.
  2. Soil Amendment: Improves soil structure and aeration while balancing acidity.
  3. Pest Deterrent: Crushed shells can deter slugs, snails, and some crawling insects.
  4. Trace Minerals: Contains potassium, magnesium, and phosphorus for overall plant health.
  5. Eco-Friendly: Reduces kitchen waste and promotes sustainable gardening.

Tip: Eggshells are most beneficial when properly prepared and applied, rather than just tossed whole into soil.


Step 2: Collect and Clean Eggshells

Proper collection ensures eggshells are safe and effective:

  • Rinse eggshells with water to remove leftover egg residue.
  • Dry them in the sun or bake at 200°F (90°C) for 10–15 minutes to kill bacteria.
  • Store in a container until ready for use.

Tip: Avoid using eggshells from cracked or spoiled eggs to prevent contamination.


Step 3: Prepare Eggshells for Use

Eggshells can be used in several forms depending on your gardening needs:

1. Crushed Eggshells

  • Crush by hand or with a rolling pin into small pieces.
  • Can be sprinkled directly around plants as a slow-release calcium source.

2. Powdered Eggshells

  • Grind dried shells into a fine powder using a coffee grinder or mortar and pestle.
  • Quickens decomposition and absorption by plants.
  • Ideal for incorporating into potting soil or compost.

3. Eggshell Tea

  • Boil crushed shells in water for 10–15 minutes.
  • Let cool and use as a liquid calcium fertilizer.
  • Can be applied directly to the base of plants or as a foliar spray.

Tip: Powdered eggshells decompose faster and provide nutrients more efficiently than larger pieces.


Step 4: Use Eggshells in Soil

Eggshells improve soil structure and provide essential nutrients:

  • Incorporate Into Soil: Mix crushed or powdered shells into the top 2–4 inches of soil before planting.
  • For Acidic Soil: Eggshells can slightly raise soil pH, making them beneficial for acid-loving plants in moderation.
  • Long-Term Fertilization: Eggshells release calcium slowly, providing sustained nutrition over time.

Tip: Use eggshells in combination with compost or organic matter for a well-balanced soil amendment.


Step 5: Prevent Blossom-End Rot

Blossom-end rot is a common problem in tomatoes, peppers, and eggplants caused by calcium deficiency:

  • Crush eggshells finely and mix into the planting hole before transplanting seedlings.
  • Apply powdered eggshells as a top dressing throughout the growing season.
  • Water plants after applying eggshells to help nutrients penetrate the soil.

Tip: Regular use of eggshells can significantly reduce the incidence of blossom-end rot in susceptible plants.


Step 6: Repel Garden Pests

Eggshells can act as a natural pest deterrent:

  • Slugs and Snails: Crush shells into sharp, jagged pieces and scatter around the base of vulnerable plants.
  • Crawling Insects: Some insects avoid crawling over rough, abrasive surfaces.

Tip: Reapply after rain, as water can wash away the protective barrier.


Step 7: Enhance Compost

Eggshells are an excellent addition to compost piles:

  • Crush shells before adding to speed up decomposition.
  • Mix with other “greens” (vegetable scraps, grass clippings) and “browns” (leaves, straw) for a balanced compost.
  • Supports microbial activity and enhances nutrient content of finished compost.

Tip: Eggshells not only add calcium but also help balance nitrogen-rich materials in compost.


Step 8: Use Eggshells for Seed Starters

Eggshells themselves can be used as mini biodegradable seedling pots:

  • Rinse and dry halves of eggshells.
  • Fill with potting soil and plant seeds.
  • Once seedlings are ready to transplant, crush the shell gently and plant it along with the seedling.
  • The shell adds calcium to the soil as it decomposes.

Tip: Eggshell seed starters are eco-friendly and perfect for small seedlings like herbs and flowers.


Step 9: Combine Eggshells with Other Natural Fertilizers

Eggshells work well in combination with other organic materials:

  • Coffee Grounds: Add nitrogen to balance the calcium.
  • Banana Peels: Supply potassium for flowering and fruiting.
  • Compost Tea: Provide additional nutrients for foliar feeding.
  • Wood Ash: Adds potassium and trace minerals, complementing calcium from eggshells.

Tip: Combining multiple organic amendments creates a well-rounded nutrient profile for your plants.


Step 10: Use Eggshells for Indoor Plants

Eggshells aren’t just for outdoor gardens:

  • Mix powdered shells into potting soil for houseplants like African violets, ferns, and orchids.
  • Sprinkle finely ground shells on the soil surface for slow-release nutrients.
  • Use eggshell tea as a liquid fertilizer for potted plants.

Tip: Regular, moderate use promotes healthy growth and vibrant foliage indoors.


Step 11: Avoid Overuse

While eggshells are beneficial, too much can cause problems:

  • Excess calcium can interfere with the absorption of other nutrients like magnesium and potassium.
  • Large, uncrushed shells take longer to decompose and provide little immediate benefit.
  • Powdered shells should be applied gradually to avoid raising soil pH too quickly.

Guideline: Apply eggshells sparingly and consistently, rather than dumping large amounts at once.


Step 12: Creative Gardening Uses for Eggshells

  1. Mulch: Mix crushed shells with other mulch materials to retain moisture and deter pests.
  2. Soil Amendment: Work into vegetable beds before planting.
  3. Compost Booster: Add to compost piles to enhance calcium content.
  4. Seed Starters: Use halves as biodegradable pots for seedlings.
  5. Foliar Spray: Use eggshell tea for a gentle nutrient boost.

Tip: Eggshells are versatile, eco-friendly, and cost-effective, making them a gardener’s secret weapon.


Final Thoughts

Eggshells are a simple, natural, and effective tool for healthier plants. Whether you use them as a soil amendment, compost addition, pest deterrent, seed starter, or liquid fertilizer, eggshells can enhance soil fertility, provide essential calcium, and promote strong, vibrant plants.

The key is proper preparation and consistent application. Crushing, drying, or powdering eggshells ensures maximum benefit, while combining them with other organic amendments creates a balanced nutrient environment.

By incorporating eggshells into your gardening routine, you reduce kitchen waste, improve plant health, and contribute to sustainable gardening practices. Over time, these tiny, often-overlooked kitchen scraps can make a big difference in your garden, helping your plants grow stronger, healthier, and more productive.

How to Make Organic Fertilizer at Home

How to Make Organic Fertilizer at Home

Organic gardening has grown immensely in popularity as more people embrace sustainable, eco-friendly practices. One of the cornerstones of healthy, thriving plants is fertilizer. While store-bought fertilizers are convenient, they often contain chemicals that can harm soil health and the environment over time. Fortunately, making your own organic fertilizer at home is simple, cost-effective, and beneficial for your garden.

In this guide, we will cover how to make organic fertilizer at home, including ingredients, methods, application tips, and the benefits of using homemade solutions.


Step 1: Understand the Benefits of Organic Fertilizer

Organic fertilizers provide essential nutrients to plants without harmful chemicals:

  1. Nutrient-Rich: Supplies nitrogen (N), phosphorus (P), and potassium (K) along with trace minerals.
  2. Soil Health: Encourages beneficial microorganisms and improves soil structure.
  3. Eco-Friendly: Reduces chemical runoff and supports sustainable gardening.
  4. Cost-Effective: Uses household waste and garden materials.
  5. Long-Term Fertility: Gradually releases nutrients, enhancing soil quality over time.

Tip: Organic fertilizers work slowly but promote sustainable, resilient gardens.


Step 2: Gather Ingredients

The beauty of homemade fertilizers is that many ingredients are already available in your kitchen or garden:

Common Ingredients:

  • Kitchen Scraps: Vegetable peels, fruit scraps, eggshells, coffee grounds, and banana peels.
  • Garden Waste: Grass clippings, fallen leaves, and plant trimmings.
  • Animal Waste: Well-composted cow, chicken, or rabbit manure.
  • Natural Minerals: Rock phosphate, wood ash, or seaweed.
  • Other: Molasses (feeds microbes), neem cake, and bone meal.

Tip: Avoid using scraps with chemicals, meat, or dairy products that can attract pests and odors.


Step 3: Choose Your Fertilizer Type

You can create different types of organic fertilizers depending on your needs:

1. Compost-Based Fertilizer

  • Ideal for: All-around nutrient supply and soil health.
  • Method:
    • Collect organic waste (vegetable scraps, leaves, coffee grounds).
    • Layer greens (nitrogen-rich) and browns (carbon-rich) in a compost bin.
    • Turn the pile weekly to aerate.
    • Ready in 2–3 months.

2. Liquid Fertilizer (Compost Tea)

  • Ideal for: Quick nutrient boost for plants.
  • Method:
    • Soak compost or organic waste in water for 24–48 hours.
    • Strain and use as a liquid fertilizer.
    • Can be applied to the base of plants or as a foliar spray.

3. Fermented Organic Fertilizer

  • Ideal for: Nutrient-rich, long-lasting fertilizer.
  • Method:
    • Mix vegetable scraps, banana peels, and molasses in a jar with water.
    • Seal and ferment for 2–3 weeks.
    • Dilute before use to avoid burning plants.

4. Manure-Based Fertilizer

  • Ideal for: Heavy-feeding plants like tomatoes, corn, and squash.
  • Method:
    • Use aged manure only.
    • Mix into soil or compost before planting.

Tip: Choose the method that best fits your plant type, soil condition, and available ingredients.


Step 4: Prepare Organic Fertilizer Safely

Safety and proper preparation are key:

  • Wash hands after handling manure or kitchen scraps.
  • Avoid adding pet waste or meat scraps to prevent harmful pathogens.
  • Ensure compost piles reach 130–140°F to kill weed seeds and harmful bacteria.
  • Store finished fertilizer in a dry, cool area.

Tip: Proper handling ensures fertilizer is safe for both plants and humans.


Step 5: Apply Fertilizer Correctly

Applying fertilizer properly maximizes its benefits:

  • Soil Application: Mix compost or granular fertilizer into the top 2–4 inches of soil.
  • Liquid Application: Apply compost tea or fermented fertilizer directly to the base of plants once every 2–3 weeks.
  • Timing: Fertilize in the early morning or evening to prevent nutrient loss from sun exposure.
  • Amount: Use small, consistent amounts rather than large doses to avoid over-fertilization.

Tip: Observe your plants for nutrient deficiencies and adjust application accordingly.


Step 6: Combine with Mulching

Mulching complements organic fertilizer by:

  • Retaining soil moisture
  • Suppressing weeds
  • Gradually adding nutrients as it decomposes

Best Mulch Materials: Straw, dried leaves, grass clippings, or wood chips.

Tip: Apply mulch after fertilizing to lock nutrients in the soil.


Step 7: Rotate Crops and Fertilize Strategically

  • Rotate plants annually to prevent nutrient depletion.
  • Apply organic fertilizers according to plant needs:
    • Leafy vegetables: High nitrogen content (coffee grounds, blood meal).
    • Fruiting plants: Balanced NPK (compost, bone meal, wood ash).
    • Root vegetables: Phosphorus-rich fertilizer (bone meal, rock phosphate).

Tip: Tailoring fertilizer to plant type ensures efficient nutrient absorption.


Step 8: Encourage Microbial Activity

Healthy soil microbes enhance fertilizer effectiveness:

  • Add compost and organic matter regularly.
  • Use fermented fertilizers or compost tea to feed microbes.
  • Avoid chemical pesticides and over-fertilization, which can harm microbial populations.

Tip: Vibrant microbial activity improves soil fertility and overall plant resilience.


Step 9: Maintain Balanced Nutrients

Organic fertilizers provide a slow-release nutrient source, but balance is key:

  • Monitor plants for signs of deficiencies:
    • Yellow leaves → nitrogen deficiency
    • Poor flowering → phosphorus deficiency
    • Weak stems → potassium deficiency
  • Adjust ingredients or combinations to meet specific nutrient requirements.

Tip: A balanced approach prevents excessive accumulation of any single nutrient.


Step 10: Benefits of Homemade Organic Fertilizer

  1. Cost Savings: Uses household and garden waste, reducing the need for store-bought products.
  2. Sustainable: Reduces landfill waste and chemical runoff.
  3. Soil Improvement: Enhances structure, water retention, and fertility.
  4. Plant Health: Strengthens plants and encourages natural resistance to pests and disease.
  5. Eco-Friendly: Supports a healthy ecosystem with minimal environmental impact.

Tip: Homemade fertilizers promote long-term soil health rather than quick, temporary growth.


Step 11: Tips for Success

  • Keep a variety of organic ingredients on hand for flexibility.
  • Rotate fertilizer types (compost, liquid, fermented) for best results.
  • Regularly aerate compost piles to accelerate decomposition.
  • Store unused compost or fermented fertilizer in sealed containers to maintain nutrient quality.
  • Observe plant growth and adjust application frequency and amount as needed.

Tip: Patience is key—organic fertilizers work gradually but provide lasting benefits.


Step 12: Creative Fertilizer Ideas

  • Banana Peel Fertilizer: Chop banana peels and bury near roots for potassium and calcium.
  • Coffee Ground Fertilizer: Mix with compost for nitrogen boost.
  • Eggshell Fertilizer: Crush eggshells and sprinkle around plants to add calcium.
  • Grass Clipping Fertilizer: Layer with compost for a nitrogen-rich addition.

Tip: Experiment with combinations to create a personalized, nutrient-rich fertilizer for your garden.


Final Thoughts

Making organic fertilizer at home is easy, sustainable, and highly effective. By using kitchen scraps, garden waste, and natural materials, you can nourish your plants while protecting the environment. Proper preparation, balanced application, and ongoing care ensure that your homemade fertilizers provide the nutrients, structure, and microbial support your garden needs to thrive.

With patience and consistency, you can create a self-sustaining garden ecosystem where plants flourish naturally. Homemade organic fertilizers not only save money but also contribute to a healthier planet, making your gardening journey both rewarding and environmentally conscious.


How to Use Coffee Grounds in the Garden the Right Way

How to Use Coffee Grounds in the Garden the Right Way

Coffee is a staple in many households, but after brewing a cup of coffee, the spent grounds often end up in the trash. What many gardeners don’t realize is that used coffee grounds are a valuable resource for your garden. Rich in nitrogen, minerals, and organic matter, coffee grounds can improve soil fertility, support plant growth, and even deter pests.

However, using coffee grounds incorrectly can harm plants. This guide will explain how to use coffee grounds in the garden the right way, including preparation methods, application techniques, benefits, and precautions to maximize their effectiveness.


Step 1: Understand the Benefits of Coffee Grounds

Coffee grounds are nutrient-rich and can benefit your garden in several ways:

  1. Nitrogen Source: Nitrogen promotes leafy growth and is essential for plant development.
  2. Organic Matter: Improves soil structure, aeration, and water retention.
  3. Microbial Activity: Supports beneficial microorganisms in the soil.
  4. pH Moderation: Slightly acidic coffee grounds can benefit acid-loving plants like azaleas, blueberries, and tomatoes.
  5. Pest Deterrent: Grounds can help repel slugs, snails, and some insects.

Tip: Always consider your plant type and soil conditions before applying coffee grounds directly.


Step 2: Prepare Coffee Grounds Properly

Proper preparation ensures coffee grounds are safe and effective for garden use:

1. Use Spent Coffee Grounds

  • Reuse grounds from brewed coffee.
  • Dry them in the sun or spread them thinly on newspaper to avoid mold.

2. Avoid Adding Sugar or Cream

  • Coffee grounds with added sugar or dairy products can attract pests and mold.

3. Blend with Other Compost Materials

  • Mix coffee grounds with leaves, vegetable scraps, and grass clippings for balanced compost.
  • Helps prevent nitrogen overload in the soil.

Tip: A balanced compost mixture should have roughly equal parts “greens” (nitrogen-rich) and “browns” (carbon-rich). Coffee grounds count as “greens.”


Step 3: Apply Coffee Grounds Directly to Soil

Coffee grounds can be applied directly in small amounts:

  • Sprinkle a thin layer (¼–½ inch) around plants, keeping a small distance from the base to prevent acidity buildup.
  • Gently mix into the topsoil to improve aeration.
  • Avoid thick layers, as they can compact and form a barrier that prevents water infiltration.

Tip: Use coffee grounds as part of a balanced soil enrichment plan rather than the sole fertilizer.


Step 4: Use Coffee Grounds in Compost

Coffee grounds are excellent for composting:

  • Add used coffee grounds to your compost bin or pile.
  • Layer with dry materials like shredded leaves, straw, or cardboard to maintain balance.
  • Regularly turn the compost to aerate and accelerate decomposition.

Tip: Coffee grounds accelerate microbial activity, making compost richer and faster to produce.


Step 5: Make Liquid Fertilizer (Coffee Ground Tea)

Coffee grounds can also be used to make a nutrient-rich liquid fertilizer:

Steps:

  1. Place 1–2 cups of used coffee grounds in a bucket.
  2. Add 2–4 liters of water and stir well.
  3. Let the mixture steep for 24–48 hours.
  4. Strain and use the liquid to water your plants.
  • Provides a gentle nitrogen boost.
  • Can be applied directly to vegetable beds, flowers, and potted plants.

Tip: Use liquid coffee fertilizer sparingly; excessive application can make soil too acidic.


Step 6: Use as Mulch

Coffee grounds can be used as a light mulch for garden beds:

  • Spread a thin layer around acid-loving plants like blueberries, azaleas, and rhododendrons.
  • Mix with other mulch materials to prevent compaction.
  • Helps retain moisture, suppress weeds, and gradually release nutrients.

Tip: Avoid using thick layers of pure coffee grounds as mulch, as they can form a crust that repels water.


Step 7: Improve Soil Structure

Coffee grounds improve soil texture, especially in clay or sandy soils:

  • Clay Soil: Grounds break up compacted clay, improving drainage and aeration.
  • Sandy Soil: Grounds help retain moisture and nutrients, reducing leaching.

Tip: Gently incorporate grounds into soil rather than leaving them on the surface for best results.


Step 8: Repel Pests Naturally

Coffee grounds can deter certain pests naturally:

  • Slugs and Snails: Sprinkle a thin line around plants; the texture and caffeine may repel them.
  • Some Ants and Cats: Coffee grounds act as a mild deterrent when sprinkled in affected areas.

Tip: Use coffee grounds as part of integrated pest management rather than the only control method.


Step 9: Avoid Overuse

Too much coffee grounds can harm plants:

  • High nitrogen levels may burn plant roots.
  • Excessive acidity may affect pH-sensitive plants.
  • Compacted layers can block water penetration.

Guideline: Use no more than 20% coffee grounds by volume in compost or soil mix. Apply thin layers rather than piles.


Step 10: Benefits of Coffee Grounds in the Garden

  1. Eco-Friendly: Recycles waste and reduces landfill contributions.
  2. Nutrient-Rich: Provides nitrogen, phosphorus, and potassium naturally.
  3. Soil Improvement: Enhances structure, water retention, and microbial activity.
  4. Pest Management: Helps deter slugs and certain insects.
  5. Cost-Effective: Free source of nutrients for your garden.

Tip: Regular, moderate use contributes to long-term soil health and plant vigor.


Step 11: Best Plants for Coffee Grounds

Coffee grounds work well for acid-loving and leafy plants:

  • Vegetables: Tomatoes, carrots, radishes, and leafy greens.
  • Flowers: Azaleas, hydrangeas, camellias, and rhododendrons.
  • Fruit Plants: Blueberries, strawberries, and citrus trees.
  • Houseplants: African violets, ferns, and orchids.

Tip: Test on a small section first if you’re unsure how a plant will react to coffee grounds.


Step 12: Creative Garden Uses

  1. Seed Starters: Mix coffee grounds with potting soil for seedlings to provide a gentle nutrient boost.
  2. Compost Activator: Sprinkle grounds into compost piles to accelerate decomposition.
  3. Orchid Fertilizer: Mix grounds with orchid bark for slow-release nutrients.
  4. Top Dressing: Sprinkle around established plants to feed the soil gradually.

Tip: Coffee grounds can also be mixed with eggshells or banana peels for a balanced homemade fertilizer mix.


Final Thoughts

Coffee grounds are a versatile, eco-friendly, and nutrient-rich resource for gardeners. When used correctly, they can:

  • Improve soil fertility and structure
  • Boost microbial activity
  • Provide nutrients for strong, healthy plants
  • Help deter common garden pests

The key is moderation and proper application. Incorporating coffee grounds into compost, as a light mulch, or in liquid fertilizer ensures plants benefit without negative side effects.

By integrating coffee grounds into your gardening routine, you can recycle waste, reduce reliance on chemical fertilizers, and create healthier soil. Your garden will flourish with richer, greener plants, more vibrant flowers, and bountiful vegetables—all thanks to a humble cup of coffee.

How to Improve Garden Soil Naturally

How to Improve Garden Soil Naturally

Healthy soil is the foundation of a thriving garden. Plants rely on soil not just for physical support but also for nutrients, water retention, and a thriving microbial ecosystem. While chemical fertilizers can provide a short-term boost, natural soil improvement techniques enhance fertility sustainably, increase biodiversity, and create long-term benefits for your garden.

This comprehensive guide will show you how to improve garden soil naturally, covering soil assessment, amendments, mulching, composting, crop rotation, and ongoing maintenance to ensure your plants flourish year after year.


Step 1: Assess Your Soil

Before making any changes, it’s important to understand your soil’s current condition:

Check Soil Texture

  • Sandy Soil: Drains quickly but doesn’t hold nutrients well.
  • Clay Soil: Holds water but can be compacted, limiting root growth.
  • Loamy Soil: Ideal for gardening; balanced texture with good drainage and nutrient retention.

Test Soil pH

  • Most plants thrive in slightly acidic to neutral soil (pH 6–7).
  • Use a home soil test kit or send a sample to a lab.
  • Adjust pH naturally using:
    • Lime to raise pH (for acidic soils)
    • Sulfur to lower pH (for alkaline soils)

Check Nutrient Levels

  • Nitrogen, phosphorus, and potassium are essential.
  • Observe plant growth: yellow leaves may indicate nitrogen deficiency, while poor flowering could suggest phosphorus deficiency.

Tip: Knowing your soil’s strengths and weaknesses allows you to choose the right natural amendments.


Step 2: Add Organic Matter

Organic matter improves soil structure, water retention, and nutrient content.

Compost

  • Decomposed plant material, kitchen scraps, and garden waste.
  • Adds essential nutrients and supports beneficial microbes.
  • Apply 2–3 inches of compost on top of the soil or mix it into the top 6–12 inches.

Manure

  • Well-aged animal manure enriches soil with nitrogen, phosphorus, and potassium.
  • Avoid fresh manure as it may burn plants or introduce pathogens.
  • Incorporate into soil before planting.

Leaf Mold

  • Decomposed leaves improve soil structure and water retention.
  • Collect leaves in a pile or bag, moisten, and let them decompose over months.

Tip: Adding organic matter gradually improves soil fertility and microbial activity over time.


Step 3: Use Natural Fertilizers

Natural fertilizers provide nutrients without harming the ecosystem:

  • Bone Meal: Rich in phosphorus for strong root development.
  • Blood Meal: High nitrogen content for leafy growth.
  • Wood Ash: Adds potassium and raises soil pH.
  • Seaweed or Kelp: Contains trace minerals, growth hormones, and improves plant resilience.
  • Banana Peels: High in potassium and calcium; can be buried or turned into a liquid fertilizer.

Tip: Combine different natural fertilizers to achieve balanced nutrition for your plants.


Step 4: Practice Mulching

Mulching protects soil and enhances fertility naturally:

  • Use straw, shredded leaves, grass clippings, or wood chips.
  • Benefits:
    • Reduces soil erosion
    • Retains moisture
    • Suppresses weeds
    • Adds organic matter as it decomposes

Tip: Keep mulch 2–3 inches thick and avoid piling directly against plant stems to prevent rot.


Step 5: Encourage Soil Microbes

Beneficial microorganisms break down organic matter and make nutrients available to plants.

  • Add compost and organic fertilizers to support microbial life.
  • Avoid chemical pesticides that disrupt microbial ecosystems.
  • Introduce mycorrhizal fungi to enhance root absorption of water and nutrients.

Tip: Healthy soil teems with life, including earthworms, bacteria, and fungi, all of which improve fertility naturally.


Step 6: Use Cover Crops and Green Manure

Cover crops protect soil and improve nutrient content:

  • Legumes (clover, beans, peas): Fix nitrogen in the soil naturally.
  • Rye, Oats, or Barley: Suppress weeds, prevent erosion, and add organic matter when tilled back into the soil.
  • Buckwheat: Grows quickly, attracts pollinators, and can be composted for soil enrichment.

Tip: Plant cover crops during off-seasons to keep soil active and fertile year-round.


Step 7: Rotate Crops

Crop rotation prevents nutrient depletion and reduces disease pressure:

  • Avoid planting the same plant family in the same location each year.
  • Rotate heavy feeders like tomatoes and corn with legumes that add nitrogen.
  • Rotate root crops with leafy crops for balanced nutrient use.

Tip: Rotating crops naturally improves soil fertility and discourages pests and diseases.


Step 8: Improve Soil Aeration

Aeration helps roots access oxygen and nutrients:

  • Double Digging: Loosen soil to allow deep root penetration.
  • Aerating Tools: Use a garden fork or mechanical aerator in compacted areas.
  • Avoid Over-Tilling: Excessive tilling can damage soil structure and microbes.

Tip: Aerated soil encourages healthy root systems and better water infiltration.


Step 9: Retain Moisture Naturally

Healthy soil retains water effectively:

  • Organic Mulches: Reduce evaporation and maintain consistent moisture.
  • Compost and Organic Matter: Improves water-holding capacity of sandy soils.
  • Swales or Rain Gardens: Collect rainwater and allow slow infiltration to nourish the soil.

Tip: Even moisture promotes nutrient uptake and prevents stress that can weaken plants.


Step 10: Avoid Harmful Chemicals

Chemical fertilizers and pesticides can disrupt soil life:

  • Harm beneficial microbes and insects
  • Cause nutrient imbalances
  • Lead to runoff and environmental pollution

Tip: Stick to natural fertilizers, organic amendments, and physical pest control for a thriving, balanced garden ecosystem.


Step 11: Monitor and Adjust

Regular observation helps maintain healthy soil:

  • Conduct seasonal soil tests for pH and nutrient levels.
  • Observe plant growth for signs of nutrient deficiency.
  • Adjust organic amendments as needed.
  • Keep a gardening journal to track improvements and outcomes.

Tip: Healthy soil is dynamic; small, consistent improvements over time yield the best results.


Benefits of Improving Soil Naturally

  1. Increased Fertility: Supports healthy, productive plants.
  2. Better Structure: Loamy, aerated soil encourages root growth.
  3. Water Retention: Reduces watering needs and drought stress.
  4. Pest and Disease Resistance: Healthy soil fosters resilient plants.
  5. Environmental Sustainability: Reduces chemical use and promotes biodiversity.

Tip: Healthy soil improves yields and plant quality without harming the environment.


Step 12: Sustainable Practices for Long-Term Soil Health

  • Compost kitchen and garden waste regularly.
  • Use natural fertilizers instead of synthetic chemicals.
  • Plant diverse species to maintain balanced nutrient use.
  • Introduce cover crops and rotate plant families.
  • Encourage beneficial insects and earthworms for natural soil enrichment.

Tip: Over time, these practices build a thriving, self-sustaining soil ecosystem.


Final Thoughts

Improving garden soil naturally is a long-term investment in plant health, sustainability, and productivity. By assessing your soil, adding organic matter, using natural fertilizers, mulching, promoting microbes, practicing crop rotation, and avoiding harmful chemicals, you can create fertile, resilient soil that supports plants year-round.

Natural soil improvement benefits both your garden and the environment. Your plants will thrive, water use will be optimized, and you’ll enjoy a vibrant, healthy garden that flourishes season after season.

Remember: healthy soil is the secret to a thriving garden. With patience, consistent care, and natural techniques, you can transform your garden into a lush, productive oasis without relying on chemicals.

How I Created My Own Pineapple Garden from Tops Without Spending a Penny – Harvesting Large, Sweet Fruits

How I Created My Own Pineapple Garden from Tops Without Spending a Penny – Harvesting Large, Sweet Fruits

Pineapples are one of the most delightful tropical fruits — sweet, juicy, and packed with vitamins, antioxidants, and bromelain, a digestive enzyme that offers numerous health benefits. Imagine enjoying fresh, homegrown pineapples without spending a dime on seeds or saplings.

The viral YouTube video “I Make My Own Pineapple Garden Without Spending A Penny From Pineapple Tops – Large And Sweet Fruits” demonstrates an ingenious way to grow pineapples using leftover pineapple tops. With patience and the right technique, you can cultivate large, sweet fruits right in your backyard or garden, all while recycling kitchen waste.

In this guide, we’ll walk you through a step-by-step method to grow pineapples from tops, tips for healthy growth, soil preparation, and tricks to get sweet, large fruits efficiently.


Why Grow Pineapples at Home?

Homegrown pineapples offer numerous advantages:

Cost-effective: Grow fruit from kitchen scraps, saving money on seeds or saplings.
Organic and chemical-free: Control fertilizers and pest management.
Sustainable: Recycle pineapple tops that would otherwise go to waste.
Fun and educational: Great for beginners and children learning about gardening.
Long-term harvest: Pineapple plants are perennial and can produce fruit for several years.

Even if you have a small garden or balcony, growing pineapples is possible with the right method.


Step 1: Selecting the Right Pineapple

The first step is choosing a healthy, mature pineapple fruit. The top, or crown, will be used to propagate a new plant.

Tips for selection:

  • Choose ripe, healthy pineapples with green, firm leaves at the top.
  • Avoid fruits with rotting or brown leaves.
  • Organic pineapples are preferable to ensure the crown is free from chemicals.

Step 2: Preparing the Pineapple Top

Propagating pineapples begins with preparing the crown properly.

Steps:

  1. Twist or cut off the pineapple crown from the fruit.
  2. Remove a few of the lower leaves to expose the base of the stem (about 1–2 inches).
  3. Let the crown dry for 1–2 days in a shaded area to prevent rotting when planted.
  4. Optionally, dip the base in rooting hormone to encourage faster root development.

Proper preparation of the top ensures healthy root growth and strong plants.


Step 3: Choosing a Container or Garden Spot

Pineapples can grow in the ground or in containers, depending on your space:

Container planting:

  • Use large pots or recycled containers with drainage holes.
  • Minimum depth: 12–15 inches to accommodate roots.
  • Width: 12–18 inches to allow room for growth.

Garden planting:

  • Choose a sunny location with well-draining soil.
  • Avoid waterlogged areas, as pineapples are sensitive to root rot.

The YouTube video demonstrates that even small spaces can yield productive pineapple plants with proper care.


Step 4: Soil Preparation

Pineapples thrive in well-draining, slightly acidic soil.

Ideal soil mix:

  • 40% garden soil
  • 30% compost or organic manure
  • 20% sand or perlite for drainage
  • 10% coco peat or peat moss to retain moisture

Mix thoroughly and fill the container or prepare garden beds. Pineapples are hardy but benefit from nutrient-rich soil for larger, sweeter fruits.


Step 5: Planting the Pineapple Top

Planting is straightforward but requires attention to detail:

  1. Make a hole in the soil large enough to fit the pineapple crown base.
  2. Insert the crown about 1–2 inches deep in the soil.
  3. Firm the soil around the base to provide support.
  4. Water gently until the soil is moist but not soggy.

Place the container or plant in a sunny location — pineapples need at least 6 hours of direct sunlight daily.


Step 6: Watering and Moisture Management

Pineapples are drought-tolerant, but regular watering encourages strong growth:

  • Water once or twice a week, depending on climate.
  • Keep the soil moist but never waterlogged.
  • Mulch around the base to retain moisture and reduce weed growth.

Pro Tip: Overwatering is the main reason pineapple crowns rot, so always check soil moisture before watering.


Step 7: Fertilization and Nutrition

Pineapples are slow-growing but respond well to regular fertilization:

  • Every 2–3 months: Apply compost or well-rotted manure around the base.
  • Use a balanced fertilizer (NPK 10:10:10) for healthy foliage growth.
  • When flowering begins, switch to a potassium-rich fertilizer to promote fruit size and sweetness.

Organic options like vermicompost, neem cake, or banana peel powder also work well.


Step 8: Caring for Your Pineapple Plant

Leaf and plant care:

  • Remove damaged or yellow leaves promptly.
  • Ensure good air circulation around the plant to prevent fungal infections.
  • Protect young plants from extreme weather conditions like heavy rain or frost.

Growth timeline:

  • Pineapple plants may take 12–18 months to bear fruit under ideal conditions.
  • With proper care, larger, sweeter fruits are achievable.

Step 9: Flowering and Fruit Development

Pineapples produce flowers on a central stalk, eventually forming the fruit:

  • A healthy, mature plant produces a flowering stalk.
  • Flowers appear in clusters and gradually form the fruit.
  • Proper sunlight, watering, and fertilization are essential for fruit development and sweetness.

Step 10: Harvesting Pineapples

Harvesting is exciting and rewarding:

  • Fruits are ready when they turn golden yellow at the base and emit a sweet aroma.
  • Use a sharp knife to cut the fruit, leaving a short stem attached.
  • Avoid harvesting too early, as it affects sweetness.

With proper care, your homegrown pineapples can match or surpass store-bought quality, both in size and taste.


Step 11: Advantages of Using Pineapple Tops

Using pineapple tops as planting material offers multiple benefits:

Zero cost: Recycle kitchen waste instead of buying seeds or saplings.
Eco-friendly: Reduces food waste.
Sustainable gardening: Encourages self-sufficient fruit production.
Easy propagation: Even beginners can start without prior experience.

It’s proof that a simple household scrap can turn into a thriving fruit plant with patience and care.


Step 12: Tips for Maximum Yield

  • Choose sunny, well-drained spots for planting.
  • Fertilize regularly with compost or organic fertilizer.
  • Mulch around the base to retain moisture and prevent weeds.
  • Remove old or damaged leaves to maintain plant health.
  • Protect plants from pests and diseases with organic sprays like neem oil.
  • Be patient — pineapples take time to grow but reward you with large, sweet fruits.

Step 13: Growing Pineapples in Containers

Container-grown pineapples are perfect for urban gardens:

  • Use pots of at least 20 liters with drainage holes.
  • Rotate pots periodically for even sunlight exposure.
  • Protect containers from extreme heat or cold to maintain soil conditions.
  • Apply slow-release fertilizers to maintain nutrients over time.

Even small-space gardeners can enjoy large, sweet pineapples using this method.


Step 14: Uses of Homegrown Pineapples

Homegrown pineapples are versatile and delicious:

Eat fresh slices for breakfast or snacks
Add to smoothies, desserts, and fruit salads
Use in tropical recipes like pineapple rice or stir-fries
Juice for natural detox drinks
Include in marinades or sauces for tangy flavor

Fresh pineapples grown at home retain more flavor and nutrients than store-bought fruits.


Conclusion: Turn Pineapple Tops into a Fruitful Garden

The YouTube video “I Make My Own Pineapple Garden Without Spending A Penny From Pineapple Tops – Large And Sweet Fruits” demonstrates that growing pineapples at home doesn’t require money or fancy tools.

By following these steps — selecting healthy tops, preparing soil, planting properly, watering, fertilizing, and caring for the plant — you can create a thriving pineapple garden that produces large, sweet fruits year after year.

Start today — your leftover pineapple tops can transform into a homegrown treasure trove of tropical fruits!


The Secret to Propagating Lemon Trees That Bear Fruit in Less Than 3 Months

The Secret to Propagating Lemon Trees That Bear Fruit in Less Than 3 Months

Lemon trees are a staple in every kitchen — from refreshing drinks to tangy recipes, their fruits add a burst of flavor and nutrition. But one common challenge for home gardeners is the long wait for fruit-bearing trees. Traditionally, lemon trees take 2–3 years or more to produce fruits from seed.

The viral YouTube video “The secret to propagating lemon trees that bear fruit in less than 3 months” introduces an incredible method to propagate lemon trees that start bearing fruit quickly. Using clever techniques, careful selection, and proper care, you can enjoy homegrown lemons in a fraction of the usual time.

In this guide, we’ll explore step by step how to propagate a lemon tree efficiently, accelerate fruiting, and maintain a healthy tree for maximum productivity.


Why Grow Lemon Trees at Home?

Growing your own lemon tree offers numerous benefits:

Fresh and chemical-free fruits: Know exactly what you’re consuming.
Cost-effective: No need to purchase lemons regularly from the market.
Health benefits: Lemons are rich in vitamin C, antioxidants, and support immunity.
Aesthetic appeal: Lemon trees are attractive additions to gardens, patios, or balconies.
Sustainable gardening: Encourages self-reliance and environmental friendliness.

Plus, there’s a special satisfaction in harvesting lemons straight from your own tree.


Step 1: Selecting the Right Lemon Variety

The first step in fast-tracking fruiting is choosing the right variety. Some lemon varieties are naturally faster to bear fruits than others.

Recommended varieties for quick fruiting:

  • Meyer Lemon: Known for sweet, small fruits and fast flowering.
  • Eureka Lemon: Classic variety, prolific fruiting under good conditions.
  • Lisbon Lemon: Hardy and high-yielding.

Tips:

  • Select healthy, disease-free trees or seeds.
  • Choose grafted saplings if possible — grafting ensures the tree inherits fruiting characteristics from the parent tree.

Step 2: Propagation Method That Speeds Fruiting

The secret revealed in the video focuses on propagation techniques that accelerate fruiting. The most effective methods are:

1. Grafting

Grafting involves joining a fruit-bearing scion to a young rootstock. This ensures:

  • Faster fruiting (2–3 months in ideal conditions).
  • Strong, healthy trees.
  • Retention of the parent tree’s fruit quality.

Steps for grafting:

  1. Select a scion from a mature, fruit-bearing lemon tree.
  2. Prepare a healthy rootstock, about 6–12 months old.
  3. Make a clean cut on the rootstock and insert the scion.
  4. Secure with grafting tape or rubber bands.
  5. Place in a warm, shaded area for the graft to heal.

2. Air Layering

Air layering is another technique that allows a new tree to grow from an existing branch. It accelerates fruiting because the branch is already mature.

Air layering steps:

  1. Choose a healthy branch on a mature lemon tree.
  2. Make a small cut or strip the bark around a node.
  3. Wrap the cut area with moist sphagnum moss and cover with plastic.
  4. Roots develop in 3–6 weeks.
  5. Cut the rooted branch and plant in soil.

Step 3: Preparing the Soil

Lemon trees thrive in well-draining, nutrient-rich soil.

Ideal soil mix:

  • 40% garden soil or loamy soil
  • 30% compost or well-rotted manure
  • 20% sand or perlite (for drainage)
  • 10% coco peat or peat moss (to retain moisture)

Pro Tip: Ensure the soil pH is slightly acidic (5.5–6.5) for optimal growth and fruiting.


Step 4: Planting the Lemon Tree

Once your grafted sapling or rooted branch is ready:

  1. Choose a sunny location — lemon trees need 6–8 hours of sunlight daily.
  2. Dig a hole twice the size of the root ball.
  3. Place the sapling carefully and backfill with soil.
  4. Water thoroughly and apply a layer of mulch to retain moisture.

Container planting:

  • Use pots of at least 20–25 liters.
  • Ensure proper drainage holes.
  • Grow indoors or on a balcony if outdoor space is limited.

Step 5: Watering and Moisture Management

Water is crucial for a fast-fruiting lemon tree:

  • Water deeply 2–3 times per week depending on climate.
  • Keep soil consistently moist but not soggy — overwatering can cause root rot.
  • Mulch around the base to maintain soil moisture and temperature.

Tip: Early morning watering helps prevent fungal growth on leaves.


Step 6: Fertilization for Rapid Growth and Fruiting

For lemon trees to bear fruit quickly, regular feeding is essential:

  • At planting: Mix compost and bone meal in soil.
  • Monthly feeding: Use a balanced fertilizer (NPK 10:10:10) for young trees.
  • Flowering and fruiting stage: Use potassium-rich fertilizer to promote flowers and fruit set.

Organic options like vermicompost, banana peel powder, and liquid compost tea work excellently.


Step 7: Pruning and Training

Pruning ensures healthy growth and supports early flowering:

  • Remove dead, weak, or crossing branches.
  • Maintain a single main trunk for young trees.
  • Encourage lateral branches for better flower production.

Proper pruning improves air circulation, reduces disease risk, and maximizes sunlight exposure.


Step 8: Flowering and Pollination

Lemon trees produce small white flowers that develop into fruit:

  • Bees and other insects naturally pollinate flowers.
  • In indoor settings, you can hand-pollinate using a soft brush.
  • Optimal flowering occurs when the tree receives full sunlight and proper nutrition.

Hand-pollination ensures more flowers set fruit, which is key for fast results.


Step 9: Common Problems and Solutions

Even fast-fruiting trees require attention:

1. Yellow Leaves:

  • Cause: Overwatering, poor drainage, or nutrient deficiency.
  • Solution: Adjust watering and provide balanced fertilization.

2. Pests:

  • Aphids, mealybugs, and spider mites may attack young trees.
  • Solution: Spray neem oil or insecticidal soap weekly.

3. Flower Drop:

  • Can occur due to stress or lack of nutrients.
  • Solution: Ensure consistent watering, sunlight, and fertilization.

Step 10: Harvesting Lemon Fruits

With grafted or air-layered propagation, fruits can appear in less than 3 months:

  • Look for a bright yellow color (depending on variety).
  • Fruits should be firm and aromatic.
  • Use scissors or pruning shears to harvest, leaving a short stem attached.

Regular harvesting encourages continuous flowering and fruiting, maximizing yield.


Step 11: Benefits of Fast-Fruiting Lemon Trees

  • Enjoy fresh lemons year-round.
  • Saves space and time compared to traditional propagation.
  • Higher productivity due to mature scion or rooted branch.
  • Easy for beginner gardeners — even small containers yield fruits.

Step 12: Tips for Maximum Yield

  • Choose sunny spots for optimal flower and fruit development.
  • Support branches if fruits are heavy.
  • Mulch regularly to conserve moisture.
  • Keep pests and diseases under control using organic solutions.
  • Fertilize consistently with potassium-rich nutrients during fruiting.

Step 13: Growing Lemon Trees in Containers

If you lack garden space, container-grown lemon trees are excellent:

  • Use pots of at least 25 liters with proper drainage.
  • Rotate pots to ensure even sunlight exposure.
  • Use stakes or trellises to support branches as fruits grow.
  • Apply slow-release fertilizers to maintain nutrient availability.

Container gardening allows urban gardeners to enjoy lemons year-round.


Step 14: Uses of Homegrown Lemons

Homegrown lemons are versatile:

Add to beverages and detox drinks
Use in salads, sauces, and desserts
Incorporate in cleaning solutions for natural disinfecting
Juice for skincare or health remedies

Fresh, homegrown lemons taste far superior to store-bought ones and are free from pesticides.


Conclusion: Harvest Lemons Faster Than Ever

The secret to propagating lemon trees that bear fruit in less than 3 months lies in using grafted saplings or air-layered branches, proper soil, sunlight, watering, and care.

By following the steps from the YouTube video, even beginners can grow healthy, productive lemon trees in containers or small gardens, enjoying fresh fruits in record time.

Start today — with the right method, patience, and care, you’ll have homegrown lemons in just a few months, adding freshness, nutrition, and a touch of nature to your home.

How I Grew Bitter Melon in an Old Styrofoam Box and Got a Bountiful Harvest

How I Grew Bitter Melon in an Old Styrofoam Box and Got a Bountiful Harvest

Bitter melon, also known as bitter gourd or karela, is a nutritious and medicinal vegetable loved in many Asian cuisines. Known for its slightly bitter taste, it’s packed with vitamins, minerals, and antioxidants.

But what if I told you that you don’t need a garden or expensive pots to grow bitter melon? The viral YouTube video “I planted bitter melon in an old styrofoam box, surprised by so many fruits” demonstrates an ingenious method for growing a highly productive bitter melon vine using a simple styrofoam box.

This blog post will take you step by step through the process, from preparing your box to harvesting a bounty of fresh, homegrown bitter melon. It’s beginner-friendly, cost-effective, and perfect for urban gardeners with limited space.


Why Grow Bitter Melon at Home?

Growing bitter melon at home has numerous benefits:

Fresh and organic: No chemicals or pesticides.
Space-efficient: Perfect for balconies, rooftops, or small yards.
High yield: A single vine can produce dozens of fruits.
Medicinal value: Rich in vitamins, antioxidants, and properties that help regulate blood sugar.
Cost-effective: You can start with leftover seeds or scraps from the grocery store.

With this method, even a small styrofoam box can produce more bitter melon than expected, making it an ideal solution for urban gardening enthusiasts.


Step 1: Choosing the Right Bitter Melon

Start with healthy seeds or a young plant.

Tips for selecting seeds:

  • Use seeds from fresh, mature bitter melon fruits.
  • Select varieties suitable for your region — small, medium, or long-fruited types.
  • Ensure seeds are healthy, free from cracks or mold.

Alternatively, you can buy certified seeds from a nursery for guaranteed germination.


Step 2: Preparing the Styrofoam Box

The beauty of this method is recycling an old styrofoam box to grow bitter melon.

Steps to prepare your box:

  1. Clean the box thoroughly with water.
  2. Drill multiple drainage holes at the bottom to prevent waterlogging.
  3. Optionally, line the inside with a plastic sheet with holes to hold the soil longer.
  4. Choose a box at least 12–15 inches deep and 18–24 inches wide for good root growth.

A styrofoam box is lightweight, inexpensive, and keeps soil warm, promoting fast growth.


Step 3: Preparing the Soil

Bitter melon thrives in well-draining, fertile soil.

Recommended soil mix:

  • 40% garden soil or topsoil
  • 30% compost or organic manure
  • 20% sand (for drainage)
  • 10% coco peat or peat moss (to retain moisture)

Mix thoroughly and fill the styrofoam box, leaving 2–3 inches at the top.

Pro Tip: Add a handful of bone meal or neem cake for extra nutrients and pest protection.


Step 4: Planting Bitter Melon Seeds

Planting bitter melon in a container is simple.

Steps:

  1. Make small holes 1 inch deep in the soil.
  2. Place one or two seeds per hole.
  3. Cover lightly with soil and water gently.
  4. Place the box in a sunny location, as bitter melon requires at least 6–8 hours of sunlight daily.

Tip: If planting multiple seeds, leave about 12–18 inches between them to give vines enough space.


Step 5: Watering and Moisture Management

Bitter melon loves moisture but hates waterlogged soil.

Watering tips:

  • Water every 2–3 days or when the top 1–2 inches of soil are dry.
  • Keep the soil consistently moist, especially during flowering and fruit development.
  • Mulch with straw or dry leaves to retain moisture and reduce weed growth.

Proper watering ensures healthy roots and abundant fruiting.


Step 6: Supporting the Vines

Bitter melon is a climbing vine, so it needs support to grow upward.

Support options:

  • Bamboo sticks or wooden trellis
  • Wire mesh or netting
  • Existing walls or fences

Pro Tip: As the vine grows, gently tie the stems to the trellis to prevent breakage. A single vine can climb 6–10 feet or more, producing dozens of fruits when properly supported.


Step 7: Fertilization and Nutrition

Bitter melon is a fast-growing, heavy-feeding plant.

Fertilization schedule:

  • At planting: Mix compost or cow dung in the soil.
  • Every 2–3 weeks: Apply liquid compost or organic fertilizer around the base.
  • During flowering and fruiting: Add potassium-rich fertilizers like banana peel powder or wood ash.

Avoid excess nitrogen — it promotes leafy growth but reduces fruit production.


Step 8: Flowering and Pollination

Bitter melon produces small yellow flowers along the vine.

  • Male flowers appear first, followed by female flowers that develop into fruits.
  • Pollination is usually done by bees and insects, but in urban settings, you can hand-pollinate using a soft brush.

Proper pollination ensures more flowers develop into fruits, increasing your harvest.


Step 9: Pest and Disease Management

Common pests include aphids, whiteflies, and fruit flies, while diseases like powdery mildew can affect leaves.

Organic management tips:

  • Spray neem oil (1 tbsp per liter of water) every 10–15 days.
  • Remove infected leaves promptly.
  • Ensure good air circulation around the box.
  • Avoid overhead watering to reduce fungal problems.

Healthy soil, sunlight, and regular monitoring go a long way in preventing problems.


Step 10: Harvesting Bitter Melon

Bitter melon fruits are generally ready for harvest 50–70 days after flowering.

Harvesting tips:

  • Pick fruits when they are green and firm — slightly immature for the best taste.
  • Use scissors or a sharp knife to cut the fruit, leaving a short stem attached.
  • Harvest regularly to encourage continuous flowering and fruiting.

A single styrofoam box can produce 10–20 or more fruits, depending on care and vine growth.


Step 11: Advantages of Using a Styrofoam Box

This method offers multiple benefits for beginner and urban gardeners:

Cost-effective: No need to buy expensive pots.
Space-saving: Ideal for balconies, rooftops, or small yards.
High productivity: Proper care can produce a full vine of fruits.
Eco-friendly: Reuses materials that might otherwise be discarded.
Beginner-friendly: Minimal tools and effort required.

It proves that you don’t need a garden to grow vegetables successfully — a simple container and proper care are enough.


Step 12: Tips for Maximum Yield

  • Ensure full sunlight for at least 6–8 hours per day.
  • Support vines properly to avoid breakage.
  • Fertilize regularly with organic nutrients.
  • Mulch to retain moisture and suppress weeds.
  • Monitor for pests and diseases; neem oil sprays are highly effective.
  • Harvest fruits regularly to encourage continuous flowering.

By following these tips, even small-space gardeners can enjoy a bountiful harvest.


Step 13: Growing Bitter Melon Year-Round

Bitter melon can grow almost year-round in tropical and subtropical climates.

  • In cooler months, place the box in a sunny, protected spot or use a mini-greenhouse cover.
  • Start new seeds every few months to maintain continuous production.
  • Rotate containers if growing multiple vines to ensure even sunlight.

With the right care, you can enjoy fresh, homegrown bitter melon throughout the year.


Step 14: Cooking and Using Homegrown Bitter Melon

Homegrown bitter melon is versatile and nutritious:

Use in stir-fries or sautéed dishes
Add to fresh salads
Cook in curries, soups, or stews
Use leaves in soups or as greens

Freshly harvested bitter melon tastes better and retains more nutrients than store-bought produce.


Conclusion: Turn a Simple Styrofoam Box into a Bountiful Bitter Melon Garden

The viral video “I planted bitter melon in an old styrofoam box, surprised by so many fruits” shows that you don’t need a garden or fancy tools to grow productive vegetables.

By following these steps — choosing healthy seeds, preparing a simple container, providing support, watering, fertilizing, and harvesting carefully — you can grow bitter melon at home with minimal space and cost.

This method is ideal for beginners, urban gardeners, and anyone looking to enjoy fresh, homegrown vegetables sustainably. With a little patience and creativity, your old styrofoam box can produce a lush, productive bitter melon vine that feeds your family for months.

Start today — your first homegrown bitter melon is just a seed away!

How to Grow Chayote Easily at Home Using Simple Methods: No Fancy Tools Needed!

How to Grow Chayote Easily at Home Using Simple Methods: No Fancy Tools Needed!

Chayote, also called vegetable pear or mirliton, is a versatile and nutritious vegetable loved in many cuisines around the world. Its mild flavor, crunchy texture, and rich vitamin content make it a great addition to salads, stews, and stir-fries.

But what if you could grow your own chayote at home without spending a fortune on seeds, pots, or gardening tools? The viral YouTube video “Chayote seeds? old paint bucket? Grow Chayote Like This Instead!” shows a clever and practical method for growing chayote in small spaces using recycled materials, perfect for beginners and urban gardeners.

In this guide, we’ll walk you through a step-by-step method to grow chayote at home, including how to prepare the seed, select containers, and get high productivity with minimal effort.


Why Grow Chayote at Home?

Homegrown chayote offers multiple benefits:

Fresh and organic: Free from chemicals and pesticides.
Space-saving: Can be grown in containers, trellises, or vertical gardens.
Low maintenance: Hardy plant that requires minimal care.
High yield: One vine can produce dozens of fruits per season.
Sustainable gardening: Reuse containers like old buckets or tubs.

With these advantages, chayote is ideal for balcony gardening, rooftop setups, or small backyard plots.


Step 1: Choosing the Right Chayote Fruit for Planting

The process starts with a healthy, mature chayote fruit, which doubles as your seed. Unlike many vegetables, chayote doesn’t require processed seeds — the fruit itself grows into a new plant.

Tips for selecting the right chayote:

  • Pick large, firm, and disease-free fruits.
  • Avoid fruits with soft spots, cracks, or signs of rot.
  • Organic chayote is preferable to ensure the seed will germinate successfully.

Once selected, wash the fruit thoroughly to remove dirt and residues.


Step 2: Preparing Chayote for Planting

Chayote can be planted directly while the fruit is still whole, which makes it very beginner-friendly.

Preparation steps:

  1. Choose a sunny location or container where the vine can grow.
  2. Identify the broader, flatter side of the chayote — this is where roots will emerge.
  3. Optionally, you can cut the chayote in half, exposing the seed inside, which can speed up germination.

Unlike other seeds, chayote requires minimal handling and starts rooting easily if conditions are right.


Step 3: Choosing a Container or Growing Space

The YouTube video shows an innovative way to use recycled containers like old paint buckets, but there are several options:

Ideal containers for chayote:

  • Old paint buckets or tubs (drill drainage holes)
  • Large plastic pots or grow bags
  • Wooden boxes or crates
  • Directly in garden soil if space allows

Container tips:

  • Minimum depth: 12–15 inches (30–40 cm) for root development
  • Drainage: Essential to prevent waterlogging and root rot
  • Size: Bigger is better — chayote vines grow fast and need support

Using recycled containers makes this method eco-friendly and cost-effective, perfect for urban gardening.


Step 4: Soil Preparation

Chayote prefers well-draining, fertile soil with good organic content.

Recommended soil mix:

  • 40% garden soil or topsoil
  • 30% compost or cow dung manure
  • 20% sand (for drainage)
  • 10% coco peat or peat moss (for moisture retention)

Mix thoroughly and fill your container, leaving 2–3 inches from the top.

Pro Tip: Add a handful of bone meal or vermicompost to encourage strong root and vine growth.


Step 5: Planting the Chayote

Once your container and soil are ready, it’s time to plant.

Steps for planting:

  1. Place the chayote fruit with the broader end facing down in the soil.
  2. Cover lightly with soil — about half of the fruit should be buried.
  3. Water gently until the soil is moist.
  4. Place the container in a sunny, sheltered spot where the plant will get 6–8 hours of sunlight daily.

Within 1–2 weeks, you’ll notice roots and shoots emerging, signaling that the plant is establishing itself.


Step 6: Watering and Moisture Management

Chayote loves consistent moisture, but too much water can cause rot.

Watering tips:

  • Water when the top 1–2 inches of soil feel dry.
  • During hot months, water 2–3 times per week.
  • Mulch with straw, dry leaves, or grass clippings to retain soil moisture.
  • Avoid overwatering the fruit, especially during early rooting.

Proper watering ensures healthy root development and vigorous vine growth.


Step 7: Supporting Vine Growth

Chayote is a climbing vine that requires support to maximize fruiting and productivity.

Support options:

  • Wooden trellis or bamboo stakes
  • Wire mesh or netting
  • Existing walls or fences

Pro Tip: As the vine grows, gently tie it to the support with soft ties to avoid breaking. A well-supported vine can grow up to 20 feet or more, producing dozens of fruits.


Step 8: Fertilization and Nutrient Care

Chayote is a fast-growing plant and benefits from regular feeding:

Fertilization tips:

  • Every 3–4 weeks: Add compost or organic manure around the base
  • During flowering and fruiting: Apply potassium-rich fertilizer (wood ash or banana peel powder)
  • Avoid excess nitrogen — it promotes leafy growth but reduces fruit set

A nutrient-rich soil will encourage strong vines and larger, healthier fruits.


Step 9: Flowering and Fruit Development

Chayote produces small greenish-white flowers, usually appearing 2–3 months after planting.

  • Flowers are followed by small fruits that gradually grow larger.
  • Regular watering and nutrient supply are crucial during this phase.
  • Check for pests such as aphids or whiteflies and manage organically using neem oil or soapy water.

A single vine can produce 10–20 fruits or more, depending on care and growing conditions.


Step 10: Harvesting Chayote

Chayote is generally ready to harvest 4–6 months after planting when the fruit reaches the desired size and is firm.

Harvesting tips:

  • Use scissors or a knife to cut the fruit from the vine — avoid pulling.
  • Harvest regularly to encourage continuous production.
  • Store harvested chayote in a cool, dry place; they can last 2–3 weeks.

Homegrown chayote is fresher and sweeter than store-bought produce, making your effort truly worthwhile.


Step 11: Advantages of This Container Gardening Method

This method of growing chayote in recycled buckets or containers is practical and beginner-friendly:

Cost-effective: No need to buy expensive pots or seeds
Space-efficient: Ideal for balconies, rooftops, or small yards
High productivity: Proper care can produce a full vine of fruits
Eco-friendly: Recycles materials while producing food
Beginner-friendly: Minimal tools and effort required

This approach proves that urban gardening doesn’t need fancy tools or large space — just ingenuity and consistent care.


Step 12: Tips for Maximum Yield

  • Choose a sunny spot — chayote loves sunlight.
  • Support vines properly to avoid breakage and allow better fruit exposure.
  • Fertilize regularly with organic nutrients.
  • Mulch to retain moisture and suppress weeds.
  • Monitor for pests and diseases; neem oil sprays are highly effective.
  • Harvest fruits regularly to encourage continuous flowering.

With these tips, your container-grown chayote can be healthy, productive, and abundant.


Step 13: Growing Chayote Year-Round

Chayote can grow almost year-round in tropical and subtropical climates.

  • In colder regions, move containers indoors or use a greenhouse setup.
  • Start new fruits every few months to maintain continuous production.
  • Rotate containers if growing multiple vines to ensure even sunlight.

Even beginners can enjoy a steady supply of fresh chayote with proper care and timing.


Step 14: Cooking and Using Homegrown Chayote

Homegrown chayote is versatile and nutritious:

Use in stir-fries or sautéed vegetables
Add to fresh salads
Cook in curries, soups, or stews
Use young leaves in soups or as greens

Freshly harvested chayote tastes sweeter and has a better texture than store-bought produce.


Conclusion: Grow Chayote Easily and Sustainably

The viral video “Chayote seeds? old paint bucket? Grow Chayote Like This Instead!” shows that you don’t need a garden or expensive tools to grow this amazing vegetable.

By following these steps — selecting a healthy fruit, planting in a simple container, providing support, watering, fertilizing, and caring for the vine — you can grow chayote at home with high productivity.

This method is perfect for beginners, urban gardeners, or anyone looking to enjoy fresh, homegrown vegetables sustainably. With minimal effort, patience, and a little creativity, your old paint bucket can become the start of a flourishing chayote vine that feeds your family for months.

Start today — your first homegrown chayote is just a seed away!

Amazing Mango Tree Propagation: Step-by-Step Guide to Grow Your Own Mango Tree at Home

Amazing Mango Tree Propagation: Step-by-Step Guide to Grow Your Own Mango Tree at Home

Mangoes — the king of fruits — are loved for their sweet, juicy, and aromatic flavor. Imagine enjoying mangoes from your very own tree, grown right at home! The viral YouTube video “Amazing Mango Tree Propagation: Step-by-Step Guide” shows just how simple it can be to propagate a mango tree and watch it flourish.

Mango propagation is an exciting process that allows gardeners to grow healthy, high-yield trees using seeds, grafting, or air layering. Even beginners can follow this step-by-step method to get a strong start for a fruit-bearing tree.

In this guide, we’ll cover everything from selecting the right mango, preparing seeds, propagation techniques, and care tips, giving you the confidence to grow your own mango paradise at home.


Why Propagate Mango Trees at Home?

Growing mango trees at home is not only rewarding but also highly beneficial:

Fresh fruit supply: Enjoy juicy mangoes without relying on the market.
Control over variety: Grow your favorite cultivar at home.
Cost-effective: Propagation from seeds or grafts is cheaper than buying saplings.
Eco-friendly: Supports biodiversity and greening your surroundings.
Educational: A great project for children and beginner gardeners.

Mango trees are also long-living and low-maintenance once established, making them ideal for home gardening enthusiasts.


Step 1: Choosing the Right Mango Fruit

Successful propagation starts with selecting a healthy, ripe mango.

Tips for choosing the best mango:

  • Pick a fruit from a disease-free, high-yielding tree.
  • Ensure the fruit is fully ripe — slightly soft with a sweet aroma.
  • Choose varieties suitable for your region’s climate (Alphonso, Kesar, Himsagar, Dasheri, etc.).

Using a healthy fruit ensures strong, viable seeds, which are essential for robust growth.


Step 2: Extracting and Preparing the Seeds

The mango seed is protected by a hard shell inside the fruit. Here’s how to prepare it:

  1. Cut the mango carefully and remove the pulp.
  2. Wash the pulp thoroughly under running water.
  3. Remove the fibrous husk around the seed without damaging it.
  4. Let the seed dry for 1–2 days in a shaded area.

Pro Tip: Only use seeds that are fully formed, plump, and free from cracks or mold.


Step 3: Choosing a Propagation Method

Mango trees can be propagated in three main ways:

1. Seed Propagation

  • Easiest method for beginners.
  • Plant the cleaned seed directly in soil or in a container.
  • Takes 3–6 years to bear fruit, but ideal for experimentation and learning.

2. Grafting

  • Ensures the new plant produces the same quality fruit as the parent tree.
  • Uses a scion (cutting from a mature tree) grafted onto a rootstock.
  • Fruit-bearing occurs faster — usually within 2–4 years.

3. Air Layering (Marcottage)

  • Produces fruit in 2–3 years.
  • Involves making a small incision in a branch, wrapping it with moist soil or moss, and allowing roots to form before cutting and planting.

For beginners, seed propagation is simple, cost-effective, and fun — so we’ll focus on that.


Step 4: Preparing the Planting Medium

Mango seeds need well-draining, fertile soil to germinate properly.

Ideal soil mix for seed propagation:

  • 50% garden soil or topsoil
  • 30% compost or well-rotted manure
  • 20% coarse sand (for drainage)

Mix thoroughly and fill a pot or container with a depth of at least 12–15 inches to accommodate the seedling roots.


Step 5: Planting the Mango Seed

Planting the seed correctly is crucial for strong germination:

  1. Soak the seed in water for 24 hours to soften the hard shell.
  2. Plant it 1–2 inches deep in the prepared soil.
  3. Cover lightly with soil and water gently.
  4. Place the pot in a warm, shaded spot for 2–3 weeks until germination occurs.

Pro Tip: Keep the soil consistently moist but not soggy. Overwatering can rot the seed.


Step 6: Caring for the Young Seedling

Once germination occurs, the seedling will start growing small green leaves.

Seedling care tips:

  • Sunlight: 4–6 hours of morning sunlight daily. Avoid harsh afternoon sun for young seedlings.
  • Watering: Maintain moderate moisture; allow soil to dry slightly between watering.
  • Fertilizing: Apply diluted organic liquid fertilizer or compost tea once a month.

At this stage, the seedling is delicate, so handle it gently and protect it from pests or strong winds.


Step 7: Transplanting to Larger Pots or Ground

When the seedling reaches 8–12 inches tall:

  1. Choose a larger container (20–30 liters) or a permanent ground location.
  2. Ensure the site receives full sunlight and has well-draining soil.
  3. Dig a hole slightly larger than the root ball, plant the seedling, and water thoroughly.

Mango trees thrive with ample space, so if planting in the ground, maintain at least 10–12 feet between trees.


Step 8: Fertilization for Growth and Fruit

Mango trees are heavy feeders, especially during the first 2–3 years.

Fertilization schedule:

  • Monthly: Use a balanced organic fertilizer (NPK 10:10:10) for young trees.
  • During fruiting: Apply potassium-rich fertilizers like wood ash, banana peel powder, or composted manure.
  • Foliar spray: Use neem extract or compost tea every 2–3 weeks to improve leaf health and reduce pests.

Proper nutrition ensures strong branches, large leaves, and eventually high fruit yield.


Step 9: Pruning and Training the Tree

Pruning helps develop strong structure and better airflow:

  • Remove dead or weak branches regularly.
  • Trim the top to encourage lateral growth.
  • Maintain a single main stem for young trees until they are established.

This reduces pest infestations and encourages more flowers in the long run.


Step 10: Pest and Disease Management

Mango trees are prone to pests like aphids, mealybugs, and caterpillars, and diseases such as powdery mildew.

Organic management tips:

  • Spray neem oil (1 tbsp per liter of water) every 2–3 weeks.
  • Remove infected leaves promptly.
  • Ensure good air circulation around the tree.
  • Use a mix of garlic-chili spray for pests if needed.

Healthy soil and sunlight are the first line of defense against most issues.


Step 11: Flowering and Pollination

Mango trees generally flower in 2–3 years from seed.

  • Male and female flowers appear on the same tree (bisexual).
  • Bees and other pollinators play a major role in fruit set.
  • Hand pollination is possible for better fruit production — gently transfer pollen from male flowers to female flowers using a brush.

Proper care during flowering ensures more flowers convert to fruits.


Step 12: Fruit Development and Harvesting

Once fruits start forming:

  • Monitor for pests and nutrient deficiencies.
  • Ensure regular watering but reduce frequency slightly as fruits mature.
  • Harvest fruits when the skin turns slightly yellow or shows the variety-specific color.

Seed-grown mango trees may take 5–8 years to bear significant fruit, while grafted or air-layered trees can fruit in 2–4 years.


Step 13: Benefits of Propagating Mango Trees at Home

Home-grown mango trees offer:

Fresh, chemical-free fruits
Eco-friendly gardening
Cost savings compared to buying grafted plants
Tropical beauty and shade
Learning experience and personal satisfaction

Watching a tiny seed turn into a fruit-bearing tree is both rewarding and educational.


Step 14: Advanced Tips for Successful Propagation

  • Use dwarf mango varieties for pots or small spaces.
  • Mulch around the base to retain moisture and reduce weeds.
  • Rotate containers if growing indoors for even sunlight exposure.
  • Thin flowers or fruits if overcrowded — encourages bigger, healthier fruits.
  • Regularly inspect roots in containers for signs of crowding; repot if necessary.

Conclusion: Grow Your Own Mango Paradise

Propagating mango trees at home is easier than most people think. With a single ripe fruit, proper seed preparation, and careful nurturing, you can grow a healthy tree that eventually rewards you with sweet, juicy mangoes.

The step-by-step method from “Amazing Mango Tree Propagation: Step-by-Step Guide” ensures beginners can start successfully and eventually enjoy homegrown mangoes year after year.

So next time you enjoy a delicious mango, save those seeds — your tropical fruit paradise is just a seed away!