Secrets for Growing Pumpkins, Melons, and Watermelons: A Complete American Home Gardening Guide

Secrets for Growing Pumpkins, Melons, and Watermelons: A Complete American Home Gardening Guide

Nothing says summer and fall like the sight of lush pumpkins, sweet melons, and juicy watermelons in your backyard. These fruits are staples in American gardens and kitchens, perfect for everything from pies and salads to refreshing summer snacks. But growing them successfully requires more than just planting seeds. With the right techniques, you can maximize yield, improve sweetness, and enjoy a bountiful harvest. Here’s a detailed guide to the secrets of growing pumpkins, melons, and watermelons for American gardeners, whether you have a large backyard, raised beds, or even containers.


Why Growing Pumpkins, Melons, and Watermelons at Home Is Worth It

  1. Unmatched Freshness and Flavor: Homegrown fruits are sweeter, juicier, and more flavorful than store-bought varieties.
  2. Cost Savings: Purchasing these fruits in season can be expensive. Growing your own reduces grocery bills.
  3. Health Benefits: Rich in vitamins, minerals, antioxidants, and fiber.
  4. Sustainable Gardening: Reduce packaging and carbon footprint by growing your own produce.

Homegrown fruits also give you the satisfaction of watching seeds transform into vibrant, edible plants.


Step 1: Choosing the Right Varieties for American Gardens

Selecting varieties suited to your climate and space is crucial:

  • Pumpkins: ‘Sugar Pie’ (small, sweet), ‘Cinderella’ (medium, decorative), ‘Atlantic Giant’ (large, record-breaking).
  • Melons: ‘Cantaloupe,’ ‘Honeydew,’ or ‘Charentais’ are ideal for moderate climates.
  • Watermelons: ‘Sugar Baby’ (compact, early), ‘Crimson Sweet’ (classic, sweet), ‘Jubilee’ (large, high yield).

Pro Tip: Choose disease-resistant varieties if you live in humid areas or regions prone to pests.


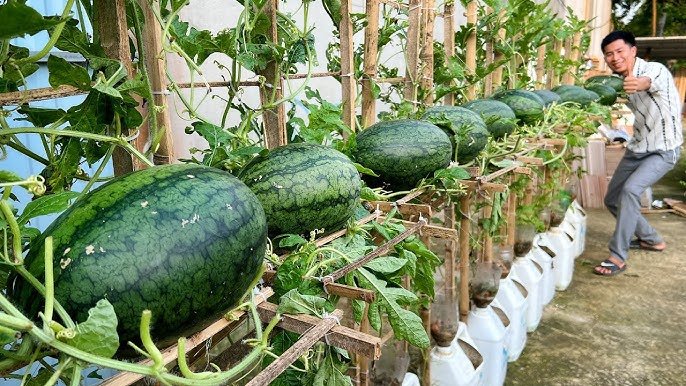
Step 2: Preparing Your Garden or Containers

Whether you have a backyard garden, raised beds, or containers, preparation is key:

  • Soil: Loose, fertile, well-draining soil is ideal. Add compost or aged manure to enrich nutrients.
  • pH Level: Slightly acidic to neutral (6.0–7.0) for optimal growth.
  • Space Requirements:
    • Pumpkins: 3–5 feet between plants.
    • Melons: 2–3 feet for bush varieties; more for sprawling vines.
    • Watermelons: 4–6 feet for large varieties; compact types require less.
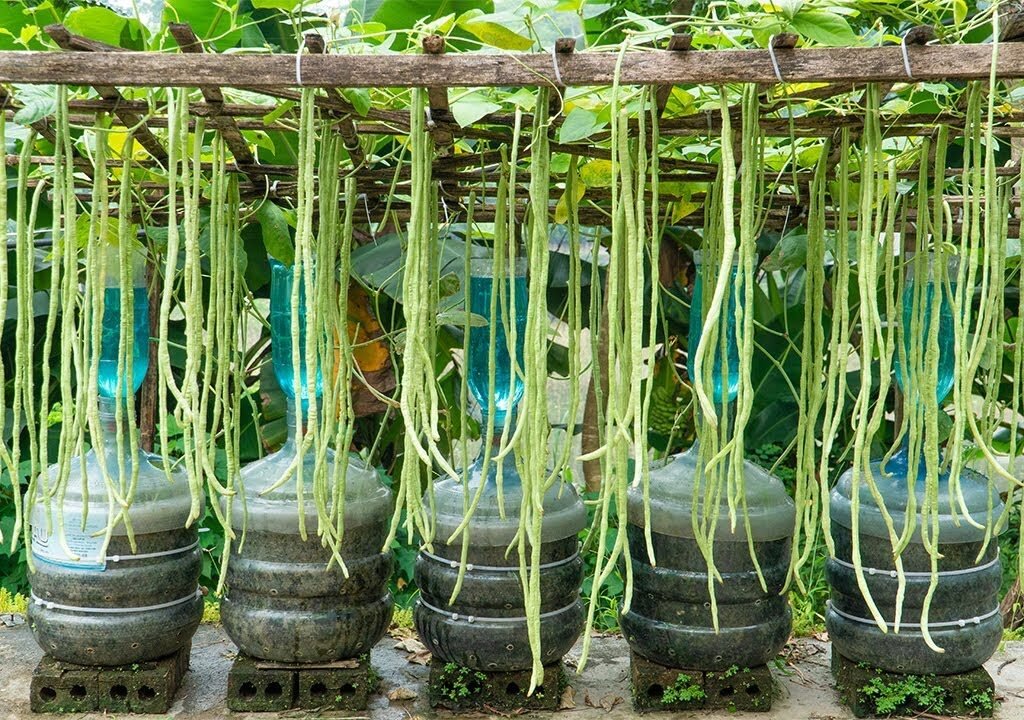
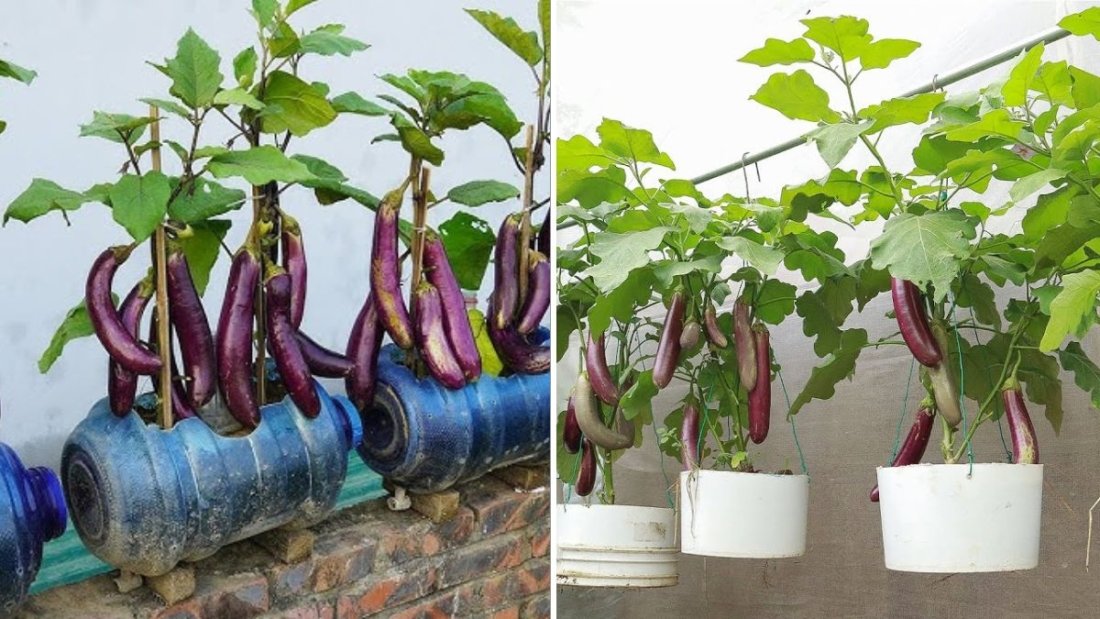
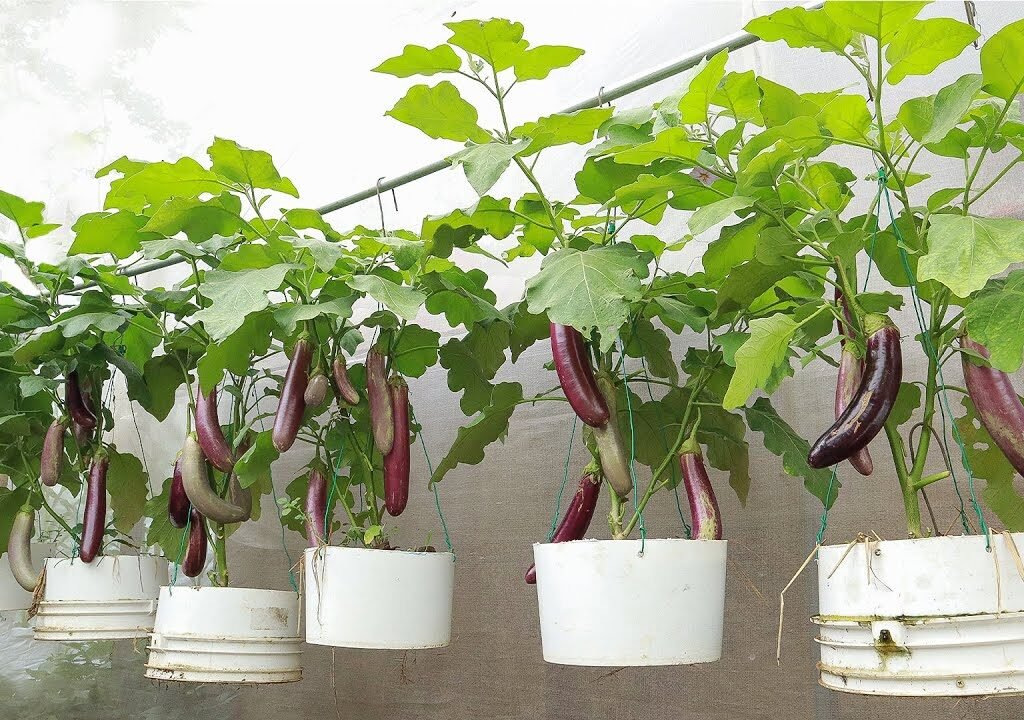
  • Containers: Use large pots or fabric grow bags (at least 18–24 inches deep) for vine crops if space is limited.

Pro Tip: Raised beds improve drainage and make watering easier for sprawling fruits.


Step 3: Planting Techniques

Proper planting sets the stage for a successful harvest:

  1. Timing: Plant after the last frost when soil warms above 60°F (16°C).
  2. Seed Preparation: Soak seeds overnight to improve germination.
  3. Planting Depth: Sow seeds 1–2 inches deep for melons and watermelons, slightly deeper for pumpkins.
  4. Spacing: Allow room for vines to spread or plan vertical growth with trellises for smaller spaces.

Pro Tip: In cooler climates, start seeds indoors 3–4 weeks before transplanting outdoors.


Step 4: Providing Sunlight and Temperature

All three crops thrive in full sun and warm temperatures:

  • Sunlight: At least 6–8 hours of direct sunlight daily.
  • Temperature: Ideal growth occurs at 70–85°F (21–29°C). Cooler nights may slow growth.
  • Microclimate: Mulch around the base to regulate soil temperature and conserve moisture.

Pro Tip: In northern U.S. states, consider using row covers or black plastic mulch to warm the soil faster in spring.


Step 5: Watering and Fertilizing Secrets

Consistent watering and proper nutrition are crucial:

  • Watering: Keep soil evenly moist but not soggy. Deep watering once or twice a week encourages strong roots. Avoid wetting leaves to prevent fungal diseases.
  • Fertilizing:
    • Early stage: Use nitrogen-rich fertilizer for strong vine and leaf growth.
    • Flowering and fruiting: Switch to phosphorus and potassium-rich fertilizers to promote blossoms and sweeter fruits.
  • Organic Options: Compost tea, worm castings, and fish emulsion work beautifully for home gardens.

Pro Tip: Drip irrigation systems help maintain consistent moisture and prevent water-related diseases.


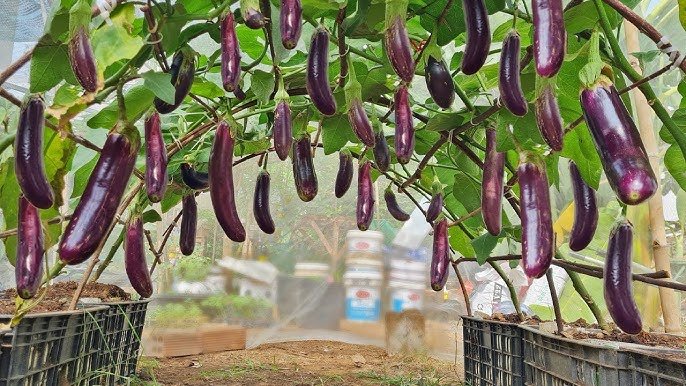
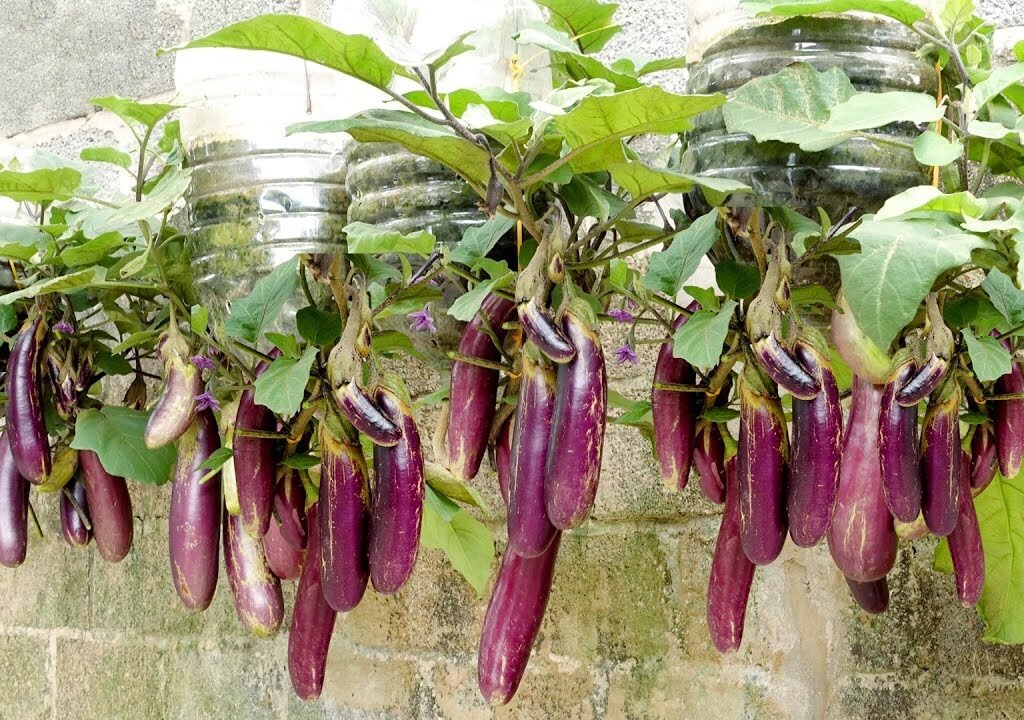
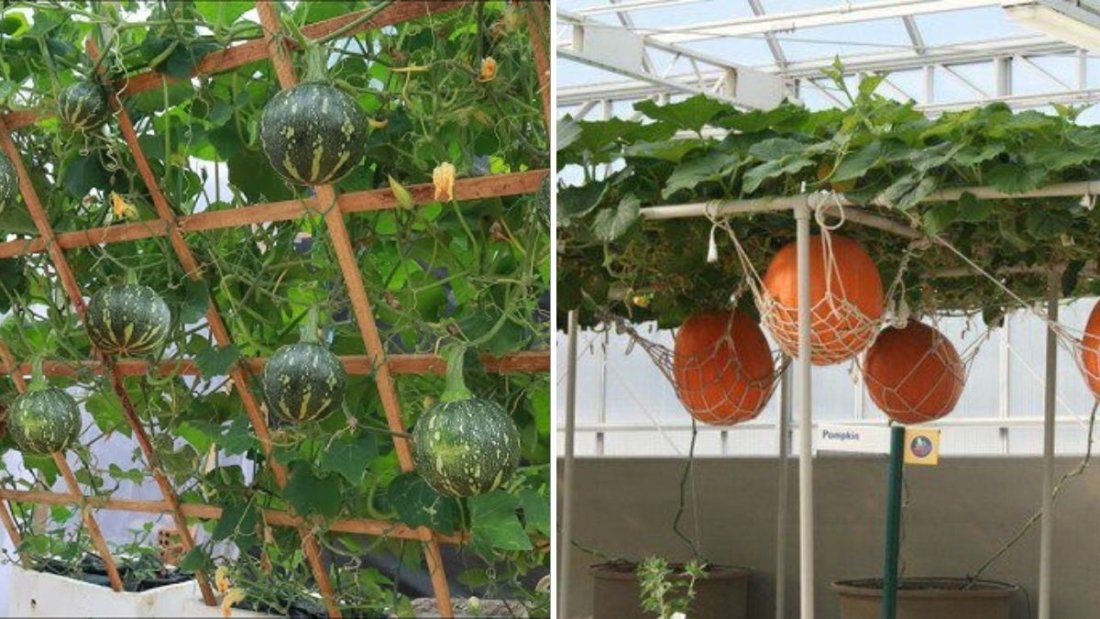
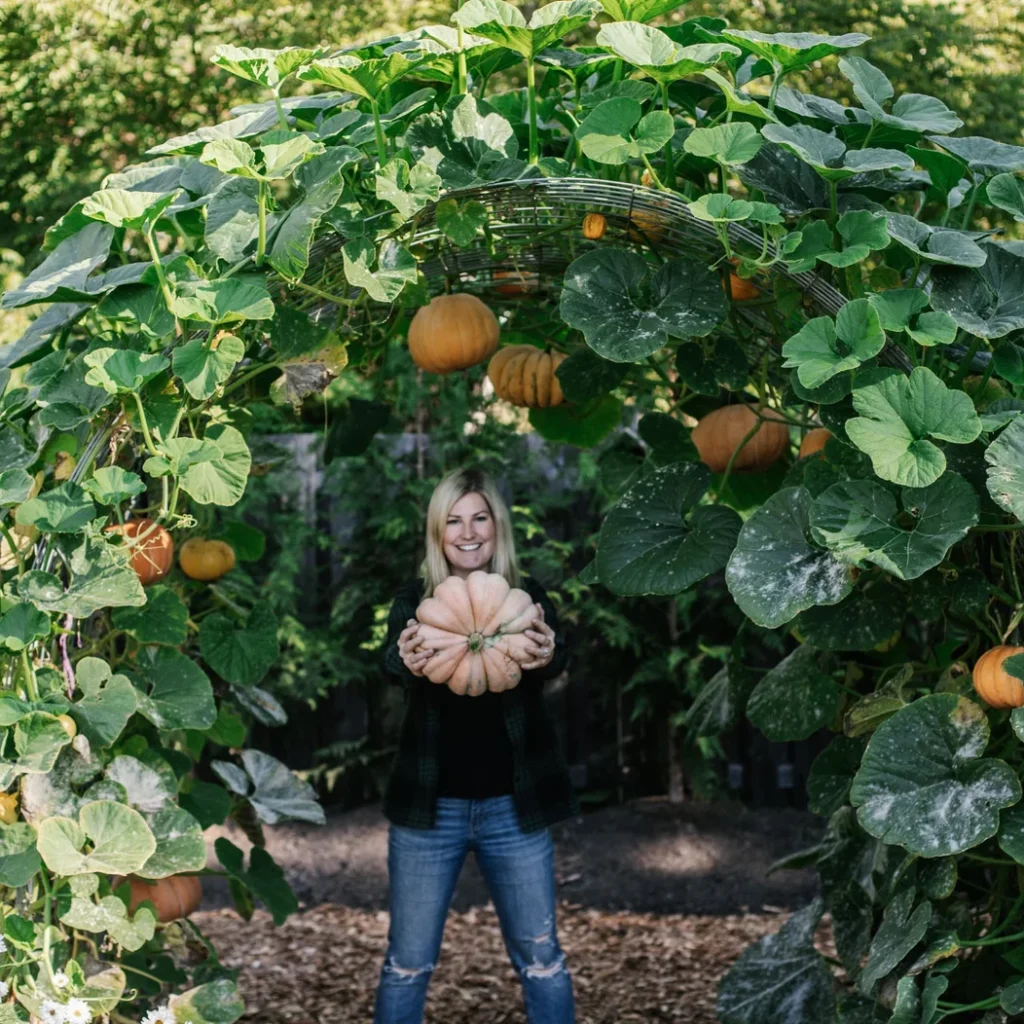
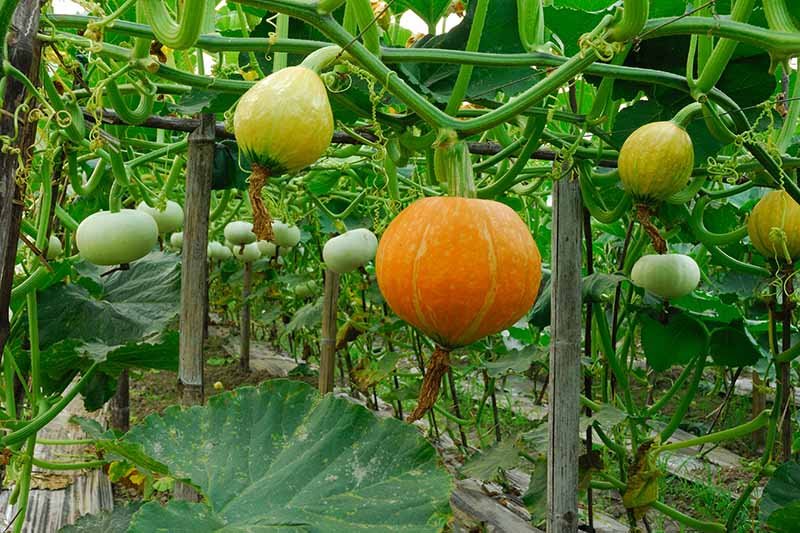
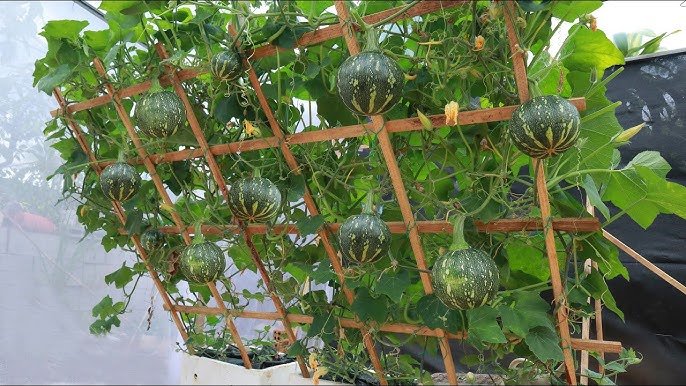
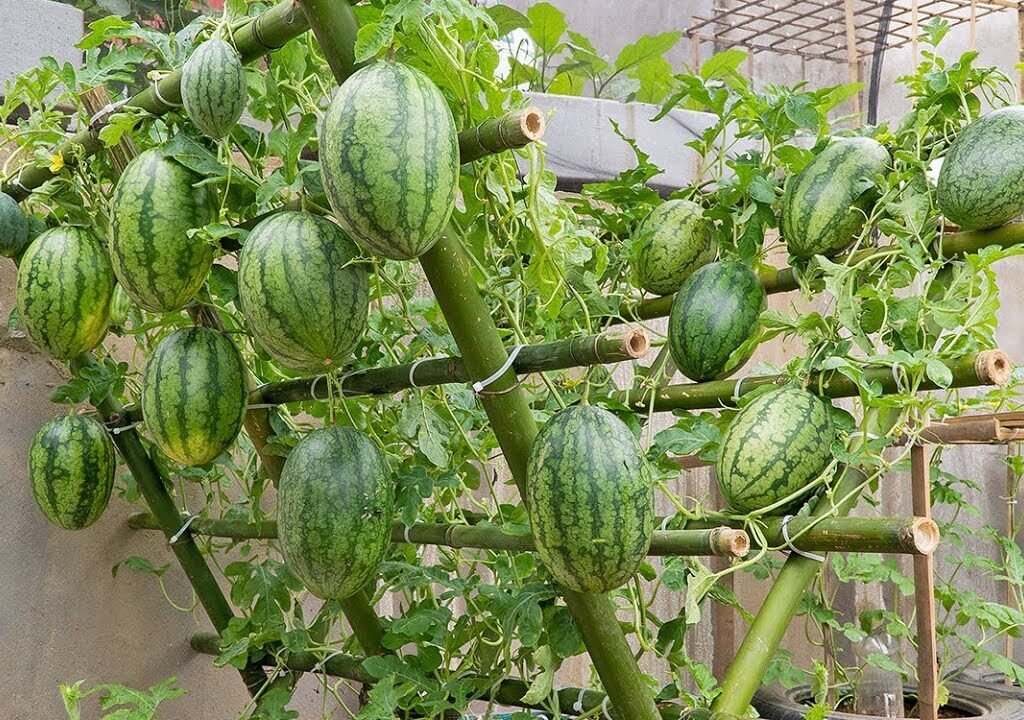
Step 6: Training and Supporting Vines

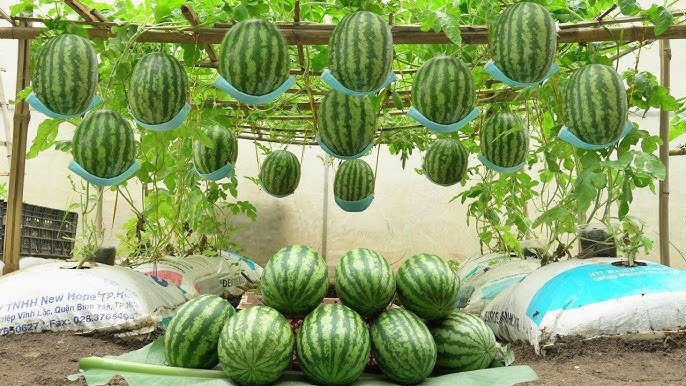
For maximum yield and space efficiency:

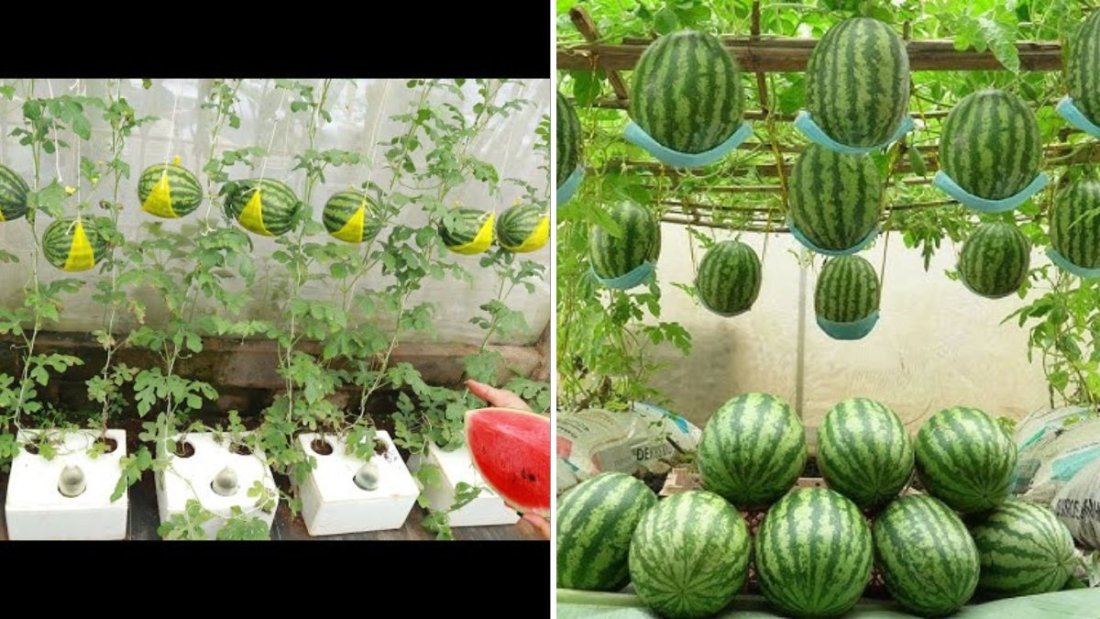
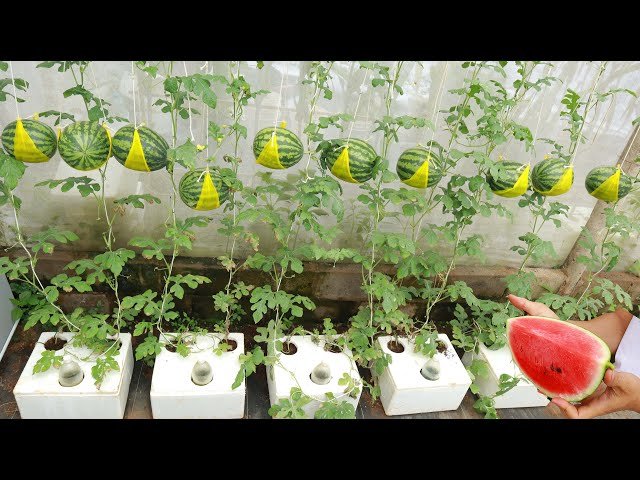
  • Trellising: Ideal for smaller pumpkins and melons. Use netting or slings to support fruits.
  • Pruning: Remove excessive lateral shoots or leaves that block sunlight to fruits.
  • Spacing Control: Train vines along paths or fences to reduce sprawling and make harvesting easier.

Pro Tip: Vertical growth improves airflow, reduces fungal problems, and keeps fruits cleaner.


Step 7: Pollination Tips

Pumpkins, melons, and watermelons require pollination to set fruit:

  • Natural Pollinators: Bees are the best. Encourage them with flowers nearby.
  • Hand Pollination: In areas with few pollinators, use a soft brush to transfer pollen from male to female flowers.
  • Flower Identification: Male flowers appear first and have a thin stem; female flowers have a small swelling (future fruit) at the base.

Pro Tip: Morning pollination yields the best results, as flowers are fresh and fully open.


Step 8: Pest and Disease Management

Even home gardens face pests and diseases:

  • Common Pests: Squash bugs, cucumber beetles, aphids, spider mites. Hand-picking or neem oil sprays work well.
  • Diseases: Powdery mildew, downy mildew, and fusarium wilt can occur in humid climates. Ensure good airflow, avoid overhead watering, and rotate crops annually.

Pro Tip: Mulching and trellising reduce soil contact and prevent fungal infections.


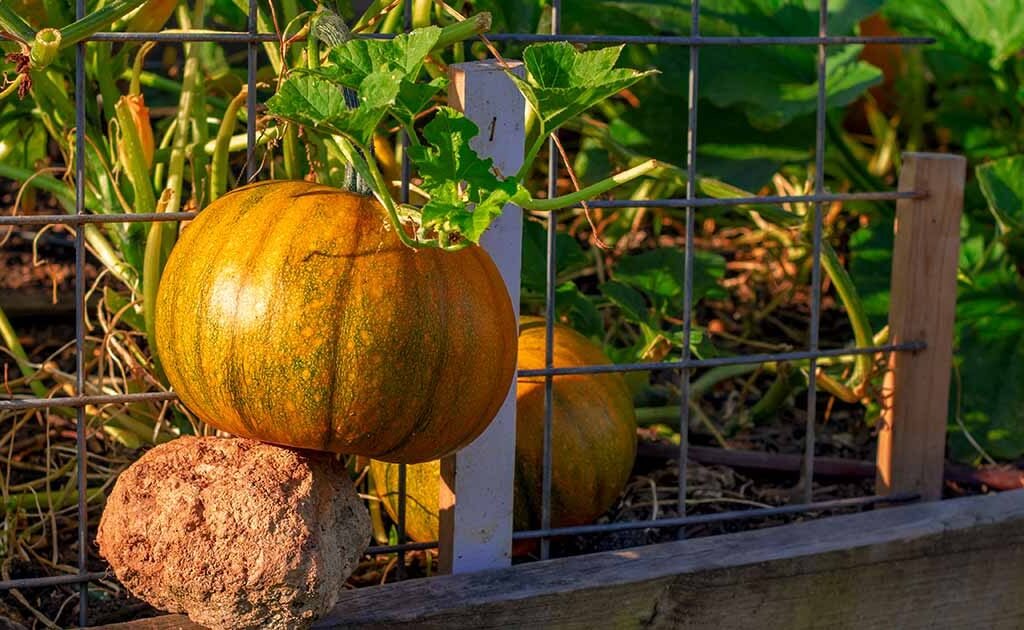
Step 9: Harvesting Secrets

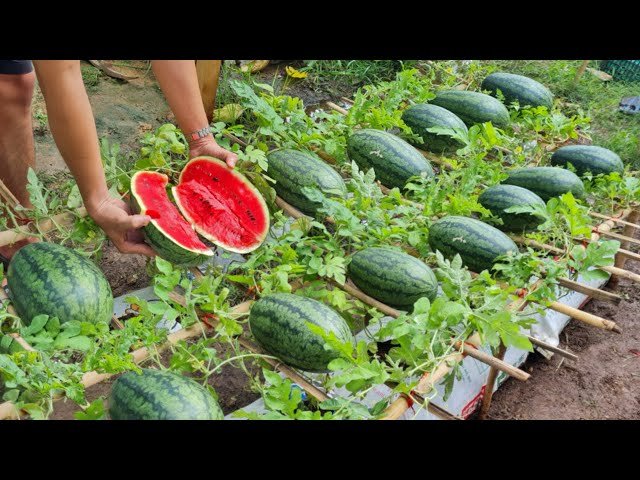
Knowing the signs of maturity ensures maximum sweetness and quality:

  • Pumpkins: Harvest when the skin is hard, color is deep, and the stem starts to dry.
  • Melons: ‘Slip’ method: cantaloupes naturally detach from the vine when ripe.
  • Watermelons: Look for a yellowish ground spot, dull rind, and a hollow sound when tapped.

Pro Tip: Use garden shears to cut fruits instead of pulling to avoid damaging vines.


Step 10: Post-Harvest Handling

Proper handling extends shelf life and preserves sweetness:

  • Curing: Store pumpkins, melons, and watermelons in a warm, dry place for several days.
  • Storage: Pumpkins store well in a cool, dry area for months; melons and watermelons should be refrigerated once ripe.
  • Consumption: Enjoy fresh, roasted, in smoothies, or in classic American desserts like pumpkin pie or fruit salads.

Pro Tips for Sweeter Fruits

  1. Full Sun: Maximum sunlight promotes sugar accumulation.
  2. Moderate Stress: Slightly less water during fruiting can enhance sweetness.
  3. Fertilizer Balance: Potassium-rich fertilizers support fruit flavor and size.
  4. Pruning: Focus energy on fewer, well-developed fruits rather than too many small ones.

Advantages of Growing These Fruits at Home

  1. Fresh, Juicy Fruits: Taste and nutrition far exceed store-bought produce.
  2. High Yield: Proper care produces abundant fruits.
  3. Health and Sustainability: Organic practices reduce chemicals and support the environment.
  4. Educational and Fun: Perfect for family gardening projects.

Final Thoughts

Growing pumpkins, melons, and watermelons at home doesn’t require a huge garden, just the right techniques, space management, and care. By selecting suitable varieties, providing full sun, supporting vines, and ensuring proper pollination and nutrition, American gardeners can enjoy high yields of sweet, juicy fruits.

Start with one plant of each type and gradually expand your home garden. Watch your backyard or balcony transform into a productive, fruit-filled oasis, perfect for family meals, desserts, and fall decorations.

No Garden? No Problem! How to Grow Eggplant at Home for High Yield and Plenty of Fruits

No Garden? No Problem! How to Grow Eggplant at Home for High Yield and Plenty of Fruits

Eggplant, also known as aubergine, is a versatile vegetable loved in American kitchens—from hearty casseroles and stir-fries to classic eggplant Parmesan. But many people believe you need a large garden to grow eggplant successfully. The good news? You can grow eggplant at home, even on a balcony, patio, or in containers, and enjoy abundant fruits and high yields. This guide will walk you through every step to grow eggplants at home, maximizing space, flavor, and productivity.


Why Grow Eggplant at Home

Homegrown eggplants offer numerous advantages for American gardeners:

  1. Freshness and Flavor: Store-bought eggplants often lose flavor after long storage. Homegrown fruits are sweeter, juicier, and fresher.
  2. Space Efficiency: You don’t need a garden—container gardening and vertical techniques work beautifully.
  3. High Yield Potential: With proper care, eggplants can produce multiple fruits per plant.
  4. Organic and Healthy: Control pests and fertilizers to grow chemical-free, nutrient-rich produce.

Growing eggplant at home is not only convenient but also satisfying, offering a constant supply of this nutritious vegetable for your kitchen.


Step 1: Choosing the Right Eggplant Variety

Selecting the right variety is key to success, especially for container or home gardening:

  • Compact Varieties: ‘Fairy Tale,’ ‘Patio Baby,’ or ‘Hansel’ are perfect for small spaces and pots.
  • Medium Varieties: ‘Black Beauty’ and ‘Florida High Bush’ produce larger fruits and do well in containers if supported.
  • High-Yield Varieties: ‘Epic’ and ‘Rosa Bianca’ are known for abundant fruits.

Pro Tip: Choose a variety suited to your local climate. In the U.S., northern states may benefit from faster-maturing varieties due to a shorter growing season.


Step 2: Choosing the Right Container

Eggplants thrive in containers when planted correctly:

  • Container Size: Minimum 12–16 inches deep and 12 inches wide for compact varieties; larger varieties need 18–24 inches in diameter.
  • Material: Plastic, ceramic, or fabric grow bags—ensure they have good drainage holes.
  • Mobility: Containers allow you to move plants to follow sunlight or protect from harsh weather.

Pro Tip: Use a saucer under the container to catch excess water and prevent floor damage if growing indoors or on a balcony.


Step 3: Using the Best Soil

Eggplants are heavy feeders and need nutrient-rich soil:

  • Soil Type: Loamy, well-draining potting mix. Avoid garden soil that may compact or retain too much moisture.
  • Fertilization: Mix compost, worm castings, or slow-release organic fertilizer into the soil before planting.
  • pH Level: Slightly acidic to neutral (6.0–7.0) is ideal.

Pro Tip: Adding perlite or vermiculite improves aeration and drainage, which is crucial for container-grown eggplants.


Step 4: Planting Eggplants

Planting eggplants in containers is simple but requires attention:

  1. Fill your container with soil, leaving 2–3 inches from the rim.
  2. Plant seedlings or start seeds indoors 6–8 weeks before the last frost for best results.
  3. Space one plant per container, or multiple compact varieties if the container is large.
  4. Water lightly after planting to settle the soil.

Pro Tip: If planting from seeds, keep them indoors in a warm, sunny spot or under grow lights until seedlings are strong enough for transplant.


Step 5: Providing Light and Temperature

Eggplants are tropical and love warmth:

  • Sunlight: At least 6–8 hours of direct sunlight per day. For indoor plants, use a south-facing window or grow lights.
  • Temperature: Ideal growth occurs at 70–85°F (21–29°C). Avoid temperatures below 55°F, which can stunt growth.
  • Humidity: Moderate humidity is preferred; avoid overly damp conditions that can lead to fungal problems.

Pro Tip: Move containers to follow the sun or use reflective surfaces to boost light for indoor plants.


Step 6: Watering and Fertilizing

Consistent moisture and nutrition are key to high yields:

  • Watering: Keep soil evenly moist but not soggy. Water deeply at the base, avoiding wetting leaves to prevent disease.
  • Fertilizing: Apply liquid fertilizer every 2–3 weeks or side-dress with compost.
  • Nutrients: Eggplants require nitrogen for foliage and phosphorus/potassium for fruit development.

Pro Tip: Mulch the top of the soil with straw or shredded leaves to retain moisture and reduce watering frequency.


Step 7: Supporting Your Plants

Container-grown eggplants often need support as they produce multiple fruits:

  • Stakes: Bamboo or wooden stakes can help keep stems upright.
  • Cages: Tomato cages work well for supporting multiple branches.
  • Pruning: Remove lower leaves and weak branches to focus energy on main fruit-bearing stems.

Pro Tip: Regular support prevents stems from breaking under the weight of large, high-yield fruits.


Step 8: Pollination

Eggplants have self-pollinating flowers, but pollination may need a little help:

  • Indoor Plants: Gently shake flowers or use a soft brush to transfer pollen.
  • Outdoor Plants: Bees and other pollinators usually handle this naturally.

Pro Tip: Hand pollination can increase fruit set, especially in containers or indoor gardens.


Step 9: Pest and Disease Management

Even at home, eggplants can face challenges:

  • Common Pests: Aphids, spider mites, flea beetles. Organic insecticidal sprays or neem oil can help.
  • Diseases: Fungal issues like verticillium wilt or leaf spot may appear. Ensure good airflow and avoid overhead watering.

Pro Tip: Inspect leaves regularly and remove damaged or yellowing foliage promptly.


Step 10: Harvesting Eggplants

Knowing when to harvest ensures the best flavor and continuous yield:

  • Indicators: Fruits are firm, glossy, and reach the typical size for their variety.
  • Timing: Pick medium-sized fruits first; overripe fruits become bitter.
  • Method: Use a sharp knife or scissors to cut fruit from the plant, leaving a short stem attached.

Pro Tip: Frequent harvesting encourages the plant to produce more fruits throughout the season.


Tips for High Yield and Sweet Fruits

  1. Sun Exposure: Full sun ensures stronger growth and sweeter fruits.
  2. Pruning: Remove excessive flowers or crowded fruits to allow remaining fruits to grow larger.
  3. Consistent Watering: Avoid drought stress—eggplants under mild stress produce sweeter fruits.
  4. Fertilization: Regular feeding with potassium-rich fertilizer enhances fruit size and taste.

Advantages of Growing Eggplants at Home

  1. Space-Saving: Perfect for balconies, patios, and small apartments.
  2. High Productivity: Proper care yields multiple fruits per plant.
  3. Fresh and Flavorful: Homegrown eggplants outperform store-bought varieties.
  4. Year-Round Gardening: Containers allow indoor growing or moving plants to extend the season.

Final Thoughts

You don’t need a traditional garden to grow eggplants successfully. With the right variety, container, soil, sunlight, and care, home gardeners across America can enjoy a high yield of flavorful, fresh eggplants.

Whether you’re cooking a gourmet dinner, preparing a comforting casserole, or experimenting with new recipes, homegrown eggplants provide unmatched freshness and satisfaction. Start small, care consistently, and watch your eggplants thrive—proving that even without a garden, anyone can enjoy the joys of gardening and a bountiful harvest.

How to Grow Pumpkins on a Trellis for More Fruits and Sweeter Harvests: An American Gardening Guide

How to Grow Pumpkins on a Trellis for More Fruits and Sweeter Harvests: An American Gardening Guide

Pumpkins aren’t just for carving jack-o’-lanterns—they’re versatile, nutritious, and a favorite in American kitchens, especially during fall. But growing pumpkins can be tricky: sprawling vines often take up too much space, and fruits sometimes remain small or less sweet. The solution? Growing pumpkins on a trellis. This technique maximizes space, increases airflow, reduces pests, and can even improve fruit sweetness. In this guide, we’ll explore everything American gardeners need to know to grow pumpkins vertically—from planting to harvest.


Why Grow Pumpkins on a Trellis?

Before you start, it’s important to understand why vertical pumpkin gardening is becoming popular:

  1. Space-Saving: Perfect for small yards, patios, and urban gardens.
  2. Better Fruit Quality: Elevating pumpkins improves sunlight exposure, airflow, and reduces rot.
  3. Pest and Disease Control: Keeping fruits off the ground helps prevent pests and fungal infections.
  4. Easier Harvesting: No more crawling through sprawling vines—fruits are easier to reach.

By adopting a trellis system, you can grow more pumpkins in less space and enjoy healthier, sweeter harvests.


Step 1: Choosing the Right Pumpkin Variety

Not all pumpkins are ideal for vertical growth. For American gardeners, consider these types:

  • Small Varieties: ‘Jack Be Little,’ ‘Baby Boo,’ or ‘Sugar Pie’—perfect for trellises and container gardening.
  • Medium Varieties: ‘Cinderella,’ ‘Lumina,’ or ‘Connecticut Field’—work well if supported properly.
  • Large Varieties: ‘Atlantic Giant’ can be grown vertically but requires strong support slings for heavy fruits.

Pro Tip: Choose a variety suited to your local climate and intended use (cooking, decorating, or both).


Step 2: Preparing Your Trellis

A sturdy trellis is essential for vertical pumpkin growth:

  • Materials: Wood, metal, or heavy-duty plastic.
  • Height: At least 6–8 feet tall for medium pumpkins. Taller for giant varieties.
  • Structure: A-frame or vertical lattice designs are popular.
  • Support: Ensure the trellis is anchored securely to withstand strong winds and the weight of pumpkins.

Pro Tip: For heavier fruits, plan to use support slings made from cloth or netting to cradle each pumpkin.


Step 3: Preparing the Soil

Pumpkins are heavy feeders and need rich, fertile soil:

  • Soil Type: Loamy, well-draining soil is best.
  • pH Level: Slightly acidic to neutral (6.0–7.0).
  • Fertilization: Mix in compost, aged manure, or organic fertilizer before planting.
  • Raised Beds: Ideal for trellis pumpkins, improving drainage and root development.

Pro Tip: Mulch around the base to retain moisture and regulate soil temperature.


Step 4: Planting Pumpkins

Planting properly ensures vigorous growth:

  1. Start seeds directly in the garden after the last frost or start indoors 2–4 weeks earlier for shorter seasons.
  2. Plant seeds 1 inch deep in rich soil at the base of the trellis.
  3. Space seeds 12–18 inches apart to allow sufficient airflow and vine growth.

Pro Tip: If growing indoors first, transplant seedlings carefully to avoid root shock.


Step 5: Training Vines on the Trellis

Vertical gardening requires consistent training:

  • Initial Growth: Guide the main vine up the trellis once it reaches 12–18 inches.
  • Lateral Shoots: Allow secondary vines to grow along the trellis for maximum fruiting.
  • Pinching: Pinch off excessive lateral shoots to focus energy on producing larger, sweeter pumpkins.

Pro Tip: Use soft ties or garden twine to secure vines without damaging them.


Step 6: Watering and Fertilizing

Pumpkins need consistent moisture and nutrients:

  • Watering: Deep, weekly watering is ideal. Avoid wetting foliage to reduce fungal risk.
  • Fertilizing: Side-dress with compost or balanced fertilizer every 3–4 weeks.
  • Nitrogen Management: Use higher nitrogen early for vine growth; switch to potassium and phosphorus as flowers appear to encourage fruit development.

Pro Tip: Drip irrigation or soaker hoses reduce leaf wetness and disease risk.


Step 7: Pollination

Pumpkin flowers require pollination to set fruit:

  • Bees: Native bees and honeybees are excellent natural pollinators.
  • Hand Pollination: For trellised pumpkins in areas with fewer pollinators, use a small paintbrush to transfer pollen from male flowers to female flowers.
  • Flower Identification: Male flowers are thin and hollow; female flowers have a small fruit at the base.

Pro Tip: Morning pollination yields the best results since flowers are fresh and open.


Step 8: Supporting Fruits

For vertical pumpkin gardening, fruit support is critical:

  • Slings: Use cloth, old t-shirts, or mesh bags to cradle pumpkins.
  • Tying: Attach slings to the trellis, ensuring the fruit hangs comfortably without strain.
  • Weight Management: Support is especially important for medium to large pumpkins; small varieties often require minimal support.

Pro Tip: Check slings regularly to avoid rubbing or cutting into the pumpkin skin.


Step 9: Pest and Disease Management

Trellised pumpkins face fewer issues, but vigilance is key:

  • Common Pests: Squash bugs, aphids, cucumber beetles.
  • Organic Solutions: Neem oil, insecticidal soap, and hand-picking pests are effective.
  • Diseases: Powdery mildew or downy mildew may occur in humid conditions. Improve airflow and avoid overhead watering to reduce risk.

Pro Tip: Rotate crops annually to prevent soil-borne diseases.


Step 10: Harvesting Pumpkins

Harvest timing impacts both flavor and sweetness:

  • Indicators: The skin is hard, color is vibrant, and the vine begins to yellow and dry.
  • Cutting: Use garden shears or a sharp knife to cut pumpkins from the vine, leaving a few inches of stem attached.
  • Curing: Cure pumpkins in a warm, dry area for 7–10 days to enhance sweetness and storage life.

Pro Tip: Handle fruits gently to avoid bruising, which can shorten shelf life.


Tips for Sweeter Pumpkins

  • Ensure full sun exposure—at least 6–8 hours per day.
  • Avoid overwatering once fruits form; moderate stress encourages sugar accumulation.
  • Regular fertilization with potassium-rich fertilizers supports fruit development and sweetness.
  • Remove excess flowers to focus energy on fewer, higher-quality fruits.

Benefits of Trellis Pumpkins for American Gardeners

  1. Space Efficiency: Ideal for urban gardens, patios, and small backyards.
  2. Improved Yield: Vertical growth allows more fruits in the same footprint.
  3. Healthier Plants: Better airflow reduces disease and pest pressure.
  4. Aesthetic Appeal: Trellised vines create a beautiful, edible vertical garden.

Final Thoughts

Growing pumpkins on a trellis is a game-changer for American gardeners. It maximizes space, produces more fruits, and improves sweetness while reducing disease and pest problems. Whether you’re growing small decorative pumpkins for Halloween or large varieties for cooking, a trellis system is both practical and rewarding.

Start with the right variety, train your vines carefully, and support your fruits properly—and you’ll enjoy a bountiful, healthy, and sweet pumpkin harvest right from your backyard or patio

How to Grow Garlic by Planting the Base: A Quick and Easy American Gardening Guide

How to Grow Garlic by Planting the Base: A Quick and Easy American Gardening Guide

Garlic isn’t just a kitchen staple—it’s a superfood with numerous health benefits, including boosting immunity, reducing blood pressure, and adding robust flavor to your favorite dishes. If you’ve ever wanted to grow garlic at home, planting it from the base (clove) is one of the easiest and most productive methods. This step-by-step guide will show American gardeners how to grow garlic in your backyard or even in containers, from planting to harvest.


Why Grow Garlic at Home?

Before jumping into the planting process, let’s explore why homegrown garlic is worth your time:

  1. Freshness and Flavor: Store-bought garlic often lacks flavor compared to fresh, homegrown bulbs.
  2. Cost-Effective: One bulb can provide multiple cloves for planting, yielding months of harvest.
  3. Easy to Grow: Garlic is hardy, low-maintenance, and adapts well to American climates.
  4. Health Benefits: Rich in antioxidants and anti-inflammatory compounds.

Growing garlic in your garden or in pots allows you to enjoy this flavorful powerhouse without relying on grocery store varieties.


Step 1: Choosing the Right Garlic

Selecting the right garlic variety is essential for successful growth in the U.S.:

  • Hardneck Varieties: Thrive in cooler climates (Northern U.S.), produce scapes (edible flower stems), and have complex flavors. Examples: Rocambole, Purple Stripe.
  • Softneck Varieties: Better for warmer climates (Southern U.S.), store longer, and have milder flavor. Examples: Artichoke, Silverskin.

Pro Tip: Purchase garlic from local nurseries or certified seed garlic. Avoid grocery store garlic—it may carry diseases or be treated to prevent sprouting.


Step 2: Preparing the Garlic Cloves

Garlic is grown from cloves, not seeds. Here’s how to prepare them:

  1. Break the bulb into individual cloves, keeping the papery skin intact.
  2. Select the largest, healthiest cloves for planting—they produce the biggest bulbs.
  3. Allow the cloves to dry for a day or two before planting to reduce the risk of rot.

Pro Tip: Keep the pointed end up and the flat root end down when planting.


Step 3: Choosing the Right Location

Garlic grows best in areas with full sun and well-drained soil:

  • Sunlight: At least 6–8 hours of direct sunlight daily.
  • Soil: Loose, fertile, and slightly acidic to neutral (pH 6.0–7.0).
  • Drainage: Avoid areas where water pools—garlic roots rot in soggy soil.

For Americans with limited space, garlic grows well in raised beds or containers. Choose a pot at least 12 inches deep to accommodate bulb growth.


Step 4: Planting Garlic

Planting garlic by the base is straightforward:

  1. Dig holes 2 inches deep and 4–6 inches apart for each clove.
  2. Place the clove in the hole with the pointed tip facing up.
  3. Cover with soil and gently pat down.
  4. Water lightly after planting to settle the soil.

Pro Tip: Mulching with straw or leaves helps retain moisture, regulate soil temperature, and suppress weeds.


Step 5: Watering and Fertilizing

Garlic requires consistent care for optimal growth:

  • Watering: Keep soil evenly moist, especially during root development and bulb formation. Avoid overwatering.
  • Fertilizing: Garlic benefits from nitrogen-rich fertilizer in early growth and balanced fertilizer later in the season.
  • Organic Options: Compost, worm castings, or fish emulsion are excellent for home gardens.

Pro Tip: Reduce watering a few weeks before harvest to prevent bulb rot.


Step 6: Caring for Your Garlic

Beyond watering and fertilizing, proper care ensures a healthy garlic harvest:

  • Weeding: Keep the garlic bed weed-free to reduce competition for nutrients.
  • Pest Control: Watch for onion maggots, thrips, or aphids. Neem oil or insecticidal soap works well.
  • Scape Removal: For hardneck varieties, remove flower stems (scapes) to encourage larger bulb growth.

Pro Tip: Garlic grows slowly—patience is key. Leaves will grow first, followed by bulb formation.


Step 7: Recognizing When Garlic Is Ready to Harvest

Timing is crucial for maximum flavor and storage life:

  • Indicators: Garlic is ready when the lower leaves start turning brown while upper leaves remain green.
  • Timing in the U.S.: Typically, garlic planted in fall is harvested the following summer. Softneck garlic may take slightly longer in warmer regions.
  • Harvest Method: Loosen the soil with a garden fork and gently lift the bulbs. Avoid pulling forcefully to prevent damage.

Pro Tip: Harvest garlic on a dry, sunny day if possible. Wet soil increases the risk of rot.


Step 8: Curing and Storing Garlic

Proper curing enhances flavor and storage longevity:

  1. Brush off excess soil (do not wash).
  2. Tie bulbs together and hang in a cool, dry, and well-ventilated area.
  3. Cure for 2–4 weeks until skins are papery and roots are dry.

Storage Tips:

  • Softneck garlic stores up to 9 months in a cool, dry place.
  • Hardneck garlic stores 6–8 months.
  • Avoid refrigeration; moisture can trigger sprouting.

Pro Tip: Save a few cloves from the best bulbs for next year’s planting.


Step 9: Using Your Homegrown Garlic

Fresh garlic elevates both flavor and nutrition in American kitchens:

  • Cooking: Roast, sauté, or add to soups, stews, and marinades.
  • Raw Use: Minced garlic adds a punch to salad dressings, salsas, and dips.
  • Health Remedies: Garlic tea or raw garlic supports immune health.

Pro Tip: Homegrown garlic is milder and sweeter than store-bought varieties, perfect for fresh American dishes.


Troubleshooting Common Issues

Even experienced gardeners encounter problems. Here’s how to handle common garlic challenges:

ProblemSolution
Yellow leavesCould indicate nitrogen deficiency or overwatering. Adjust fertilization and drainage.
Small bulbsEnsure cloves are large and soil is rich in nutrients.
PestsRemove affected leaves and apply neem oil or organic insecticidal spray.
Rotting bulbsImprove drainage and reduce watering frequency.

Why Planting Garlic by the Base Works Best

Planting garlic by the base is popular for good reasons:

  • Maximizes Bulb Growth: Each clove grows into a full bulb.
  • Easy to Manage: Requires minimal tools and space.
  • Low Maintenance: Once planted, garlic needs occasional watering, fertilization, and care.

American gardeners can enjoy the benefits of homegrown garlic without large garden plots or complicated methods.


Final Thoughts

Growing garlic at home from the base is quick, easy, and highly rewarding. By choosing the right variety, preparing healthy cloves, planting properly, and providing consistent care, you can enjoy fresh, flavorful garlic in your cooking year-round.

Whether you live in a small apartment with a sunny windowsill or have a backyard garden in the Midwest, garlic is versatile and forgiving. Start planting today, and experience the satisfaction of harvesting your very own organic garlic bulbs.

Fresh, homegrown garlic isn’t just an ingredient—it’s a garden victory on your kitchen counter.


How to Grow Ginger in a Pot from Planting to Harvest: A Complete American Home Gardening Guide

How to Grow Ginger in a Pot from Planting to Harvest: A Complete American Home Gardening Guide

Ginger isn’t just a flavorful addition to your kitchen—it’s a powerhouse of health benefits, from boosting immunity to aiding digestion. If you’ve ever wanted fresh, homegrown ginger but don’t have a large garden, growing it in a pot is a perfect solution. This guide will walk you through how to grow ginger in a pot successfully, from planting to harvesting, tailored for American home gardeners.


Why Grow Ginger in a Pot?

Before diving into the steps, let’s explore why container gardening is ideal for ginger:

  1. Limited Space Friendly: Perfect for apartments, patios, or small yards.
  2. Climate Control: Ginger thrives in warm, humid conditions. Growing in a pot allows you to move it indoors during cooler months.
  3. Pest and Disease Management: Potted plants are easier to monitor and protect.
  4. Year-Round Harvest: With proper care, you can grow and harvest fresh ginger throughout the year.

Step 1: Choosing the Right Ginger Rhizome

The first step is selecting a healthy ginger root (rhizome). For American gardeners:

  • Look for organic, plump, and firm rhizomes at local nurseries or farmers’ markets.
  • Ensure there are at least 2–3 “eyes” or growth buds on the rhizome.
  • Avoid soft or shriveled roots—they may not sprout.

Pro Tip: Soaking the ginger in warm water overnight before planting can stimulate growth.


Step 2: Selecting the Perfect Pot

Ginger grows horizontally, so wide, shallow pots are ideal. Consider:

  • Material: Terracotta or ceramic pots allow good drainage. Plastic pots retain moisture, which is okay if you monitor watering carefully.
  • Size: A pot at least 12 inches wide and 8 inches deep will support a healthy rhizome.
  • Drainage: Ensure there are drainage holes to prevent waterlogging, which can rot the root.

Step 3: Using the Right Soil

Ginger prefers loose, rich, and well-draining soil. Here’s what works best:

  • A mix of 2 parts potting soil + 1 part compost + 1 part sand or perlite
  • pH level: Slightly acidic to neutral (6.0–6.5)
  • Avoid heavy clay soils—they retain too much water and can rot the root.

Pro Tip: Adding a slow-release organic fertilizer can give your ginger a steady nutrient supply.


Step 4: Planting Your Ginger

Planting ginger is simple but requires patience:

  1. Cut the rhizome into pieces, each with at least one eye.
  2. Allow the cut pieces to dry for a day to prevent rotting.
  3. Fill your pot with soil, leaving 2–3 inches of space from the top.
  4. Plant the rhizome 1–2 inches deep, buds facing up.
  5. Water lightly after planting.

Pro Tip: Plant ginger in late winter or early spring for the best growth cycle in most U.S. climates.


Step 5: Providing Optimal Light and Temperature

Ginger is tropical, so light and warmth are crucial:

  • Light: Bright, indirect sunlight. A south-facing window is perfect.
  • Temperature: Ideal growth occurs at 75–85°F (24–29°C).
  • Humidity: Ginger loves humidity. Mist the plant regularly or place the pot on a tray with water and pebbles.

Pro Tip: In colder climates, consider indoor grow lights during winter months.


Step 6: Watering Your Potted Ginger

Watering is key to healthy growth:

  • Keep the soil consistently moist but not soggy.
  • Reduce watering slightly in winter when growth slows.
  • Avoid waterlogging—ginger roots are prone to rot if overwatered.

Pro Tip: Use a watering can with a fine spout to avoid disturbing the soil.


Step 7: Fertilizing Your Ginger

To grow plump, flavorful rhizomes, regular feeding is essential:

  • Use a balanced liquid fertilizer every 3–4 weeks during the growing season.
  • Organic options like worm castings or compost tea work well.
  • Avoid high-nitrogen fertilizers, which encourage leaves at the expense of root development.

Step 8: Caring for Your Ginger

Beyond watering and fertilizing, proper care includes:

  • Mulching: A 1-inch layer of organic mulch retains moisture and keeps roots cool.
  • Pruning: Trim yellow or dead leaves to encourage new growth.
  • Pest Management: Watch for spider mites or aphids. A mild neem oil spray can keep pests away.

Pro Tip: Ginger grows slowly. Be patient—most rhizomes take 8–10 months to mature.


Step 9: Harvesting Ginger

Harvesting is where the rewards pay off:

  • Ginger can be harvested as early as 4–6 months for “baby ginger,” which is tender and mild.
  • For mature ginger, wait 8–10 months until the leaves start to yellow and die back.
  • Carefully dig around the rhizome and lift it from the soil.
  • Wash off the soil and store in a cool, dry place or refrigerate.

Pro Tip: Leave some rhizome in the soil to regrow for the next season.


Step 10: Using Your Fresh Ginger

Homegrown ginger is more flavorful than store-bought and can be used in:

  • Teas and smoothies
  • Stir-fries and curries
  • Homemade gingerbread or baked goods
  • Natural remedies for colds or digestion

Pro Tip: Slice and freeze extra ginger—it retains flavor and is easy to use in cooking.


Common Issues and How to Solve Them

Even seasoned gardeners encounter problems. Here are tips for common issues:

ProblemSolution
Yellow leavesCould indicate overwatering or poor drainage. Check soil and pot drainage.
Slow growthEnsure sufficient warmth and indirect sunlight; consider adding fertilizer.
PestsUse neem oil or insecticidal soap; isolate infected plants.
Rotting rhizomeAvoid waterlogged soil; plant in well-draining mix.

Final Thoughts

Growing ginger in a pot is rewarding, even for American gardeners with limited space. With the right rhizome, soil, pot, and care, you can enjoy fresh, aromatic ginger right at home. From boosting your culinary creations to supporting your health naturally, homegrown ginger is worth the patience.

Start small, monitor your plant, and enjoy the satisfaction of harvesting your very own ginger—one spicy, fragrant rhizome at a time!

How to Grow Big, Long Beans in Plastic Bottles: A Smart Gardening Hack for Americans

How to Grow Big, Long Beans in Plastic Bottles: A Smart Gardening Hack for Americans

Growing fresh, nutritious beans at home doesn’t require a huge backyard or expensive pots. With a creative, eco-friendly method using plastic bottles, you can grow big, long beans right on your balcony, patio, or small urban garden. This method is perfect for Americans looking to combine sustainability, cost savings, and space efficiency while enjoying homegrown produce. In this article, we’ll walk you through a complete step-by-step guide to planting, nurturing, and harvesting beans that are large, healthy, and flavorful.


Why Grow Beans in Plastic Bottles?

Plastic bottle gardening has become a popular trend in urban agriculture due to its many advantages:

  1. Eco-Friendly: Recycle plastic bottles that would otherwise pollute the environment.
  2. Space-Saving: Ideal for apartments, balconies, and small backyards.
  3. Cost-Effective: No need to purchase expensive pots or raised beds.
  4. Controlled Growth: Bottles help maintain moisture and nutrients, promoting bigger, longer beans.
  5. Beginner-Friendly: Easy to set up and manage, even for first-time gardeners.

This method ensures your beans grow healthy, elongated, and crunchy, perfect for salads, stir-fries, or soups.


What You’ll Need

Before starting, gather these essentials:

  • Used plastic bottles (2-liter soda bottles or larger)
  • Scissors or a sharp knife
  • Potting soil (rich in organic matter)
  • Compost or organic fertilizer
  • Bean seeds (pole beans are ideal for long beans)
  • Watering can or spray bottle
  • Trellis or string support (for climbing beans)

Having these items ready will make planting quick, efficient, and fun.


Step 1: Preparing Your Plastic Bottles

  1. Clean the Bottles: Rinse thoroughly to remove residues.
  2. Cut the Bottles: Slice horizontally about one-third from the bottom. The lower part will hold the soil, and the upper part can act as a mini greenhouse or water reservoir.
  3. Create Drainage Holes: Poke 3-5 holes in the bottom to prevent waterlogging, which can harm bean roots.

This setup ensures healthy root growth and proper drainage, which are essential for long, robust beans.


Step 2: Preparing the Soil

Beans thrive in nutrient-rich, well-drained soil. To prepare the perfect mix:

  • Combine 2 parts potting soil, 1 part compost, and 1 part perlite or sand for aeration.
  • Add organic fertilizer to encourage flowering and pod development.
  • Moisten the soil lightly before planting.

By giving your beans a nutrient-dense base, you maximize the potential for big, long beans.


Step 3: Planting Your Beans

Bean seeds can be planted directly in the bottles for best results:

  • Plant 2-3 seeds per bottle about 1 inch deep.
  • Water lightly to settle the soil.
  • Once seedlings sprout and grow a few inches tall, thin them to one strong plant per bottle to allow space for elongated growth.

Tip: Choose pole bean varieties if you want long, climbing beans. Bush beans grow shorter pods, so selecting the right variety is key.


Step 4: Supporting Your Beans

Long beans are climbing plants, so they need vertical support:

  • Install a small trellis or string system next to the bottles.
  • Gently tie young stems as they grow to guide them upward.
  • Ensure plenty of sunlight reaches all parts of the plant for even growth and maximum bean length.

Proper support prevents plants from breaking under their own weight and encourages straight, long pods.


Step 5: Watering and Fertilizing

Consistent care is crucial:

  • Watering: Keep soil moist but not soggy. Beans dislike waterlogged soil. Water 2-3 times a week, adjusting based on weather.
  • Fertilizing: Use organic fertilizer or compost tea every 3-4 weeks to boost flowering and pod growth.
  • Sunlight: Ensure your bottles receive at least 6 hours of direct sunlight daily.

With proper watering, nutrients, and sunlight, your beans will grow long, healthy, and crunchy.


Step 6: Pest and Disease Management

Beans are generally hardy but can face issues like aphids, spider mites, or fungal infections. Prevent problems naturally:

  • Neem oil or mild soap sprays can deter pests.
  • Companion planting with herbs like basil or parsley repels insects.
  • Proper spacing ensures airflow, reducing fungal risks.
  • Remove damaged leaves promptly to prevent spread.

By maintaining plant health, your beans will thrive and produce high-quality pods all season.


Step 7: Harvesting Your Beans

Timing is key to enjoy big, tender beans:

  • Pods are ready when they are firm, glossy, and 6-12 inches long (depending on the variety).
  • Use a sharp knife or scissors to cut beans from the stem.
  • Harvest regularly to encourage continuous production.

Pro Tip: Don’t wait too long to pick pods—overripe beans become tough and lose their flavor.


Benefits of Plastic Bottle Bean Gardening

  1. Space Optimization: Perfect for small urban spaces or limited garden areas.
  2. Eco-Friendly Gardening: Reuse bottles to reduce waste.
  3. Large, Long Beans: Controlled environment encourages longer pods and more yield.
  4. Low Maintenance: Easy watering, fewer pests, and minimal weeding required.
  5. Year-Round Gardening: With some protection, you can grow beans even in colder months.

This method combines sustainability, efficiency, and practicality, making it perfect for modern American gardeners.


Creative Tips for Bottle Bean Gardening

  • Vertical Garden Walls: Hang multiple bottles in rows for a living wall of beans.
  • Self-Watering System: Use the top half of the bottle as a reservoir to keep soil moist.
  • Companion Plants: Plant herbs or flowers in neighboring bottles to repel pests and boost growth.
  • Rotate Bottles: Turn bottles occasionally to ensure even sunlight distribution for all plants.

These simple tricks maximize yield, bean quality, and visual appeal.


Perfect for American Urban Gardeners

Plastic bottle gardening makes bean cultivation accessible to everyone:

  • Apartment dwellers in cities like New York or Chicago can grow their own food on balconies.
  • Suburban homeowners can save yard space while producing high yields.
  • Eco-conscious Americans can combine gardening and recycling, reducing environmental impact.

Growing beans in bottles also allows families to teach kids about gardening and sustainability.


Conclusion

Planting beans in plastic bottles is a revolutionary, space-saving, and eco-friendly gardening technique. With minimal investment, you can enjoy large, long, crunchy beans that rival farm-fresh produce. By following the steps of bottle preparation, soil mixing, proper planting, support, watering, pest control, and harvesting, you can maximize your yield and flavor.

Whether you have a tiny balcony or a small backyard, this method allows anyone to cultivate fresh, nutritious beans while reusing plastic bottles. Transform your unused bottles into productive, sustainable gardens today and enjoy the taste of homegrown beans all season long.

Revolutionary Way to Grow Eggplant in Used Plastic Bottles: Big, Crunchy Fruits at Home

Revolutionary Way to Grow Eggplant in Used Plastic Bottles: Big, Crunchy Fruits at Home

If you’ve ever dreamt of growing fresh, juicy eggplants right in your backyard or balcony without spending a fortune on gardening tools, you’re in for a treat. A unique and environmentally friendly method using used plastic bottles can transform your small space into a mini eggplant paradise, yielding large, crunchy fruits that taste like they came straight from a farm. In this article, we’ll explore everything from preparation to harvesting, giving you a step-by-step guide to growing eggplants efficiently.


Why Grow Eggplants in Plastic Bottles?

Eggplants are a staple in American kitchens, featuring in dishes from creamy eggplant parmesan to smoky baba ghanoush. Yet, many gardeners struggle with limited space, expensive pots, or poor soil conditions. That’s where plastic bottle gardening comes in:

  1. Eco-Friendly: Reuse bottles that would otherwise pollute landfills.
  2. Space-Saving: Ideal for small patios, balconies, or urban gardens.
  3. Cost-Effective: No need to invest in traditional pots or raised beds.
  4. Controlled Growth: The bottle system helps retain moisture, reduce pests, and ensure consistent soil nutrition.

By following this method, you can grow large, crunchy, and nutrient-rich eggplants with minimal effort.


What You’ll Need

Before getting started, gather the following materials:

  • Used plastic bottles (2-liter soda bottles work best)
  • Scissors or a sharp knife
  • Potting mix (preferably rich in organic matter)
  • Compost or organic fertilizer
  • Eggplant seeds or seedlings
  • Watering can or spray bottle
  • String or hooks (optional, for vertical hanging)

Step 1: Preparing the Bottles

  1. Clean the Bottles: Rinse thoroughly to remove any residual soda or chemical residues.
  2. Cut the Bottle: Slice the bottle horizontally about one-third from the bottom. The bottom part will serve as your planting container, and the top can be used as a protective mini-greenhouse.
  3. Drainage Holes: Poke 3-5 small holes at the base to prevent waterlogging, which can harm eggplant roots.

This simple preparation sets the foundation for healthy root growth and preventing overwatering, which is crucial for crisp, crunchy eggplants.


Step 2: Preparing the Soil

Eggplants thrive in well-drained, nutrient-rich soil. To prepare the mix:

  1. Combine 2 parts potting soil, 1 part compost, and 1 part sand or perlite for aeration.
  2. Add organic fertilizer to promote flowering and fruiting.
  3. Moisten the soil lightly before planting.

By creating a nutrient-dense environment, your eggplants will grow bigger and produce crunchy, firm fruits.


Step 3: Planting Seeds or Seedlings

You have two options: direct seeding or transplanting seedlings.

For Seeds:

  • Plant 2-3 seeds about ½ inch deep in each bottle.
  • Keep soil consistently moist but not waterlogged.
  • Seeds will sprout within 7-14 days.

For Seedlings:

  • Gently remove seedlings from their trays.
  • Plant them in the bottle, ensuring roots are covered and stems are upright.

Tip: Plant one seedling per bottle to allow space for large fruits to develop.


Step 4: Watering and Maintenance

Eggplants need consistent care to thrive.

  • Watering: Keep soil moist, watering 2-3 times a week. Avoid overwatering, as plastic bottles can retain water longer than traditional pots.
  • Sunlight: Place bottles in a location with at least 6-8 hours of sunlight per day. Eggplants love the sun!
  • Fertilizing: Feed with organic fertilizer every 3-4 weeks to encourage flowering and fruiting.

Optional: Use the top half of the bottle as a mini greenhouse to protect seedlings from pests or harsh weather.


Step 5: Supporting the Plants

As eggplants grow, they become heavy with large fruits. To prevent bending or breaking:

  • Use stakes, strings, or trellis systems for vertical support.
  • Tying stems gently with cloth strips prevents damage and improves fruit shape.

With proper support, you’ll notice larger fruits with firm, crunchy textures.


Step 6: Pest and Disease Management

Eggplants are susceptible to aphids, flea beetles, and fungal infections. Prevent problems naturally:

  • Neem oil spray for aphids and other pests.
  • Companion planting with basil, marigold, or mint to repel insects.
  • Proper spacing and pruning to allow airflow, reducing fungal risks.

By maintaining a healthy environment, you’ll ensure consistent harvests throughout the season.


Step 7: Harvesting Your Eggplants

Patience pays off! Depending on the variety, eggplants are ready to harvest 60-90 days after planting. Signs of readiness include:

  • Firm, shiny skin
  • Smooth, dark color (purple varieties)
  • Fruits that resist gentle pressure without bruising

Use a sharp knife or scissors to cut fruits, leaving a small stem to avoid damaging the plant. Harvesting regularly encourages more flowering and fruiting, giving you an abundant supply of crunchy, farm-fresh eggplants.


Benefits of This Method

  1. Year-Round Gardening: With controlled containers, you can grow eggplants in urban apartments, balconies, or small yards regardless of soil quality.
  2. Large Fruits: Proper nutrient management and space in bottles promote larger-than-normal eggplants.
  3. Environmentally Friendly: Repurposing plastic bottles reduces waste and promotes sustainable gardening.
  4. Low Maintenance: Easy watering, minimal weeding, and reduced pest exposure make it ideal for beginner gardeners.

Creative Tips for Bottle Eggplant Gardening

  • Vertical Gardens: Hang bottles using hooks and ropes to maximize space.
  • Multi-Layer Gardens: Stack multiple bottle rows for a living wall of eggplants.
  • Self-Watering System: Use the top half of the bottle as a reservoir to keep soil consistently moist.
  • Companion Herbs: Plant basil or parsley in nearby bottles to enhance flavor and repel pests naturally.

Perfect for American Home Gardeners

This unique method suits urban gardeners across America:

  • Balcony gardeners in New York City can enjoy fresh eggplants without soil beds.
  • Suburban backyard enthusiasts can grow large fruits in limited space.
  • Eco-conscious Americans can recycle plastic bottles while cultivating nutritious produce.

Eggplants grown in bottles are not only crunchy and flavorful but also rewarding for beginners and experts alike.


Conclusion

Growing eggplants in used plastic bottles is a revolutionary, eco-friendly, and space-saving method. From preparing bottles and soil to harvesting large, crunchy fruits, this method makes gardening accessible for everyone. Not only will you enjoy farm-fresh, pesticide-free eggplants, but you’ll also contribute to reducing plastic waste and embracing sustainable gardening practices.

Whether you’re a small-space gardener in an apartment or a backyard enthusiast, this approach promises abundant, delicious, and visually impressive eggplants. Start today, and transform your unused plastic bottles into a thriving home garden. Your taste buds—and the planet—will thank you.


Grow Fresh Mint at Home: Easy Plastic Bottle Water Gardening for Endless Herbs

Grow Fresh Mint at Home: Easy Plastic Bottle Water Gardening for Endless Herbs

Mint is one of the most versatile and aromatic herbs used in American kitchens — from refreshing mojitos and iced teas to savory dishes, desserts, and homemade sauces. Imagine having a constant supply of fresh, vibrant mint leaves right on your kitchen counter or balcony.

The best part? You don’t need a garden or soil-filled pots to grow it. With plastic bottle water gardening, you can cultivate mint quickly, efficiently, and sustainably. This method is ideal for urban gardeners, apartment dwellers, or beginners looking for easy herb-growing solutions.

In this guide, you’ll learn step-by-step how to grow mint in plastic bottles with water at home, including preparation, maintenance, and harvesting, so you can enjoy lush, fragrant mint year-round.


1. Why Grow Mint in Plastic Bottles?

Growing mint in plastic bottles using water (hydroponic style) is a game-changer for small-space gardening.

Benefits of Plastic Bottle Water Gardening:

  • Space-saving: Perfect for balconies, windowsills, and kitchen counters.
  • No soil required: Avoid mess, pests, and soil-borne diseases.
  • Water-efficient: Minimal maintenance; bottles act as mini-reservoirs.
  • Continuous growth: Mint grows fast and can be harvested repeatedly.
  • Beginner-friendly: Requires minimal gardening skills or tools.

This approach ensures fresh, organic mint leaves whenever you need them without the hassle of traditional gardening.


2. Choosing the Right Mint Variety

Mint grows easily, but some varieties thrive better indoors in containers.

Best Mint Varieties for Bottle Gardening:

  • Spearmint: Sweet, mild flavor; perfect for drinks and salads.
  • Peppermint: Strong, cooling taste; great for teas and desserts.
  • Chocolate Mint: Unique aroma; ideal for creative recipes.
  • Apple Mint: Fruity flavor; adds a refreshing twist to dishes.

 Pro Tip: Start with cuttings from garden or store-bought plants for faster results compared to seeds.


3. Materials You’ll Need

Growing mint in bottles is simple and affordable. Here’s what you’ll need:

Materials List:

  • Plastic bottles (1–2 liters)
  • Scissors or sharp knife
  • Mint cuttings (3–5 inches long)
  • Water (preferably filtered or boiled and cooled)
  • Optional: Liquid fertilizer for faster growth
  • Tray or mat to place bottles on

 Tip: Transparent bottles let you monitor root development and water levels easily.


4. Preparing Plastic Bottles

Proper preparation ensures healthy roots and long-lasting growth.

Step-by-Step Preparation:

  1. Cut the top third of the plastic bottle and invert it into the bottom half.
  2. Fill the inverted top section with water for cutting placement or create a small mesh for aeration.
  3. Ensure the bottle is stable on a flat surface and receives indirect sunlight.
  4. Optional: Drill a few tiny holes for better airflow if using a covered bottle system.

 Pro Tip: The inverted top method allows mint cuttings to grow roots efficiently while reducing water stagnation.


5. Preparing Mint Cuttings

Mint grows quickly from cuttings, making it ideal for water gardening.

Step 1: Choose Healthy Cuttings

  • Select fresh, green stems with 3–4 leaves.
  • Avoid woody or damaged stems.

Step 2: Remove Lower Leaves

  • Strip leaves from the bottom 1–2 inches of the stem.
  • Leaves above water level prevent rot.

Step 3: Place in Water

  • Submerge the cut stem in clean water, ensuring only the leafless portion is underwater.
  • Roots typically appear in 7–14 days.

 Pro Tip: Change water every 3–4 days to prevent algae and bacterial growth.


6. Sunlight and Location

Mint requires indirect sunlight to thrive indoors.

Optimal Conditions:

  • Sunlight: 4–6 hours of indirect sunlight daily
  • Temperature: 65–75°F (18–24°C)
  • Placement: Windowsill, balcony, or kitchen counter near a bright window

 Pro Tip: Rotate bottles occasionally for even light exposure and healthy growth.


7. Maintaining Water Levels

Water management is key to keeping mint healthy and fast-growing.

Guidelines:

  • Keep roots fully submerged but not drowning.
  • Replace water every 3–4 days or when it becomes cloudy.
  • Optional: Add a few drops of liquid fertilizer weekly for faster growth.

 Pro Tip: Use filtered or boiled water to prevent chemicals like chlorine from affecting growth.


8. Fertilizing Mint

While mint grows well in water alone, nutrients can boost leaf production.

Fertilizing Tips:

  • Use liquid fertilizer or water-soluble organic nutrients once a week.
  • Avoid over-fertilizing — too much can burn roots.
  • Hydroponic solutions are ideal for strong, aromatic leaves.

 Pro Tip: Organic options like liquid seaweed or diluted compost tea can be safely added to water.


9. Supporting Mint Growth

Mint spreads rapidly and can become bushy.

Tips for Managing Growth:

  • Trim leaves regularly to encourage branching.
  • Remove flowers promptly to focus energy on leaf growth.
  • Use small stakes if stems grow tall in water bottles.

 Pro Tip: Frequent trimming ensures dense, lush growth and prevents legginess.


10. Common Problems and Solutions

Even in water bottles, mint can face some challenges.

ProblemCauseSolution
Yellow leavesNutrient deficiencyAdd diluted liquid fertilizer
Root rotStagnant waterChange water regularly; clean bottle
Weak growthInsufficient sunlightMove to brighter indirect light
Algae in waterSunlight exposureCover water surface or reduce direct light

 Pro Tip: Inspect roots and leaves weekly to catch problems early.


11. Harvesting Mint

Mint is ready to harvest in 3–4 weeks after rooting, depending on the variety.

How to Harvest:

  • Snip top leaves and stems with scissors, leaving the lower leaves for continued growth.
  • Harvest regularly to encourage bushy, healthy plants.
  • Use fresh leaves immediately or store in a small glass of water for short-term freshness.

 Pro Tip: Avoid removing more than 1/3 of the plant at a time to maintain strong growth.


12. Maximizing Mint Yield

  • Use multiple bottles to create a mini indoor herb garden.
  • Trim consistently to encourage branching.
  • Rotate bottles to evenly distribute sunlight.
  • Replace old cuttings with new ones to maintain continuous harvest.

 Pro Tip: Pair mint with basil, oregano, or thyme in small bottle gardens for a full herb collection.


13. Fun Fact: Mint’s Health Benefits

Mint is rich in antioxidants, vitamins, and essential oils. Regular use can aid digestion, relieve headaches, and freshen breath. Growing mint at home ensures organic, chemical-free leaves ready to enhance your meals, teas, and drinks.


14. Conclusion: Effortless, Continuous Mint Gardening

Growing mint in plastic bottles with water is a beginner-friendly, space-saving gardening method. It’s cost-effective, low-maintenance, and highly productive, perfect for indoor or balcony gardening.

With just a few bottles, water, and mint cuttings, you can enjoy lush, aromatic mint leaves year-round. This method not only provides fresh herbs at your fingertips but also promotes sustainable, eco-friendly gardening by reusing plastic bottles.

Start your plastic bottle mint garden today and enjoy the satisfaction of harvesting fresh, vibrant mint — simple, efficient, and endlessly rewarding!

Grow Celery Easily at Home: How Small Plastic Bottles Can Yield Lush, Fresh Vegetables

Grow Celery Easily at Home: How Small Plastic Bottles Can Yield Lush, Fresh Vegetables

Celery is a versatile, nutrient-packed vegetable widely used in American kitchens for soups, salads, juices, and garnishes. Imagine walking into your kitchen and grabbing fresh, crisp celery stalks that you grew yourself — no trips to the grocery store and no pesticides.

The good news? Growing celery at home doesn’t require a large garden. With just a few small plastic bottles, some soil, and basic care, you can cultivate lush, healthy celery plants in a fraction of the space. This method is perfect for urban gardeners, balcony growers, and beginners who want fresh vegetables year-round.

In this guide, we’ll cover everything from choosing celery seeds to planting, caring, and harvesting — all optimized for small-space, container-based gardening.


1. Why Grow Celery in Plastic Bottles?

Plastic bottle gardening is an innovative, space-saving solution for growing vegetables at home. Celery, with its shallow roots and high water needs, is especially suitable for this approach.

Benefits of Growing Celery in Plastic Bottles:

  • Space-efficient: Ideal for apartments, balconies, and small patios.
  • Cost-effective: Reuses plastic bottles, reducing waste.
  • Low-maintenance: Easy to manage and water-efficient.
  • Healthy yields: Control over soil quality ensures lush, flavorful celery.
  • Beginner-friendly: Simple setup with minimal gardening experience required.

Plastic bottles also allow for monitoring water levels and soil moisture, helping celery thrive in a controlled environment.


2. Selecting the Right Celery Variety

Not all celery types are equally suited for bottle gardening. Choosing compact, fast-growing varieties ensures better results in small containers.

Best Celery Varieties for Plastic Bottles:

  • Golden Self-Blanching: Crisp, tender, and mild flavor; perfect for container growth.
  • Tango: Fast-growing and heat-tolerant.
  • Green Utah: Traditional variety, flavorful and sturdy.
  • Baby Celery: Smaller plants, ideal for balcony or indoor containers.

Pro Tip: If your goal is continuous harvest, choose varieties that mature quickly and tolerate container growth.


3. Materials You’ll Need

You don’t need a garden bed to grow celery. Here’s what you’ll need for bottle-based gardening:

Materials List:

  • Small plastic bottles (1–2 liters)
  • Sharp scissors or knife for cutting
  • Potting soil or lightweight container soil mix
  • Organic compost or vermicompost
  • Celery seeds or cuttings
  • Watering can or spray bottle
  • Optional: Tray to catch excess water

Tip: Use transparent bottles to monitor root growth and water levels easily.


4. Preparing Plastic Bottles

Proper preparation is key to healthy celery growth and water efficiency.

Step-by-Step Preparation:

  1. Cut the bottle in half; keep the top inverted to act as the planting container.
  2. Poke 2–4 small drainage holes in the bottle cap.
  3. Fill the top half with soil mixed with compost.
  4. Insert the inverted top half into the bottom half to act as a self-watering reservoir.
  5. Place bottles in a sunny or partially sunny location, ensuring at least 4–6 hours of light daily.

Pro Tip: The self-watering system reduces the need for constant attention, perfect for busy gardeners.


5. Preparing the Soil Mix

Celery thrives in nutrient-rich, well-draining soil.

Ideal Soil Mix:

  • 50% potting soil
  • 30% organic compost
  • 20% perlite or sand for drainage

Soil pH: 6.0–7.0 (neutral to slightly acidic)

Pro Tip: Add a slow-release fertilizer or bone meal to boost growth during early stages.


6. Planting Celery

Celery can be grown from seeds, seedlings, or cuttings, depending on availability.

Step 1: Seed or Cutting Preparation

  • Seeds: Soak in water for 12–24 hours for faster germination.
  • Cuttings: Use healthy celery bases from kitchen scraps.

Step 2: Plant in Bottle

  • Sow 2–3 seeds or place one cutting per bottle.
  • Cover lightly with soil and water gently.
  • Germination occurs in 7–14 days for seeds; cuttings may root within a week.

Step 3: Thinning Seedlings

  • Once seedlings grow 2–3 leaves, thin to one strong plant per bottle.

Tip: Keep soil consistently moist to prevent celery from becoming tough or bitter.


7. Sunlight and Temperature Requirements

Celery prefers moderate sunlight and cool temperatures.

Optimal Conditions:

  • Sunlight: 4–6 hours of indirect or morning sun daily
  • Temperature: 60–75°F (15–24°C)
  • Placement: Balcony, windowsill, or shaded patio areas

Pro Tip: Avoid scorching afternoon sun; celery prefers cooler, stable conditions.


8. Watering and Moisture Management

Celery has high water requirements, making a self-watering bottle ideal.

Watering Guidelines:

  • Fill the reservoir as needed to keep soil consistently moist.
  • Water gently at the base to avoid disturbing roots.
  • Use mulch or organic matter on top of soil to retain moisture.

Pro Tip: The clear bottle helps monitor water levels and root health.


9. Fertilizing Celery

Container-grown celery needs regular feeding to produce lush, healthy stalks.

Fertilizer Schedule:

  • At planting: Mix compost or slow-release fertilizer into soil.
  • Every 2 weeks: Apply liquid fertilizer high in nitrogen for leafy growth.
  • Optional: Top-dress with compost during growth to maintain soil fertility.

Pro Tip: Organic options like worm tea, fish emulsion, or diluted compost tea encourage faster, greener growth.


10. Supporting Celery Stalks

Celery grows upright and may need light support to prevent bending, especially in small bottles.

How to Support:

  • Use small stakes or chopsticks inserted into the bottle.
  • Tie stalks gently with soft string if necessary.
  • Ensure good spacing between bottles for airflow.

Pro Tip: Proper support ensures long, crisp stalks without crowding.


11. Common Problems and How to Solve Them

Even in bottles, celery can face pests and growth issues.

ProblemCauseSolution
Yellow leavesNutrient deficiency or overwateringAdjust fertilizer; check water levels
Aphids or spider mitesPoor air circulation or infestationSpray neem oil or insecticidal soap
Stunted growthLack of sunlight or crowded rootsMove bottles to sunnier area; thin seedlings
Tough stalksInconsistent wateringMaintain regular moisture

Tip: Inspect plants regularly and remove unhealthy leaves promptly.


12. Harvesting Celery

Celery is ready to harvest in 60–90 days, depending on variety.

How to Harvest:

  • Cut outer stalks first, allowing inner stalks to continue growing.
  • Use scissors or a sharp knife to avoid damaging the plant.
  • Harvest leaves for soups or salads while stalks continue to mature.

Pro Tip: Regular harvesting encourages continuous growth and prevents plants from becoming woody.


13. Maximizing Yield in Small Plastic Bottles

  • Use one plant per bottle for root expansion.
  • Rotate bottles for even sunlight exposure.
  • Mulch and feed regularly for lush, healthy growth.
  • Consider planting staggered batches to enjoy celery throughout the season.

14. Fun Fact: Celery Is a Hydrating Superfood

Celery contains 95% water, making it hydrating and low in calories. Homegrown celery ensures chemical-free, nutrient-rich stalks perfect for salads, juices, soups, and stir-fries.


15. Conclusion: Effortless, Lush Celery Gardening

Growing celery in small plastic bottles is a beginner-friendly, innovative gardening method. It’s space-efficient, eco-friendly, and low-maintenance, making it ideal for urban gardeners or anyone wanting fresh vegetables at home.

With just a few bottles, some soil, seeds or cuttings, and sunlight, you can enjoy lush, crisp celery all season long. This method not only reduces water usage but also gives you healthy, organic vegetables without a large garden.

Start your bottle celery garden today and experience the satisfaction of harvesting fresh, homegrown stalks — easy, sustainable, and delicious!

Grow Peppers in Plastic Bottles: Easy, No-Water Gardening for Maximum Flavor at Home

Grow Peppers in Plastic Bottles: Easy, No-Water Gardening for Maximum Flavor at Home

Peppers are a staple in American kitchens, from spicy chili peppers to sweet bell peppers. Imagine having a constant supply of fresh, crisp peppers right on your balcony or kitchen counter, without worrying about constant watering. Sounds too good to be true? With plastic bottle gardening, it’s completely possible!

This innovative method allows you to grow peppers in recycled plastic bottles, creating a self-sustaining system that reduces water usage while providing healthy, homegrown vegetables. Whether you’re an urban gardener, beginner, or someone with limited space, this approach is simple, low-maintenance, and incredibly rewarding.

In this article, you’ll learn step-by-step how to grow peppers in plastic bottles, including seed selection, bottle preparation, soil mix, care, and harvesting — all designed to give you a high-yield, low-effort pepper garden.


1. Why Grow Peppers in Plastic Bottles?

Growing peppers in plastic bottles might sound unconventional, but it comes with a host of benefits:

Advantages of Plastic Bottle Gardening:

  • Space-saving: Perfect for apartments, balconies, or small patios.
  • Low maintenance: Self-watering system reduces the need for frequent watering.
  • Cost-effective: Recycles plastic bottles, reducing waste and saving money.
  • High yield potential: Encourages healthy root growth in a contained environment.
  • Beginner-friendly: Simple setup with minimal tools and expertise needed.

This method is ideal for hot peppers, bell peppers, and mini sweet peppers, making it versatile for any type of home cooking.


2. Selecting the Right Pepper Variety

Not all peppers thrive in confined spaces, so choose varieties that adapt well to container or bottle gardening.

Best Pepper Varieties for Plastic Bottles:

  • Mini Bell Peppers: Compact, colorful, and ideal for small spaces.
  • Jalapeño: Hot peppers with manageable vine growth.
  • Cayenne: Slender, spicy peppers suitable for vertical growth.
  • Sweet Italian Peppers: Longer, mild peppers with consistent production.

Pro Tip: Choose fast-growing, compact, or bush varieties for better yields in bottles.


3. Materials You’ll Need

Plastic bottle gardening is affordable and eco-friendly, requiring only a few supplies:

Materials List:

  • Large plastic bottles (1–2 liters)
  • Sharp knife or scissors for cutting
  • Potting soil or a lightweight container mix
  • Organic compost or vermicompost
  • Pepper seeds
  • Water for initial setup
  • Optional: Small tray to catch excess water

Tip: Use recycled soda or water bottles — clear bottles allow you to monitor root growth and soil moisture.


4. Preparing Plastic Bottles

Proper bottle preparation ensures healthy root development and allows for self-watering functionality.

Step-by-Step Preparation:

  1. Cut the plastic bottle in half, keeping the top portion inverted.
  2. Poke 2–4 small drainage holes in the bottle cap.
  3. Fill the top half with soil mixed with compost.
  4. Insert the inverted top half into the bottom part of the bottle to act as a water reservoir.
  5. Position bottles in a sunny location, ideally with 6–8 hours of sunlight per day.

This self-watering system minimizes maintenance while keeping soil consistently moist.


5. Preparing the Soil Mix

Peppers need nutrient-rich, well-draining soil for optimal growth.

Ideal Soil Mix for Bottles:

  • 50% potting soil
  • 30% organic compost or worm castings
  • 20% perlite, coco peat, or sand for aeration

Pro Tip: Add a pinch of bone meal or slow-release fertilizer to encourage flowering and fruit development.


6. Planting Pepper Seeds

Planting peppers correctly in bottles ensures strong seedlings and high yields.

Step 1: Seed Preparation

  • Soak seeds in water for 4–6 hours to improve germination.
  • Optional: Scarify seeds lightly for faster sprouting.

Step 2: Planting Seeds

  • Place 2–3 seeds in the soil, about ¼–½ inch deep.
  • Cover lightly with soil and water gently.
  • Germination usually occurs within 7–14 days.

Step 3: Thinning Seedlings

  • Once seedlings have 2–3 leaves, thin to one strong plant per bottle for better growth.

Tip: Keep the soil evenly moist but not waterlogged to prevent root rot.


7. Sunlight and Location

Peppers thrive in full sunlight and need warm temperatures to grow.

Optimal Conditions:

  • Sunlight: 6–8 hours of direct light daily
  • Temperature: 70–85°F (21–29°C)
  • Placement: Balcony, windowsill, or patio with good airflow

Pro Tip: Rotate bottles every few days for even sunlight exposure and balanced growth.


8. Watering and Maintaining the Self-Watering System

The beauty of bottle gardening is minimal watering, but initial care is key.

Watering Tips:

  • Fill the bottom reservoir once a week, depending on climate.
  • Monitor soil moisture through the clear bottle to ensure roots are hydrated.
  • Refill as needed to keep soil consistently moist, but avoid overfilling.

Tip: The self-watering setup works best with organic soil mixes that retain moisture without becoming soggy.


9. Fertilizing Peppers

Even in bottles, peppers need nutrients to produce healthy leaves and fruit.

Feeding Schedule:

  • At planting: Mix compost into the soil.
  • After 3–4 weeks: Apply a balanced liquid fertilizer every 2 weeks.
  • During flowering and fruiting: Use potassium- and phosphorus-rich fertilizer for bigger, tastier peppers.

Tip: Organic options like fish emulsion, compost tea, or diluted liquid seaweed work perfectly in small container systems.


10. Supporting Pepper Plants

While mini peppers are compact, taller varieties may require support.

How to Support Peppers:

  • Use small stakes or bamboo sticks inside the bottle.
  • Tie plants gently with soft twine to prevent bending or breakage.
  • For vining peppers, consider vertical trellis or netting alongside bottles.

Pro Tip: Proper support ensures better air circulation, reducing the risk of fungal disease.


11. Common Problems and How to Avoid Them

Even in bottles, peppers can face pests and challenges.

ProblemCauseSolution
Yellowing leavesNutrient deficiency or overwateringAdjust fertilizer and monitor water levels
Aphids or whitefliesPoor air circulation or infestationSpray neem oil or insecticidal soap
Stunted growthInsufficient sunlightMove bottles to sunnier location
Blossom dropTemperature fluctuations or stressKeep temperature consistent and soil moist

Tip: Inspect plants weekly to catch issues early.


12. Harvesting Peppers

Peppers are ready to harvest when fully colored and firm, depending on the variety.

How to Harvest:

  • Use scissors or gently twist peppers to avoid damaging stems.
  • Harvest regularly to encourage continuous production.
  • Mini peppers can be picked earlier for snacking or salads.

Tip: Regular harvesting prevents the plant from overburdening itself and encourages more flowers and fruit.


13. Maximizing Yield in Plastic Bottle Gardens

  • Grow one plant per bottle for optimal root space.
  • Rotate bottles for even sunlight exposure.
  • Use high-quality potting mix and compost for nutrient-rich growth.
  • Consider staggered planting to enjoy peppers throughout the season.

14. Fun Fact: Peppers Are Vitamin Powerhouses

Peppers are rich in vitamin C, vitamin A, and antioxidants, making them excellent for boosting immunity. Homegrown peppers are chemical-free, fresh, and flavorful, making them a perfect addition to salads, stir-fries, sauces, and snacks.


15. Conclusion: Effortless, High-Yield Pepper Gardening

Growing peppers in plastic bottles is a revolutionary, beginner-friendly method for urban gardeners. It’s space-efficient, eco-friendly, and highly productive, requiring minimal maintenance thanks to the self-watering system.

With just a few bottles, soil, seeds, and sunlight, you can enjoy fresh, homegrown peppers all season. This approach not only saves water but also reduces waste and provides healthy, organic produce for your family.

Start your plastic bottle pepper garden today and enjoy the satisfaction of harvesting flavorful peppers at home — no constant watering, no hassle, just fresh, vibrant veggies!